

The collectible Action Figures found in Neomuna.
The collectible Action Figures found throughout Neomuna.
Contents
Locations[edit]
Ahisma Park[edit]
- Start into Ahisma Park from the entrance exiting Striders' Gate.
- Run and jump up onto the building across from the entrance.
- Run across the building and jump the gap to the balcony on the next building over (using the Grapple is recommended in some cases).
- Once inside here, go over to the right and drop down into the lower area of this building.
- Head over to the right and go under the nearby stairs.
- Go to the right and to the end of this small area under the stairs to find the Action Figure.


Typhon Imperator[edit]
- Make your way into Ahimsa Park, and go to the Northeast to enter the Typhon Imperator.
- Inside, head over to the left and take the ramp down, going around the large pillar in front of you.
- Run past it and past the large statue behind it, through to the next door across from you.
- Go to the right at the end and drop down the shaft here.
- Head forward and onto the balcony there.
- Jump over to the right onto the next balcony there.
- Drop down the next shaft, carefully landing on the pillars on the left.
- Go along the balcony there and head forward from there.
- Get to the back left and climb up to the ledge above you.
- Head to the right-hand side and jump across the gap.
- Go to the back right and jump through the narrow opening in the back portion.
- Drop down the next shaft.
- At the bottom of it, go to the back right and through the door there.
- Inside the next room, go to the back left and climb up the mid-height pillar.
- Jump over to the chandler and from there jump through the higher door.
- Run along the tops of the pillar and over to the right and through the next door there.
- This will bring you into a throne room.
- Climb up the stairs and go through the portal at the top of the stairs.
- Through the portal, get to the end of the hallway and turn to the right.
- Go to the part with the pots where the pillars are.
- Look on the shelf there to find the raised dish there that you can interact with.
- Activate it and turn around.
- You will have to make a circuit around the room and collect the Data Motes that appear.
- The first appears just in front of you.
- After that, run and drop down onto the walkway leading to the center of the room.
- Collect the mote and head to the middle to collect the third Mote.
- Turn just a little to the left and jump for the balcony over the center to find Mote #4.
- Turn a little to the right and jump for the walkway going around the outside of the room.
- Climb up to the #5 mote in front of you.
- Turn to the right and start along the walkway you are on.
- Climb upwards along the outside walkway to reach the next level.
- At the top you will find #6 mote.
- Continue forward to reach #7 mote.
- Jump to the next balcony to find #8 Mote
- Turn to the right, looking upward slightly toward the center to find #9 Mote in the air above the middle.
- Land from this jump and keep going straight forward.
- Collect #9 Mote.
- Run forward to reach #10 Mote and finish the collect.
- Jump the gap in frnt of you to the sections of piping.
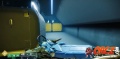
- Sitting there will be the Action Figure.


Liming Harbor[edit]
- A Vex Conflux can appear here, blocking line of sight against some of the incoming Vex.
- Be sure you don't leave the desk to avoid losing your progress through this challenge.
- From the landing zone (when available), land there (in the Southeast).
- Go over to the Southern Building here.
- On ground level, go to the North and head through the door here.
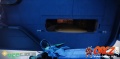
- Look to the left to find the desk here.
- go behind the desk and look for the control panel on the front of it.
- Interact with this to start the activity to unlock the Action Figure.
- This is another case of you needing to defend a location from enemies walking through doors.
- You start with a few Mischievous Miscreants.
- Look to the left then right to destroy the first pair.
- Look more to the right to destroy another Mischievous Miscreant .
- Another Mischievous Miscreant will appear out the Door on the left-hand side.
- A pair of Mischievous Miscreants show up from the front doors.
- Look to the right and you will encounter the first Troublemaking Thief.
- You will find another pair of Troublemaking Thieves coming through the front door on the left.
- Another will appear on the right after that.
- After this, it's time for another enemy to appear: Rabble Rouser.
- They will appear through the left-hand door.
- The next one appears to the right of the desk.
- Follow that by looking out the front door to the right.
- Getting close to the end, you will begin to encounter: Scandal Seekers.
- The trio come through the front.
- There could be 1 more Scandal Seeker
- After that, you just need to collect the Action figure from the desk.


Radiosonde[edit]
- Make your way from Liming Harbor to the Southern building.
- Once there, go into the building and make your way to the Eastern door and start climbing up from there.
- Jump up onto the platform then go over to the right and through the door there.
- Get across to the open hatch to the far right (either with a long jump or by jumping to the right then making the jump).
- Go down the hallway, bending to the left before getting to the breakable door.
- Bust through the door after that.
- Get across the room and break the far door, and head on through it.
- In the next room, either head to the right and go through the vents or clear the Harpies here to open the door to the left.
- Either way leads to another room with Harpies.
- You can kill them to open a door or head to the left to find another side path through to the next room.
- This will bring you to the room with the stairs.
- Either go past the Vex here or fight through them.
- At the top, either defeat the Vex or break through using the vent on the left.
- Either way will get you into the final room with the reactor.
- Go to the control panel in front of it and interact with it.
- Turn around and look at the Yellow circles above the door.
- Time to input a code (it never changes)
- Number the Circles 1-8, with 1-4 going left to right on the top row and 5-7 on the bottom going left to right.
- That code is: 6-8-4-5-2-7-3-1
- Done right, the action figure will appear in front of the control panel.


Number Circles

Sequenced Circle


Irkalla Complex[edit]
- Inside the Zephyr Concourse, head over to the Western side.
- Once there, head down the corridor to Esi Terminal.
- Go over to the left, past the Vex and continue and climb up the ledges and through the door in front of you.
- Go over to the right and head down the corridor there.
- Turn to the right and go through the red-lit open doorway on the right.
- Run through the open room, up the stairs and out into the next large room.
- This will bring you into the Irkalla Complex.
- Go over to the left and jump into the portal you can find there.
- On the other side, fight through the needed Cabal and into the break in the building.
- On the other side, go over to the left and to the stack of crates there.
- Jump up onto the rooftop of the building to the left and continue upwards to the higher rooftop.
- Once there, climb onto the disable mounted turret to the left.
- Get to the end of it and look out into the distance over the short building in front of you.
- There, you'll see a Pyramid Lock there in the sky.
- A careful shot with a long-range weapon will destroy it.
- Go over to the left and to the next disabled turret.
- Go to the end of it and look out toward the black spot in the sky.
- Shoot this lock after that.
- Continue over to the next turret to the left.
- Go to the end of it and look for the Black Spot to appear in the sky.
- Destroy the Pyramid Lock with another shot.
- Look at your feet at the end of the turret to find the action figure.


Maya's Retreat[edit]
- Start in Liming Harbor (and post-story use the Fast Travel point to quickly get here).
- From the Fast Travel point, drop down and then go over to the right and head toward the cliffs using the road there.
- Go into the cave found there.
- Weave your way through to make your way to Maya's Retreat.
- On the far side, go across the walkway and stay to the right.
- Getting to the far side head over to the right and start climbing along the right-hand side of the cliffs here.
- This gets you to another walkway that you need to reach the far side of (keeping to the left).
- Get to the end of the walkway and jump onto the stone pillars to climb up to the cliff above.
- Go inside the cave and head over to the left.
- Around the corner, you will find a Brazier that you can light, so do so.
- Go back to the entrance of the cave and make your way over to the right.
- Jump over to the ledge to the right around the small jut in the area.
- Look down along the cliffside to find an opening in it.
- Jump into that opening.
- Inside there, go forward and you will find another Brazier to Light, again, do so.
- Continue through to the left to the opening.
- Jump onto the level platform in front of you.
- Jump over to the right and use the narrow ledges to reach the stone jut out from the cliff.
- On the larger platform, look across the gap.
- You likely need the Grapple to get across the gap.
- Get across the gap to reach the next Brazier you need to light.
- With all these Braziers lit, a secret is revealed, an Action Figure!


Zephyr Concourse[edit]
- Make your way to the Zephyr Concourse from Striders' Gate.
- Head toward the central building, turn to the left and follow along the outside of it.
- Make your way along the outer ring and up the stairs toward the Bar here.
- On the side you approached, with the Downramp to reach the ground-level.
- Jump over t the bar and go to the section with all the bottles, and just next to the kettle with the bottles next to it, just a bit to the left.
- Look for the tablet sitting on the counter here.
- Interact with it to call a number of Cabal, Patrons, that come toward the bar.
- Stay within the bar area itself and kill off the incoming Patrons.
- Getting through 9 of them, you will call in the next wave of Belligerent Patrons.
- You will need to kill off 4 of them.
- This will bring in the next tier of Patron: Rampaging Patrons.
- Just kill them off to get the message, A secret is revealed...
- Go back to the tablet to find the next Action Figure.


Esi Terminal[edit]
- Make your way to the Esi Terminal via Zephyr Concourse.
- In Zephyr Concourse, head to the Eastern side, where the you have the fare gates.
- Go over those gates and you'll arrive in the Esi Terminal.
- Turn to the left and head along this walkway.
- Take the first right after that, going down the stairs.
- Down there, go over to the left and through the door.
- You'll arrive in a "restaurant."
- In here, head to the straight across the room and through the door behind the divider wall.
- Go a bit to the left and find the sink there.
- Once there, interact with it to start the challenge here.
- There are "plates" that need to be collected and brought to another sink.
- The first "plate" is just to the left of the sink.
- Turn to the right and head to the far side of the kitchen area.
- You'll find another sink to dunk the "plate into.
- There are 4 more "plates" to collect and you will need to evade 2 Sous Chef while doing this.
- You can't damage the chefs, so just focus on evasion and getting the "plates"
- The second one is just to your right from the "dunk sink," so grab it and bring it in.
- After that, you need to head back into the "restaurant" to find the others.
- Head through to the "restaurant" and over to the left to find the next plate.
- It's sitting on the cart just to the left with the large glass containers on it on the bottom right-hand side.
- Dunk it and head back into the "restaurant".
- The next "plate" is in the middle of the , nearby the bar.
- Grab and dunk it.
- After that, make your way to the bar of the "restaurant."
- Collect the plate from there and bring it to the sink to dunk.
- Just wait a moment after that and the Action Figure will appear.


Strider's Gate[edit]
- Time to collect the Figure in Strider's Gate.
- From Nimbus, jump down to the enter of the door below you to the right.
- Go through the door here and head over to the arcade cabinets that you can see against the back wall to the right.
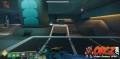
- Head to the middle one and interact with it, you will be teleported elsewhere in Strider's Gate.
- You have a final challenge to get the last figurine.
- Time to play a game to get it in fact.
- You are timed and it can be tricky, but with good video and photos, you can find every target.
- A high impact Scout Rifle is recommended so you can destroy the target in a single shot.
- Once you arrive, it's time to get to work.
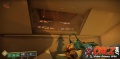
- Look to the crate on the lower level on the left.
- On the middle of it is the 1st target.
- Look just a little to the right, to the blast mark after that, to find the 2nd target.
- Next, look to the grating in front of the missiles for the 3rd target.
- The 4th target is sitting on the crate to the right, in front of the banner.
- The 5th target is behind the middles, at the end of the grating.
- The 6th target is just to the left of that, on the small outcropping of the raised platform in front of you.
- The 7th target is on the left-hand side of the raised platform, where the small canisters are.
- The first Time Gem appears above the raised platform in the middle.
- The 8th target appears below the "time bar", on the highest overhang, on the edge of it.
- The 9th target is to the left, appearing on the the yellow ledge to the left of the "time bar."
- The 10th target is on the front edge of the yellow ledge, to the right of the circular raise.
- The 11th target is at the foot of the walkway on the left hand side, between the plant and the holographic projection of a tree.
- The 12th-19th target is a line of targets along the front, where the first target appeared.
- The 20th target appears on top of the missiles.
- The 21st target is red board above the banner to the right.
- The 22nd target is on the closer rectangular platform on the raised platform
- The 23rd target is on the farther rectangular platform on the raised platform
- The third "Time Gem" appears at the "head" of the missiles on the right-hand side.
- The 24th target is sitting on the ledge above the raised platform, just below the "time bar."
- Look to the middle circular device, just in front of the elevator up to Nimbus to spot the next 3 targets (25-28)
- Look to the right from there to spot the next trio of targets (29-31).
- Look in front of the missiles for targets 32-34, shoot the middle one to quickly destroy all 3 of them.
- Look to the raised platform, below the yellow outcropping, between the rectangular raises, to find 3 more targets (33-35).
- The fourth "Time Gem" appears below the outcropping of the yellow platform.
- Look to the right from there to spot find the next 2 targets: (36-37)
- Go to the right after that to find the next pair (38 & 39).
- Look to the yellow section after that, where the closer holographic tree is, to find the next 5 targets (40-44).
- Aim for the middle of the group to have the blast explode them all quickly.
- Look to the side of the building at that and look for the targets there (45-50).
- Move a little to the left so you can look at the nearby red building side, because there are 4 targets there (51-54).
- Successfully hitting all the targets will bring you back to the arcade machines with the notice: You hear a prize dispensing from the arcade cabinet.
- Collect the figure from the right-hand arcade cabinet.


Placing the Figures[edit]
- Go to the room with the Arcade Reward Figure.
- All around it, you will find where to place the figures.
- Just make a circuit and they'll all be placed.
- If you are missing any, you will get a clue to where they are.


