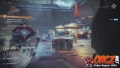
The Objective, “Destroy anti-air turrets” in Destiny 2.
Destroy anti-air turrets is an Objective in the Adventure Anti-Anti-Air in Destiny 2.
Contents
Summary[edit]
Find other consoles to disable the remaining shields, then destroy the rest of the turrets' power generators.
Walkthrough[edit]
- The Shield wall will drop and now you will have 7 turrets need to be destroyed.
- It is not as simple as just shooting the turrets, you must instead find and disable the shields protecting the power source for each.
- Jump down to the right-hand edge of the platform below you, to the marked console.
- Interact with it to have Ghost disable the shield protecting the turret's power supply.
- With the shield down, you can shoot the power supply to destroy the turret.
- While this happening, Cabal forces will be moving in on your position.
- The initial wave has you facing off again a number of Legionaries.
- Just after that you will see a Cabal Dropship come in and deposit more Legionaries with Defender Harn.
- Psions come into the area from the back and from the recent dropship, attempting to snipe the Guardian.
- Turn around and head toward the walkway above the ramp you passed/used to reach the first console.
- Behind the shield walls there you will find another console to deactivate the shield around another shield power source.
- Turn to the right, looking away from the base.
- Along the left-hand wall, you will see another shield deactivate at the base of a turret.
- Reaching this power source is hard to reach from the console using a Pulse Rifle or SMG. Moving closer will make it possible to hit it. Otherwise you will want to use either a Scout Rifle or Sniper Rifle.
- Looking back toward the base, across from the console, you will find more Legionaries and Defender Born.
- Engage them from a distance or start for the walkway bridging the two sides of the area.
- You will find Security Chief Kolg and 2 more Legionaries along the way over.
- Defeating them will unleash a pack of War Beasts that will chareg you.
- Defeat them all to help ensure an easy time hacking the console nearby.
- Continue to the raised walkway beyond the bridge.
- Go to the console there and interact with it to have Ghost hack it.
- This will deactivate the shield and then aim at the marked turret's power source, found nearby where you entered this open section.
- 1 more remains in this section. Turn toward the base, where you can see a the shielded cage, looking to the right of that.
- The control console is nearby that cage. Hack it to lower the last of the shields in this area.
- The turret found to the left of the last one you destroyed, the outer most turret power source found on the right-hand wall going away from the base itself.
- Destroying this turret's power source will bring a group of Cabal: Legionaries, Centurion, Psions and Enforcer Karch.
- Go forward to the front of the area where the last drop ship was.
- Look to the left and down to find a walkway going to another section of this area.
- Fight through the remaining forces from the drop ship as you go across the walkway.
- There are 3 more consoles and turret power sources that need to be destroyed in this area.
- Start by heading forward and then just over to the left.
- There you find a pair of control consoles next to each other.
- As you approach the consoles, a group of Cabal will move you.
- You will once again be facing Psions and Legionaries who will scatter throughout the area to attack you.
- Additionally, there are some War Beasts that will be coming from the other side.
- Among all these foes you will find Ordnance Keeper Tulg.
- Clear out the remaining forces and then go over to the consoles in the middle.
- Each of these will reveal a power source on the wall in sight beyond them.
- Just one power source remains.
- Go over to the far wall where you just destroyed the power sources.
- Look to the left to spot the final power conduit.
- Destroy it to complete this objective.


Objectives[edit]

Destroy anti-air turrets