

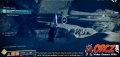
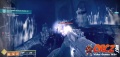
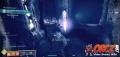
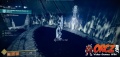
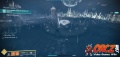
The Shattered Realm Mysteries found within the Ruins of Wrath during the Season of the Lost.
Contents
- 1 Abilities
- 2 Mysteries
- 3 Ruins of Wrath
- 3.1 Trival Mystery - In Light's Reach
- 3.2 Trivial Mystery - Below
- 3.3 Enigmatic Mystery - Aloft, Adrift
- 3.4 Trivial Mystery - Turret Treasure
- 3.5 Trivial - Impactor Cache
- 3.6 Trivial - Howardite Cache
- 3.7 Trivial - Pallasite Cache
- 3.8 Trivial - Chrondite Cache
- 3.9 Trivial - Kamacite Coffer
- 3.10 Engimatic - Eclipsed Cache
- 3.11 Ascendant - Lord of the Undercroft
- 3.12 Enigmatic - Harrowed Hall
- 3.13 Trivial - The Deep
- 3.14 Ascendant - Light The Way
- 3.15 Trivial - Spire's Reach
Abilities[edit]
- Barrier Breach, True Sight, Safe Passage
- Having all 3 abilities unlocked through the Wayfinder Compass will enable to you to get all documented Mysteries.
Mysteries[edit]
- 9/7/2021
- 9 Trivial Mysteries, 2 Enigmatic Mysteries
- 9/28/2021
- 2 Trivial, 1 Enigmatic, 2 Ascendant
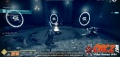
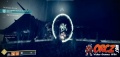
Ruins of Wrath[edit]
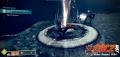
Trival Mystery - In Light's Reach[edit]
- Abilities: True Sight
- Location: Ruins of Wrath - The Staging Grounds
- Reaching this mystery requires activating at least the first Beacon within the Ruins of Wrath.
- Turn your back on the Beacon and head over to the True Sight Anchor behind you.
- Activate the Anchor to gain access to the Ascendant Platforms that will allow the Guardian to reach the island they started on.
- Once the platforms are revealed, jump up onto them.
- Get to the large circular one just before the next island to find this Trivial Mystery chest.


Trivial Mystery - Below[edit]
- Abilities:
- Location: The Causeway
- From In Light's Reach, you will want to continue on to the island now accessible to you.
- Drop from the ground level to the lowest section of this island.
- You will see some large lanterns here, but also a Barrier Anchor.
- Activate the Anchor to gain Barrier Breach.
- Go past the pillar in front of you on the left.
- Rush forward to reach the barrier ahead in the right-hand wall.
- Once through the barrier, go forward into the new cavern.
- Inside this cavern, look ahead to the left to find the Trvial Mystery chest, "Below."


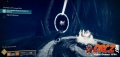
Enigmatic Mystery - Aloft, Adrift[edit]
- Abilities: True Sight, Barrier Breach
- Location: The Outer Islands
- Return to the First Beacon to begin the hunt for this Enigmatic Mystery
- Go past the stairs and over to the left, over to the edge of the platform you are on.
- Here, you will find a True Sight Anchor to use.
- Invoke True Sight to see a set of Ascendant Platforms appear in front of the Guardian.
- Make your way across the platforms to the far-off floating island.
- Once on the island, head forward and over to the right.
- Go to the far side of the island to find a Barrier Anchor guarded by a Knight.
- Invoke Barrier Breach and continue forward to the end of the path.
- At the end, quickly turn to the left and go through the barrier there.
- Having passed through the barrier, go forward and to the back right of the cavern.
- Open the chest to claim the Aloft, Adrift Mystery


Trivial Mystery - Turret Treasure[edit]
- Abilities: True Sight
- Locations: The Staging Grounds
- Make your way back to the first beacon within the Ruins of Wrath.
- Head on up the stairs to the next landing above the beacon.
- If you have the enhanced True Sight, with the extended duration, you can run from the beacon all the way over to the chest.
- From the beacon, head over to the right.
- Make your way over to the far right of the area, the Staging ground, where you can see the large Tower.
- Get to the far side of the
- If you have the Extended True Sight, you can rush up the Ascendant Platforms from the beacon.
- Otherwise, drop down to the lower section of the Staging Ground to find a True Sight Anchor.
- With True Sight invoked, there are Ascendant Platforms revealed.
- These Ascendant Platforms spiral upwards along the Hive Tower.
- Hurry on up the Hive Tower to reach the top using the Platforms.
- Reaching the top of the Tower, you will need to hurry to the far side at the top the tower.
- Getting to there, you will find the chest to unlock this mystery.


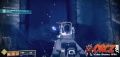
Trivial - Impactor Cache[edit]
- Abilities: Safe Passage
- Location: The Debris Field
- Return to the platform with the first beacon.
- This time, head to the far side of the platform, where you can see the floating rocks with all the hive weaponry in the ground.
- Jump out onto the platform and get over to the largest platform of the area.
- Head over to the Strife Anchor and invoke the Safe Passage.
- Be ready for 3 powerful Hive to appear when you access the Strife Anchor.
- Defeat them and then turn back toward the platform with the first beacon.
- Look to the right of the platform, to find a small floating rock with a chest on it.
- While you have Safe Passage, quickly rush over to the small platform by jumping over to it.
- Open it up to get the Impactor Cache Mystery.


Trivial - Howardite Cache[edit]
- Abilities: True Sight, Barrier Breach
- Location: The Debris Field
- From Impactor Cache, turn to the right and jump over to the next floating island with the Hive Swords.
- Make your way from these Hive Islands over to the island with the Second Beacon.
- Once there, go to the right-hand side of the floating island.
- You will find True Sight Archor sitting there.
- Use the Ascendant Platforms to get across the large gap to the next floating island.
- Climb up onto the island and go over to the right.
- There, you will find a Barrier Anchor to activate.
- With Barrier Breach active, climb up the ledge to the left.
- Turn to the right from there, rushing over to the barrier-covered cave entrance.
- Inside there, go straight back to find the chest for this mystery.


Trivial - Pallasite Cache[edit]
- Abilities: True Sight, Safe Passage
- Location: The Debris Field
- From the Howardite Cache above, go back on out of the cave reactivating Barrier Breach from the nearby Barrier Anchor if needed.
- Once back on the outside of the island, go back to the True Sight Anchor you passed on the way onto the Outer Islands.
- Return to The Field of Promised Ruin, where the second beacon is.
- From there, continue forward to the floating small islands with the Hive Weapons in the ground.
- Return to the Strife Anchor and activate it once again.
- Turn toward the massive Dreadnaught and go over to the True Sight Anchor in front of you.
- Activating it will cause a short series of Ascendant Platforms to appear.
- Go along them to the middle to find the Mystery Chest.


Trivial - Chrondite Cache[edit]
- Abilities: Safe Passage
- Location: The Debris Field
- Time to get another chest in this area.
- Continue across the Ascendant Platforms to the next large Floating Island.
- Go on up the ledges to the next Field of Strife.
- Head into it and head toward the Hive Structure in front of you.
- Either head over to the right to find the Strife Anchor or just go to the front right of the Hive Structure.
- There is a slight rise here at the base of the structure that allows a Guardian with enough Mobility to jump up to grab the ledge and mantle up.
- Go over to the chest in front of you to claim the Chrondite Cache.


- Destiny2MysteriesRuinsofWrath170.jpg


Trivial - Kamacite Coffer[edit]
- Abilities: Barrier Breach
- Location:
- From the Chrondite Cache, start toward the tall lights in front of the tunnel with a ledge in front of it, to the left of the chest.
- Climb up the ledge and head into the tunnel in front of you.
- Go on up the slope and follow it down into a large chamber.
- Reaching this large chamber, go over to the left and drop down the ledge here.
- Follow the path here all the way down to the base of the trail, when you get to reach the Barrier Anchor.
- Once you do, activate the barrier.
- With Barrier Breach active, turn around and start running back up the slope you just came down.
- Look along the right-hand side to spot the barrier in the wall leading into a small conclave.
- Inside there, you will find the Chest to complete the Kamacite Coffee Mystery.


Engimatic - Eclipsed Cache[edit]
- Abilities: Barrier Breach, True Sight
- Additional Information: This chest requires having augmented speed, have a Lightweight weapon equipped and/or have an Exotic like Transversive Steps or ST0MP-EE5
- Location: The Debris Field
- From the Kamacite Coffer chest, you will want to leave the conclave and head over to the right.
- Start sprinting back up the slope to reach the top of it.
- At the top of the slope, you will find a True Sight Anchor on the right-hand side of the pillar.
- Quickly activate the anchor and rush through the barrier.
- Once through, climb up the Ascendant Platforms.
- Get to the top of the building to find the Eclipsed Cache.


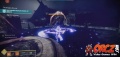
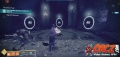
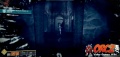
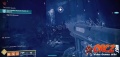
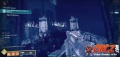
Ascendant - Lord of the Undercroft[edit]
- Abilities: Barrier Breach, True Sight, Safe Passage
- Location: The Undercroft
- Start at The Staging Ground Beacon, but head over to the right.
- This will bring you over to the Warbinger's Tower.
- There will be a Revenant Knight standing in a Hive Circle with a Tomb Ship hovering over it.
- Go over there and clear out the Knight, the Wizards, and the 3-4 Acolytes.
- Clearing all of them out will make it easier to stand in the Hive Circle.
- Standing in the Hive Circle will trigger the ritual and have the nearby door just down the stairs in the Warbinger's Tower.
- The door is marked with Toland's orb and a message from Queen Mara.
- Go into the middle and drop through the opening just about the suspended spire.
- Dropping down, you will need to deal with a number of Thralls that will almost immediately swarm the Guardian when they land in the lower section of the Warbinger's Tower.
- Be wary of the Cursed Thrall that are also in the area as well.
- Use the nearby Barrier Anchor to get Barrier Breach.
- Once invoked, go on through the Barrier across from the Anchor.
- This leads to a long drop with spiked rotating pillars lining it.
- Dropdown carefully, jumping/hovering/boosting as needed to avoid instant death.
- This will bring you to the Undercroft itself, where you will find your target, Scoroboth, Son of Xivu Arath and a number of Acolytes and a Hive to help it.
- Start by ignoring Scoroboth, Son of Xivu Arath and running into the farther part of the room, where you have the large stone and the Toland Orb to the right.
- As you approach this barrier, look to the right just before the barrier, to find the Barrier Anchor so you can get Barrier Breach.
- Across from this Barrier Anchor is a Strife Anchor, so you can benefit from Safe Passage.
- Rush through the nearby barrier and start down the hallway.
- This will get you into a hallway filled with a Field of Strife
- Rush through the hallway into the next room.
- Inside this smaller room you will find a number of Acolytes as well as a few Ravagers of Xivu Arath.
- Look along the left-hand side to find the Harrowed Hall Enigmatic Mystery.
- Grab the orb in the back of the hallway and make your way back on through the Field of Strife.
- Get to the open room that you dropped into to find Scoroboth, Son of Xivu Arath.
- Throw the orb at Scoroboth to break the shield around him.
- Immediately, you can attack and damage Scoroboth with your arsenal.
- Once Scoroboth is damaged enough, he will flee.
- Head to the stairs in the back and then drop down this hole.
- In this lower section, you will see Toland once again.
- Head away from Toland, into the Field of Strife.
- Here, activate the Stride Anchor to trigger Safe Passage and draw out the local Wardband.
- Deal with them and then turn your attention to the just appeared Scoroboth.
- Take a moment to find the Barrier Anchor.
- Go under the bridge here to find an Orb of Energy, passing through the barrier.
- Grab the Orb and then go over to Scoroboth and hit him with it.
- Damage Scoroboth until he fades from reality and reappears with his shield once again.
- Go over to the right-hand side of the throne here to find Barrier Anchor, and across from it, you will find a Strife Anchor to suppress the Field of Strife.
- Head through the barrier to the left of the doorway you went through, while facing it.
- Go through the barrier and head through the corridor.
- This leads to a large chamber.
- Head over to the right and down the next corridor, following Toland here.
- Get to the end of the corridor to find the next charge that you need.
- Grab the charge and return to the throne once more to lob it at Scoroboth.
- This will break his shield for the final time, so rush in and defeat him.
- Go to the throne itself to find the Ascendant Mystery, Lord of the Undercroft.
- Turn around and out of the Field of Strife, and to the area where you first landed here.
- Go over to the right and head through the Portal there to return to the main section of the land.


Enigmatic - Harrowed Hall[edit]
- Abilities: Barrier Breach, True Sight, Safe Passage
- Location: The Undercroft
- Start at The Staging Ground Beacon, but head over to the right.
- This will bring you over to the Warbinger's Tower.
- There will be a Revenant Knight standing in a Hive Circle with a Tomb Ship hovering over it.
- Go over there and clear out the Knight, the Wizards, and the 3-4 Acolytes.
- Clearing all of them out will make it easier to stand in the Hive Circle.
- Standing in the Hive Circle will trigger the ritual and have the nearby door just down the stairs in the Warbinger's Tower.
- The door is marked with Toland's orb and a message from Queen Mara.
- Go into the middle and drop through the opening just about the suspended spire.
- Dropping down, you will need to deal with a number of Thralls that will almost immediately swarm the Guardian when they land in the lower section of the Warbinger's Tower.
- Be wary of the Cursed Thrall that are also in the area as well.
- Use the nearby Barrier Anchor to get Barrier Breach.
- Once invoked, go on through the Barrier across from the Anchor.
- This leads to a long drop with spiked rotating pillars lining it.
- Dropdown carefully, jumping/hovering/boosting as needed to avoid instant death.
- This will bring you to the Undercroft itself, where you will find your target, Scoroboth, Son of Xivu Arath and a number of Acolytes and a Hive to help it.
- Start by ignoring Scoroboth, Son of Xivu Arath and running into the farther part of the room, where you have the large stone and the Toland Orb to the right.
- As you approach this barrier, look to the right just before the barrier, to find the Barrier Anchor so you can get Barrier Breach.
- Across from this Barrier Anchor is a Strife Anchor, so you can benefit from Safe Passage.
- Rush through the nearby barrier and start down the hallway.
- This will get you into a hallway filled with a Field of Strife
- Rush through the hallway into the next room.
- Inside this smaller room you will find a number of Acolytes.
- Look along the left-hand side to find the Mystery
Trivial - The Deep[edit]
- Abilities: True Sight
- Location: The Undercroft
- Follow the path into the Undercroft through the Enigmatic - Harrowed Hall, getting to the first section of it, below the the spinning pillars.
- Once there, clear out any Hive in the area.
- After that, find the True Sight Anchor and invoke it for True Sight.
- Head toward the back of this first section of the Undercroft, where you can find some Ascendant Platforms.
- Head along them to find the Mystery sitting just over the opening down to the lower section of the Undercroft.


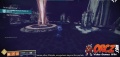
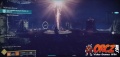
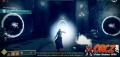
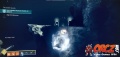
Ascendant - Light The Way[edit]
- Abilities: Safe Passage, True Sight
- Location: The Debris Field, The Staging Ground, the Outer Islands, The Warbinger's Tower, The Field of Promised Ruin.
- Make your way to The Debris Field where you can find the Field of Strife nearby the giant bones.
- Go to the far side of the Field of Strife, where you will see an Energize Hive structure with a Soulfire Exarch.
- Killing it will drop a Flame for the Guardian to use, with a marker showing a location to bring the flame to.
- Exit the Field of Strife and head on through the bones over to the right.
- Follow this path over to the left and down to the ledge below.
- On this lower ledge, follow the path forward and up the slope.
- Continue into the tunnel and into the large chamber the Hive Runes on the pillar.
- Go to the center and dunk the flame to energize this whole ritual and bring this mystery properly.
- A number of portals will appear, with a number of Hive Symbols above them.
- Begin by heading through the portal with the circle split by a line (second portal from the right).
- This will bring you to a rooftop in the Staging Ground, where you will find another Soulfire Exarch.
- Defeat the Wizard and head through any of the portals here.
- Go to the center of the area with all the portals.
- Claim the fire there, and head back through the portal with the Circle with the line through it.
- Go back to the rooftop you were just on and dunk the flame.
- With the portals here, go through the portal with the Triangle with a line through it.
- Turn to the left and jump up the ledge here to reach the area above in the Outer Island.
- There you will encounter a few more hive with a Soulfire Exarch, Knights, and Acolyte.
- With all of them defeated, return to the portal.
- Go back through the portal to the central ritual site.
- Grab the flame here and go through the portal with the circle with the line through.
- Once back through to the
- Return to the Hive device you were just at and dunk the flame.
- Turn around and you will see 3 portals that have appeared.
- Go through the portal on the right.
- This will bring you to the next location at the top of the Warbinger's Tower.
- Once again a Soulfire Exarch needs to be defeated.
- After defeating this Exarch, you can complete Trivial Mystery: Spire's Reach easily while up here.
- Having defeated the Soulfire Exarch, go through the portal that opened on the back of the Warbringer's Tower.
- This will bring you back to the central location of the Ritual.
- Grab the flame and head back through the portals: Second from the right (Circle divided by a line), Middle (Triangle divided by line), and right-hand portal (2 slashes, dot, and 3 lines (1 long, 2 short)) to return to the Warbringer's Tower.
- Place the flame in the Hive device.
- 2 portals will appear.
- Go through the portal on the right (5 lines, 2 shorts lines above a long line, and 2 short lines below the long line).
- This will bring you to the Field of Promised Ruin, the first beacon, where another Soulfire Exarch is channeling energy.
- Defeat her and the Fire will drop.
- Head over to the left, to the Hive Device, and plant the Flame.
- This will open the final portal.
- Just go on through it.
- On the other side of the portal, you will enter a Field of Strife in the Outer Islands, slowing you.
- Go on up the slope through the tower in front of you.
- Continue to the top of the path, defeating Thrall along the way.
- At the top, look for the Safety Anchor.
- Invoke Safe Passage and turn to the left, where you will find a True Sight Anchor.
- Invoke True Sight quickly and jump out onto the Ascendant Platforms that appear in front of you and to the right.
- Go along the platforms to reach the final section of this path.
- There you will find the Soulfire Hierarch.
- Defeat her to reveal the mystery chest itself in the middle of the tower's rooftop you are on.


- Destiny2MysteriesRuinsofWrath408.jpg
- Destiny2MysteriesRuinsofWrath409.jpg


Trivial - Spire's Reach[edit]
- Abilities: True Sight.
- Location: Warbinger's Tower
- Follow the path in Light the Way through the portal until you reach the Warbinger's Tower.
- Defeat the Soulfire Exarch if you haven't already.
- Once up there, go over toward the entrance of this realm.
- Here, you can find a True Sight Anchor hidden in the light pillar here.
- Invoke True Sight and jump out onto the Ascendant Platforms in front of you.
- Drop down onto the lower ones and go into the lookout below the top of the tower.
- Protected by a pair of Revenant Acolytes is your target, the Spire's Reach Trivial Mystery.


