“Elder Knowledge” is the Twelfth Main Story Quest in The Elder Scrolls V: Skyrim
You get “Elder Knowledge” after completing the quest “The Throat of the World”.
Locations[edit]
Walkthrough[edit]
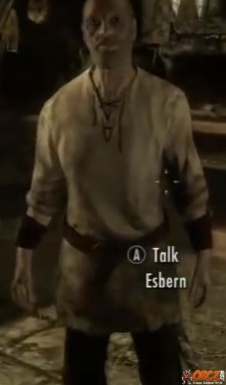
Head back down through the cave and talk with the people inside Sky Haven Temple. There you can find Esbern without any trouble. Talk with him and he will direct you to the College of Winterhold where someone should be able to point you in the right direction.
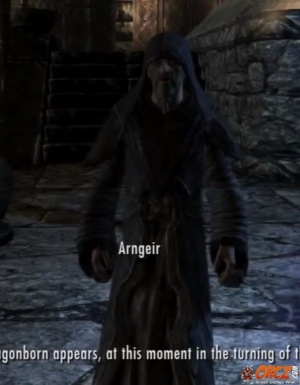
Alternatively, you can head to High Hrothgar and talk with Arngeir. He will tell you that the Greybeards don't bother themselves with such matters but the College of Winterhold and their mages are more interested in such pursuits. So, either way you are bound for the College of Winterhold. This is found in the Northeastern part of Skyrim, East of Dawnstar.
Once in Winterhold just head to the North and you will find the bridge leading you to the college. There you will find Faralda. She has the task of watching the bridge and testing those who would enter the college. You can persaude your way in, mention you are the Dragonborn or just take the test. If you opt for the test, she will ask you to cast a spell. If you don't know the spell, she will sell you the tome for 30 Gold. If you opt to prove yourself the dragonborn, just use one of the Dragon Shouts
She will then lead you across the bridge, assuming this is your first visit. Keep somewhat close to her to ensure things work properly. Just inside you will meet Mirabelle Ervine, she will give you some Apprentice Robes, Boots and offer to give you a tour. Ignore it for now and just head for the Main Hall, The Hall of Elements, across from the end of the bridge. Once inside the Hall of Elements make an immediate right turn to the East and enter the Arcanaeum.
Once inside the Arcanaeum look for Urag gro-Shub, an Orc Mage. Talk to him about the Elder Scrolls. He won't be too helpful but he will give you two books to read: Effects of the Elder Scrolls and Ruminations on the Elder Scrolls. One makes some sense while the Ruminations is little more than ramblings. Talk to Urag about the second, insane, book. He will direct you toward its writer: Septimus Signus (this also begins the Daedric quest Discerning the Transmundane).
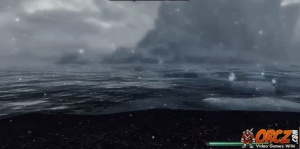
You need to leave the College and make your way to the North of it toward where Septimus was last known to be. To get there you will need to either swim or jump across the ice floats in the area. This will let you make your way to the North.
Along the way expect to encounter Horkers and Wolves.
When you make it to your destination you will see a Boat and across from it an entrance to a cave. This is Septimus Signus's Outpost:
Go inside and you should head down the ladder in front of you. This will quickly lead you to your target, Septimus Signus. He explain that he can direct you to the Elder Scroll, but only if you help him with the Dwemer Lockbox he is trying to solve. He will tell you that you need to visit Blackreach which is hidden underneath Tower Mzark which is in the Alftand Glacial Ruins. He will give you a Blank Lexicon and an Attunement Sphere. Leave his Outpost after that. Now you need to make your way to Alftand, the gateway to the underground city of Blackreach.
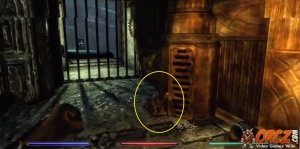
Head to the Southwest and make your way to Alftand. Once there go to the Northern side of it and look for the stairway leading down. Follow it to find the entrance to the Alftand Glacial Ruins. Once inside follow the blood that you find. This will lead you to some dwarven architecture. A Stone tunnel that ends at a connecting room with a stone table that is covered in things and a door facing to the North that is barred. Be sure to grab the Research Notes that are on the table. The doorway can be unlocked form the far side. Be sure to be on guard for the Dwarven Spider Workers. Follow the passage leading over to the Western path going up. Follow the path down to the left and be on guard for J'darr, a crazed Khajiit. Just follow the path forward them there. You just need to deal with a Dwarven Sphere or three first. Turn to the North after that. This will lead you toward a Golden Door that is locked (Apprentice level). Open it up for treasure and then head to the east.
This leads back to a room you passed through earlier with lots of cogs and pistons. Now you're on the raised portion of it. You need to head around the room to the left, jumping over the pistons. These can push you off the center, forcing you to restart this section. Time your jumps well and you should have little trouble.
This will lead you to the Alftand Animonculory just past the pistons.
Inside the Animonculory start off to the East. You can search the side rooms to find some items. Follow the path into the room with the golden grating. Head on through the break in it to find Endrast and by him: Endrast's Journal. Be careful as you emerge because there are Dwarven Spheres roaming the area. Head over to the East and go on up the stairs to the North to continue. You will find more Dwarven Worker Spiders in the area. Keep going to the East after that and up the next ramp. You will come to a barred passage. There is a lever on your right to lower the bars. On the other side is a second lever to close the bars again. There is little need unless you want to break the pursuit of enemies who are after you.
You are now in a massive shaft leading down deeper into the Animonculory. Look for the ramp on the far side of the room, just past the braizer, to have a safe way down. This will lead down to a Golden door that is locked (Apprentice difficulty). Get through, deal with the Spider Worker and head to the right, go through the open gate and then loot the chest there. Head on out of the room then drop off the platform to the one below you. Head to the West to find some more loot but you want to head to the East to proceed down.
As you go down, be on guard against some Falmer who are lurking on the pathway. Be mindful of the pistons that occasionally jet out from the sides. Just make your way down to the next golden door. This will lead you into a small Falmer hive. There are about 6 Falmer around. Use the stairs and covered area to make things a bit easier to manage. Head on down the stairs after you deal with them then go to the left and into the next corridor. Look for the next of stairs going down. To the left of them is some scaffolding. Use that to cross over to the South and avoid a number of Fire spurt traps that would need to be jumped over otherwise. Continue onto the South. You are looking for a Boiler Room. In there you will find an Ancient Dwarven Elevator in the Northwest. Use it to ascend back into the Alftand Glacial Ruins.
Once at the top, head over to the barred gateway to the South. Use the lever to lower the bars to allow for easier navigation in the future.
Head back down using the elevator. Now make for the Southwestern corner of the room. There a Golden door can be found that will lead onwards. This leads out to another downward ramp. Follow it to encounter more Falmer and a Frostbite Spider. Take them all down and through the door at this lowest point. This will lead you into the Afltand Cathedral
Head into the Cathedral and go to the West. Deal with the Falmer then open the golden door there. Another pair of Falmer wait on the other side at the top of the stairs. Head to the left of the stairs just ascended to find more stairs. This leads to the lever you need to lower the Bars blocking your way forward. Be on guard as there are a skeever or two in the area.
Go on up the stairs in front of you and press on deeper into the Cathedral. Just through the gate you opened there is a Dwarven Centurion. it is a good idea to trigger the fight then rush back to the lever and close the gate. This will trap the Centurion on the far side of the gate and make it a lot easier to take down. Be sure to loot its body as it has the Key to Alftand Lift which is important.
Head on up the stairs and open the gate. Approach the Dwarven Mechanism. This will trigger the appearance of Umana and Sulla Trebatius. The two will start to fight each other. The Dragonborn can either wait and kill the survivor or intervene and they will attack together.
When the fight is done, go up to the Dwarven Mechanism and activate it. This will cause the area around it to drop down and create a stairwell. Follow the stairs down to the room hidden below it. This leads right to Blackreach.
Once in Blackreach you will want to head to the Southeast, after going West down the nearby ramp. This lets you find the nearby Great Lift to Alftand. You can activate it by hitting pressing a button by the golden tower in a Dwarven Head Pedastal. Now start over to the West along the cobblestone path. Continue until you come across a stone bridge just past a lake with a cascading waterfall. Turn South after that. This will lead you to your destination: The Tower of Mzark. Go inside the doors and pull the lever to ascend into the Tower itself.
Go inside search the first room for items and then into the next one with the massive Bronze device. Head to the left and start up the ramp there. keep going up until you find the control panel there. It is time to begin the Oculory Puzzle.
Solve this puzzle and you will be rewarded with the Elder Scroll raising out its Containment Sphere.
Approach and take the scroll. This will complete the quest and immediately begin the next one.
The easiest way out is to look for the Elevator that is in the Oculory. Look beneath where the control pedestals are to find it and quickly return to the surface of Skyrim.


