

The Blue Flame Trial is a Trial in the game The Legend of Zelda: Breath of the Wild.
This page has the walkthrough/solution to the Blue Flame Puzzle.
Contents
Location
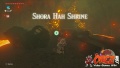
Shora Hah Shrine
Shrine
Recommended Runes


NPCs

Walkthrough
- Activate Magnesis and head forward to the large metal block with spikes on the bottom of it.
- Use Magnesis to lift the block up and keep it suspended while you move Link under and past it. It will automatically release at a point.
- Take the stairs up to the left of the unlit brazier.
- You will see 2 rails, each with a metal block on them.
- Use Magnesis to create a staircase upwards by bringing the metal blocks in front of Link.
- Go to the top of the stairs to find a Blue Flame with a Torch next to it on the left.
- Look to the left and you will see a platform with a chest on it.
- Run and glide over to this platform to open the chest and claim the Royal Bow inside it.
- Collect and equip the Torch, if you do not have one, and lit it.
- Head back down the stairs and go over to the unlit Brazier.
- Light it with the Torch to open the bars nearby.
- Go through the newly opened gateway, but do not put out your torch yet.
- Through the gateway and make your way over to the far end of the walkway. You can lower the torch by using the Left Trigger.
- Lowering the torch will let Link pass underneath the water streams without the torch going out.
- Lit the Brazier there to start a moving platform across from you. It has a brazier that you will need to light.
- Equip Stasis and watch the moving platform with the unlit brazier on it.
- Wait for the moving platform to reach the bottom of its track, freeze it with Stasis.
- Equip your bow, notch an arrow, light the arrow using the blue flame brazier in front of you and then fire it aiming at the unlit brazier on the moving platform.
- Aim for the top of the brazier to most accurately hit the proper target. This will cause a staircase to rise up out of the lava.
- Go back to the first brazier and turn right, going up the new staircase.
- At the top of the staircase, stand on the pressure plate with Magnesis or Stasis ready.
- A Spiked Metal Ball will come rolling down the ramp toward Link. Use your equipped rune to either grab and throw the Ball out of the way or freeze it long enough to get out of the way.
- Go up the cleared ramp, and follow the walkway over to the right and into the fenced off area.
- In this area, you will encounter 4 Guardian Scouts that you should defeat before attempted to open the chests or light the Brazier in the back of the area.
- These Guardian Scouts only attack using their Beam Blast. If you have a Guardian Shield you can reflect these blasts back at the Scouts to destroy them.
- There are 2 chests in this area, the one closest to the entrance has a Giant Flameblade inside it while the one closer to the unlit brazier has a Giant Ancient Core.
- Go to the moving platform with the Brazier that you just lit and use your Torch.
- Light it with the Blue Flame and bring it to the Brazier in the back of the area where you just fought the Guardian Scouts.
- Igniting this Brazier will lift the back in the back of the area and reveal the next section of it.
- With your still burning Torch, go and light the brazier in the middle.
- Equip Stasis and freeze either of the water nozzles next to the 2 remaining unlit braziers here.
- Relight your Torch and then ignite the 2 remaining braziers.
- The bars between the Braziers will lift, allowing access to the next portion of the puzzle.
- Take your Blue Flame Torch through and light the brazier ahead to the right.
- You will see 2 moving platforms with braziers on them, with a water stream coming from a nozzle on both sides of moving platform's path.
- You need to light an arrow with Blue Flame and fire it to light both braziers at once.
- Use Stasis to alter the platform's timing as needed to get them to match up.
- This can also be used to hold one in place so the other platform can reach the same point, making for an easy shot.
- You will need to fire the arrow just before the platforms reach their "meeting point" for the arrow to travel between them appropriately.
- Freeze the farther platform using Stasis to make this challenging shot a bit easier.
- Once both braziers are lit from a single shot, wind turbines will start generating an updraft for Link to cross using.
- Cross to the second formerly moving platform.
- Light an arrow and take aim at the nearby Brazier on the next ledge. Lit it with your arrow.
- With it lit, travel back to that ledge.
- Light your Torch once again and then throw it at the brazier on the metal block on the rail. This will light the Brazier.
- Jump up onto the block and collect your torch.
- Head over to the right, going up the stairs.
- Cross to the far end of this walkway and jump into the wind stream, using the Paraglider.
- Go over to the right, just behind the column next to you.
- There is a ledge with a chest on it just there. Inside it is a Forest Dweller's Sword you can collect.
- Track back to the walkway you jumped off of to reach this ledge. This will place Link across from the water nozzle blocking the Blue Flame's path on the Metal Block.
- Equip Stasis and aim it at the water nozzle in the middle of the rail's path. Freeze the nozzle.
- Equip Magnesis and use it to pull the metal block on the rail all the way over to the far side.
- Have Link follow to the next walkway connected to the rail using the Wind Stream.
- On that walkway, go just past the metal block you moved.
- You will see a metal Chest sitting just out of reach. You can use Magnesis to pull the chest over to it.
- Inside the chest you will find a Silver Rupee.
- Go down the ramp nearby the Blue Flame brazier. You have some Guardian Scouts to deal with.
- Defeat the Guardian Scouts on this portion of the walkway. These 3 Scouts have a Guardian Spear, Ancient Battle Axe and Guardian Sword.
- You can also light your torch and throw it onto the dead leaves on the lower walkway to quickly defeat the Guardian Scouts.
- Go and light your torch with the path forward clear, going back down the ramp and up the far stairs.
- Light the Brazier you can see ahead to the right.
- Go and open the nearby chest, across from the stairs Link just climbed. Inside it you will find 10 Ice Arrows inside.
- Relight your Torch.
- Move into the middle of the ring of Braziers surrounded by Water Nozzles.
- To complete this last portion, you will need to use a Charge attack to quickly light all of the Braziers before the Water Nozzles put them out.
- When done successfully, the gates in the back of the are will open up, clearing the way to the Monk.
- Climb the stairs and interact with the Monk Shora Hah.


Strategy Guide/Tips
- This Shrine requires precision archery, use the best set up for you to complete this.
- Bring a lot of Arrows for this shrine to ignite the Braziers over great distances.
Video Walkthrough
Shrines of Trials Puzzles
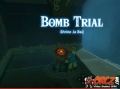
Ja Baij Puzzle
Remote Bomb
Oman Au Puzzle
Magnesis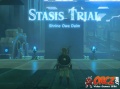
Owa Daim Puzzle
Stasis
Shora Hah Puzzle
Blue Flame


