
m (→Temple of Time Enemy Camp) |
m (→Eastern Abbey Enemy Camp) |
||
| Line 157: | Line 157: | ||
*Look into the pit and use Stasis helps to reveal the Lizalfos in hiding. | *Look into the pit and use Stasis helps to reveal the Lizalfos in hiding. | ||
*When all the Lizalfos in this area are dead, the challenge here will be complete. | *When all the Lizalfos in this area are dead, the challenge here will be complete. | ||
| − | *Completing this Enemy camp will cause [[Breath of the Wild: | + | *Completing this Enemy camp will cause [[Breath of the Wild: Rohta Chigah Shrine|Rohta Chigah Shrine]] to rise from the ground. |
<gallery> | <gallery> | ||
Revision as of 16:10, 20 May 2021

EX The Champions' Ballad is a Quest (Main Quest) in the game The Legend of Zelda: Breath of the Wild.
Contents
Acquisition
- Complete Free the Divine Beasts.
- Install Champions' Ballad.
NPCs

Zelda
Quest Giver- BreathoftheWildMonkMazKoshia.jpg
Enemies

Keese
Monsters
Fire Keese
Monsters
Ice Keese
Monsters
Bokoblin
Monsters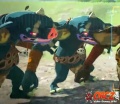
Blue Bokoblin
Monsters
Silver Bokoblin
Monsters
Chuchu
Monsters
White Chuchu
Monsters
Fire Chuchu
Monsters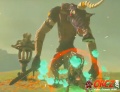
Moblin
Monsters- BreathoftheWildBlackMoblin.jpg
Black Moblin
Monsters - BreathoftheWildSilverMoblin.jpg
Silver Moblin
Monsters 
Lizalfos
Monsters
Blue Lizalfos
Monsters
Black Lizalfos
Monsters
Ice-Breath Lizalfos
Monsters
Fire-Breath Lizalfos
Monsters

Windblight Ganon
Boss
Fireblight Ganon
Boss- BreathoftheWildMonkMazKoshia.jpg
Monk Maz Koshia
Boss


Description
Zelda reaches out to Link. With his success overcoming the Divine Beasts, she directs him to return to the Shrine of Resurrection and return his Sheikah Slate to the terminal he got it from.
He will be challenged with another Trial and 4 additional shrines. After that, he must seek out the songs of his fellow Champions: Mipha, Urbosa, Daruk, and Revali.
Quest Items

Walkthrough
- Once the quest is activated, return to the Shrine of Resurrection.
- Go into the chamber where Link awoke at the beginning of the game.
- Interact with the terminal where you get your Sheikah Slate.
- This will begin a new trial.
- This will cause the One-Hit Obliterator to appear and you will be prompted to pick it up.
- The weapon, when held, will drain Link down to 1/4 heart, regardless of what your present health is.
- Your health will remain at this total until you you complete this trial or leave the Great Plateau.
- You can end the trial at any time by leaving the Great Plateau.
- To resume the trial, all you would need to do is return to the Shrine of Resurrection and again pick up the Obliterator.


Forest of Spirits Enemy Camp
- Head out of the Shrine of Resurrection and go to the North.
- Among the trees of the Forest of Spirits you will find the first Camp of monsters that you will need to clear out.
- Jump from the cliff outside the Shrine of Resurrection and head to the North-North-East.
- After a short glide, looking to the right, you will see the first camp.
- In this camp, you will need to defeat 1 Bokoblin, 3 Blue Bokoblins, and 1 Silver Bokoblin.
- Be careful because around the tree with the Silver Bokoblin flies a swarm of Keese.
- These Keese can be dealt with easily using Bomb Arrows and a multi-shot bow like the Forest Dweller's Bow.
- Glide toward the split log you can see as you are coming in.
- On that log is the Bokoblin.
- Get in range then drop from the glider and snipe the Bokoblin as you fall onto the log.
- Immediately crouch after you land to avoid being noticed by either the Silver Bokoblin or nearby Blue Bokoblins.
- To the left of the log you can see a Blue Bokolin, with another nearby the far end of the log on the ground.
- From the log, use a long-range bow and snipe the Bokoblin to the left, then snipe the other by the log you are on.
- The one by the log can move into the log itself, giving you a great chance to get a sneak strike on it.
- Attacking the Blue Bokoblin while it is nearby the far end of the log will have another jump out of the grass, revealing itself.
- Either let it be or take it out now to save dealing with this Bokoblin a bit later.
- Start over to the left of the large tree stump with the Silver Bokoblin.
- Look into the grass carefully to the Northeast, there is another Bokoblin hidden in the grass.
- Be wary because there is another pair of Bokoblins over to the right just past the tree and the crates.
- The Bokoblin has a Lightning Rod.
- There is another Blue Bokoblin armed with a Shield and Traveler's Sword.
- Defeat them and head over to the East.
- Keep on guard because there are a few more Bokoblins hidden in the grass.
- You can use the Upgraded Stasis to find these Bokolins easily.
- There is the earlier Bokoblin around the corner now.
- Defeat them to finish most of the ground level Bokoblins.
- Finally, go to the area between the log and the stump.
- 2 Chuchus will jump up from the ground.
- Defeat them to finish the enemies on the ground.
- Climb up the tree stump after those Chuchus are defeated to finish out this area.
- Do not immediately climb onto the top.
- Go around the top of the stump so you can easily sneak up onto the top and ambush the Silver Bokoblin there.
- There is a chest at the top of the tree for you to climb, it has a Phrenic Bow
- Another chest can be found on the ground between the stump and the hollow tree. It has 5 Bomb Arrows.
- Completing this will reveal the Shrine: Yowaka Ita


Eastern Abbey Enemy Camp
- This camp is populated by Lizalfos. There are 4 Lizalfos, Fire-Breath Lizalfos, 3 Blue Lizalfos, 1 Black Lizalfos, and 1 Silver Lizalfos.
- You need to be careful because there is also a Decayed Guardian along the Eastern side of the camp.
- Bring your approach the Camp from its Northern end.
- There are numerous wooden walls set up that the Lizalfos can use for protection that can work very well for cover.
- Approach the camp on the barren side, coming up from the nearby ruins.
- This will narrow down the immediately enemies to just one Lizalfos that can easily be sniped with a distance bow.
- If spotted, you will need to deal with most of the Lizalfos in the area.
- Immediately run to the flatland between the ruins and the camp.
- This will help protect you from any Lizalfos who are trying to shoot you while forcing the others to rush you, drawing them out from cover.
- Dodge incoming attacks and defend until you are close enough to hit with the Obliterator.
- The Lizalfos with bows are likely using Fire Arrows, so be mindful of where you are running to avoid the flames
- These fires can also be used to kill off the weaker Lizalfos easily.
- Keep away from the slope more toward the edge of the plateau to avoid activating the nearby Decayed Guardian.
- Likely, there will be 2 more Lizalfos at the top of the hill in this enemy camp after you have cleared out the others.
- Sneak along the base of the hill over to the East.
- Go up the hill from the eastern side, by the remains of the wall, to easily get the drop on the Lizalfos at the top.
- The last Lizalfos can be found hiding in a pit along the remains of the wall, so go over to the Western side of the top of the hill.
- Look into the pit and use Stasis helps to reveal the Lizalfos in hiding.
- When all the Lizalfos in this area are dead, the challenge here will be complete.
- Completing this Enemy camp will cause Rohta Chigah Shrine to rise from the ground.


Temple of Time Enemy Camp
- This enemy camp is found to the Southeast of the Temple of Time in the small forest down the hill from it.
- The camp is a bit smaller, but the difficulty does go up a bit here.
- You will need to defeat 3 Bokoblins, Moblin, 1 Fire-Breath Lizalfos, and 3 Lizalfos.
- Start by sniping the Lizalfos that is standing on the rock at the edge of camp.
- Done quietly, it will let you avoid most detection while moving about the camp.
- Move over to the right and try to get to the wooden barriers on the Western side of camp.
- Move deeper into camp, using the trees as cover to hide from the Lizalfos keeping watch in the middle of camp.
- Move toward the middle using careful timing to go from one tree to the next to reach the rock.
- Watch carefully for the patrolling Fire-Breath Lizlafos and Moblin.
- The Fire-Breath Lizlafos will eventually make its way to the Northeastern portion of camp, where it will likely be alone.
- From behind the rock you can easily snipe it or sneak up on it for a Sneakstrike.
- Either way, this will likely alert 2 Bokoblins who were hiding in the tall grass nearby.
- They are armed with Korok Leaves so surprising them with arrows while they are unaware will be to your benefit.
- Now there are 2 more Lizalfos and the patrolling Moblin.
- Use a long range bow (like the Phrenic Bow) to eliminate the Lizalfos on top of the rock.
- Wait for the Moblin to come around the rock, past your hiding place.
- Sneak up behind it and kill it with a Sneakstrike as it is going around the corner.
- Climb up onto the rock in the middle of camp, keeping to the Northern side of it.
- Use this rock to Snipe the Lizalfos to the West of the rock, on the nearby hillside.
- Open the chest on the top of the rocks to find Arrows inside it.
- Carefully snipe the
- Completing this camp will have Ruvo Korban Shrine rise from the ground.


Mount Hylia Enemy Camp
- Make your way to the marked location near the summit of Mount Hylia.
- You need at least Cold Resistance 1 to survive for any length of time here. Use either equipment, food, or elixirs to protect against the chill.
- This camp has 1 Blizzrobe, Moblins, 2 Ice-Breath Lizalfos, and 1 Silver Moblin.
- The White Chuchus around are not part of the Camp, instead they are just around.
- Make your way to the up the nearby slope and use the rock on the Eastern side of the camp.
- Be careful going up the slope, there will be the occasional Ice Keese that will move in toward you.
- On the top of the rock you will be able to see the whole camp below you.
- You can see a Blizzrobe on one side of the camp.
- Use a long range weapon to Snipe the Blizzrobe using a Fire Arrow.
- Fire an arrow past the Blizzrobe and then take out the Wizzrobe with a second arrow.
- With the Blizzrobe dealt with, turn your attention toward the Moblins, and the 2 [[[Breath of the Wild: Ice-Breath Lizalfos|Ice-Breath Lizalfos]] below you.
- Turn your attention first to the Moblin nearby the White Chuchu.
- This Moblin has a Boko Shield and a Bokoblin Arm.
- Take this Moblin out by sniping it. Be sure to keep in mind you can freeze the Moblin by killing the White Chuchu.
- One of the Ice-Breath Lizalfos is found South of where most of the Moblins are.
- The second one is found just North of the rock you are on, between it and a nearby wooden barrier.
- When you have cleared out the others, turn your attention to the 2 Moblins and Silver Moblin in the main camp.
- Using the long range bow (or a multi-shot) fire an Ice Arrow to freeze both of them.
- After that, use Bomb arrows to attack from a distance or move in and attack with your Obliterator.
- Finally, give things a little time to calm if you used the Bomb arrows, and sneak up on the Silver Moblin.
- Completing this enemy camp will have Etsu Kormia Shrine rise from the ground.


The Shrines of the Beasts
- Having completed the 4 Shrines on the Great Plateau, you are bid to travel back to the area nearby each of the Divine Beasts.
- New Trials have appeared nearby each of them for you to complete.
Urbosa's Song

Urbosa's Song
Quest
Daruk's Song

Fireblight Ganon
Boss

Mipha's Song


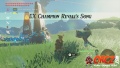
Revali's Song
Windblight Ganon
Boss
Return to the Shrine of Resurrection
- When the the final Song is complete, you will hear from Monk Maz Koshia again.
- The Monk will tell Link that he needs to return to the Shrine of Resurrection once again.
- Go inside and head down into the chamber where Link began the game.
- Once inside that chamber, place the Sheikah Slate back in its pedestal to begin the next portion of it.
- The door out of the Shrine of Resurrection will close and Link will be taken deep underground.


The Final Shrine
- Wait a short while for the elevator to reach the bottom of its shaft.
- At the bottom of the shaft, the Monk will tell you to find the map terminal to activate the shrine and allow access to its whole area.
- Go forward from the elevator to the map terminal in front of you. There will be a Guardian Scout that you will need to destroy along the way.
- Interact with the Guidance Stone in the middle of this chamber to gain control over the gear in the middle of that chamber.
- This gear will be integral to solving the 4 rooms found off this main chamber.
- Each of the 4 rooms offers a challenge that you will need to complete to access the control terminal and open 1 of 4 locks blocking access to the Monk.


Back Left - Conductive Charge Room
- This one is found just to the left of the entrance from the elevator.
- Activate the central drive shaft in either direction.
- Look at the wall where you can see a metal bar on metal tracks.
- Slide the bar over against the wall.
- You can see 2 openings in the circular section that the bar is sliding against.
- Get the metal bar into the opening to begin moving this large stone moving doorway.
- Wait for the doorway to reach the door itself and head into the large room beyond the door.
- Once inside, look in the direction that the door is moving.
- You will see a chest that is spinning along on the inside portion of the spinning doorway.
- Inside the chest you will find a Gerudo Scimitar.
- From there, look to the back left where you can see a landing.
- Glide over there and onto the landing.
- Go up the stairs there and to the top landing.
- Look toward the ceiling in the middle.
- You will see a metal rod there that you can grab and pull loose with Magnesis.
- Drop the metal rod to the ground from there.
- Follow it down yourself.
- Put the rod into the contraption in the middle of the floor.
- The clamp on top will come down and secure the rod in position.
- Watch for the metal bolt that is in the middle of the area.
- Grab it with Magnesis and set it outwards to its maximum.
- This will begin to rotate the back panel of the room.
- To open the gate in the back, you must have the central gear rotating counter-clockwise.
- The circuit in the back of the room needs to be completed to access the terminal.
- Once the circuit is complete, the gate will rise, allowing access to the terminal.
- Go in the room of the terminal and access it.
- This will lift one of the locks holding the Monk's room closed.


Back Right - Sheikah Sphere Tumble
- While fairly easy to access, solving this puzzle room takes a surprising amount of timing.
- From the entrance of the elevator, go to the first lava wheel on the right.
- Set the central drive shaft to be moving clockwise.
- Jump onto an emerging lava wheel paddle and use that to reach the platform leading toward the room.
- Go into the moving doorway into room, but wait in the doorway.
- Wait for it spin upwards, look into the room, on the right-hand side above the terminal.
- On top of the chamber with the terminal you can see a chest.
- When the doorway you are in reaches its apex, glide over to the top of the chamber.
- This will grant access to the chest and the Cobble Crusher inside it.
- Now, from this height, glide over to the far side of the spinning spiked pillar in the middle of the room.
- Land between the spinning spiked pillar and the flame jets.
- Wait for a rotating platform to block the Flamejets for Link to jump over the gap and into the back portion of the room.
- This section can take multiple tries to get right because it is all about positioning and timing.
- There are 3 parts to the back wall: 1 small gear, 1 large gear with a Sphere track, and 1 Sheikah Sphere dispenser with hatch.
- To get the Sheikah Sphere, you need to drop it into the track and then use the central shaft to maneuver the Sphere through the track to the drop point at the far end.
- Getting the Sheikah Sphere into the track requires you to line up the solid funnel opening with the hatch on the right-hand side.
- Use Stasis to freeze the large gear in place when the large gear's track opening lines up with the hatch.
- Step on the nearby pressure switch to release the Sphere into the track.
- If mistimed, immediately release Stasis to shorten the recharge time.
- You will see the Sphere roll into the track and come to a rest at the first U-bend of the track.
- To get the Sphere through now will require you to charge the central drive shaft's direction several times.
- Begin by setting it to run Counter-clockwise.
- Wait for the Sphere to roll farther down into the tube.
- Once it has, set the shaft to drive clockwise.
- Again, for the sphere to move along the track before settling a little.
- This will prepare the sphere to just drop out of the track when the exit point comes around next.
- Alter the drive shaft direction if this will speed up the process.
- Go down the ramp in front of you and collect the Sphere.
- Go back up the right and over to the right.
- You will see a closed track there that you can drop the Sphere onto it.
- The track will deposit the Sphere into its receptacle nearby the entrance to the room itself.
- Glide back across the room to the now open chamber with the Control terminal.
- Go over to the terminal and interact with it to unlatch a lock in the back of the main chamber.


Front Left - High and Low Flow
- Use the lava paddles to make your way up to the central drive shaft in the middle of the main chamber.
- Go to the lava wheel nearby the entrance of the main chamber.
- Jump up onto a lava paddle and turn around to face the nearby wheel.
- Once toward the top, make your way toward the back of the room, across the open shaft.
- The first time across the shaft you will encounter a Guardian Scout II.
- This one is armed with a Guardian Spear+ and a Guardian Shield+.
- Go over to the left and down the ramp over to the left.
- Look to the side and you will see a large gear in the upper right that has an elongated tooth.
- There is an adjacent spinning wheel with sliding blocks on its spokes.
- Watch and you will see the Sliding Blocks are just missing the elongated tooth.
- To gain access to the area, use Stasis on one of the Sliding Blocks while it is at the end of a spoke.
- This will raise a platform just underneath large gear with the long tooth.
- Rush onto the platform and through the open doorway in the front left of the room.
- Go into the room you just gained access to.
- Drop down to the lip of the pool.
- In the back middle you can see a plunger switch next to a paddle.
- Use Cryonis to activate the switch, engaging the mechanisms in this room with the main drive shaft.
- Now, head to the back of this room and into the path of the paddle platform coming toward you.
- Ride it most of the way up the wall.
- Look to the left-hand side of the room to spot a walkway along the wall.
- Jump over and glide to this landing.
- Head along the walkway to reach the back of the room.
- In this room you can see 3 water spouts in the back and 1 near the middle of the room itself.
- Stay on the walkway and head over to the wheel sticking out from the wall to the center of the room, above the walkway.
- Go to the wheel and freeze it with Stasis.
- Face the back of the room (with the 3 spigots) and hit the wheel to build up momentum.
- Break Stasis to shut off the water in this room.
- This will let Link get at the chest that is underwater in the back of the room beneath where the spigots are.
- In this chest is a Zora Spear.
- Dive into the water and head toward where you entered room.
- Go through the revealed archway in front of you.
- In this section, go up the stairs.
- Just next to the top of the stairs you can see a pressure switch that you will want to trigger.
- Go and stand on the switch.
- Look to the right while on the Switch.
- You will see a large Metal Sphere is exposed there.
- Grab the Sphere with Magnesis and set it in front of the large stone block it was behind.
- Step off the Pressure Switch and then back onto it.
- This will launch the Metal Sphere into the back of the room, raising the water level again, allowing Link to access the nearby terminal.
- Go to the water between the pressure switch and the out-of-reach staircase leading to the Terminal.
- Use Cryonis to create a pillar enabling access to this section.
- Climb the pillar and then jump over to the terminal.
- Interact with the terminal to release a Lock on the Monk's room.


Front Right - Twisted Winds
- Use the lava paddles to make your way up to the central drive shaft in the middle of the main chamber.
- Go to the lava wheel nearby the entrance of the main chamber.
- Jump up onto a lava paddle and turn around to face the nearby wheel.
- Once toward the top, make your way toward the back of the room, across the open shaft.
- The first time across the shaft you will encounter a Guardian Scout II.
- This one is armed with a Guardian Spear+ and a Guardian Shield+.
- Once on the platform, head over to the right.
- Follow the ramp down and then over to the left.
- At the end of the platform, stop and look over to the right.
- On top of the nearby gear is a metal chest.
- Use Magnesis to grab the chest and pull it over to link.
- Inside the chest is a set of 5 Bomb Arrows.
- Now you will need to complete the connection between the central drive shaft and the gear in the front right of the room.
- Grab the Metal Rod from the lower socket.
- Move it upwards to the higher socket.
- Opposite that socket is an extendable arm of the central drive shaft.
- Use Magnesis to bring this arm over the Shaft you just placed in the socket.
- It can take a short while for the two to align, so keep pulling until they slot into one another.
- Once they do, the front right door will begin to move, allowing Link access to the room beyond the formerly stationary door.
- Go into the room where you will immediately notice strong winds.
- The direction is tied to the direction of the central drive shaft.
- Go into the back of the room, by the massive Fan blades spinning.
- Go up the stairs and climb up the ladder to the left.
- Use Stasis to freeze the blades and allow Link to run by.
- Behind the fan you will find a Guardian Scout.
- Quickly defeat it then turn your attention to the chest.
- Open the chest to claim the Swallow Bow inside it.
- Head back out to the Fan and refreeze it with Stasis.
- Go up the stairs and climb up the ladder to the left.
- At the top of the ladder, access the Map if the Wind is blowing toward the back of the room (where the massive fan blades are) and redirect the central shaft to Clockwise.
- With the wind blowing toward the entrance of the room, glide over there.
- This will allow Link to land on a walkway above where he entered the room.
- Climb the ladder above the entrance to reach the higher walkway.
- Go onto the very top platform and look to the back of the room.
- You will see a moving platform above the middle platform you were just on.
- Change the direction of the wind once again.
- Glide over to the moving middle platform and land there.
- Use Stasis to freeze the fan in the back of the room when on the right-hand side.
- In the upper back-right you can see a landing with the Terminal.
- With the fan frozen, glide past the fan and land on the platform.
- Go and interact with the terminal to remove another lock from the back door.


Monk Maz Koshia
- Having cleared the 4 trials of the Shrine of Resurrection, Link can now access the Monkl's chamber.
- Go to the far side of the chamber, to the front of the drive shaft, and look up.
- You will see a massive gear that you can grab with Magnesis.
- Grab it and slam the gear into the door opposite it.
- Hold it there until the gear aligns with where the locks were.
- With the gear in place, the door will open.
- Go forward and into the Monk Chamber.
- Approach and interact with the Monk to begin the finale.
- The Monk will animate and the fight will begin.


You do not need to worry about losing fight if you get knocked off.
- Maz Koshia is a tough opponent with a 3 phase fight that you need to survive.
- Stay alert because Maz Koshia can open with a quick jump into the air followed by shooting a Shock Arrow.
- During this phase, Maz Koshia's attack are: Elemental Arrows, Teleportation, Gylph Counter (Teleport attack that can be parried), Blurred Rush (moves very fast with a single attack using his Guardian Sword, and Homing Ground Burst.
- When you are being rushed, dodge backwards to possibly trigger a perfect dodge or simply defend with your shield.
- Dodge as you hear the third whoosh from the Monk's high speed movement.
- When Maz Koshia uses the ground burst attack, you can jump into the air and use the surrounding updraft to get lift.
- This allows for a great chance to get numerous arrow hits in.
- Getting Maz Koshia down by 1/3 of his health will trigger the second phase of the fight.
- Maz Koshia is now fighting with numerous shadow clones of himself.
- These clones can still hurt Link but vanish after a single hit.
- They will maintain the usage of the Elemental Arrows, so keep moving!
- When you do find the real Maz Koshia, try to lock onto them immediately.
- You will be able to get in several hits before the Monk will teleport away.
- There are times the Monks will create a straight line to rush in.
- They will then start running at Link to take a single swing before scattered nearby.
- You can charge up a usage of Urbosa's Fury to quickly hit all of them and instantly reveal the true Maz Koshia.
- Using weapons with some Area of Effect, like a Frostblade or Flameblade can help a lot.
- Sometimes from the straight line, the lead will get a red glyph around it.
- This will lead to at least 2 of the Monk vanishing from the line to attempt to ambush Link.
- The rest will scatter to surround and attack Link.
- Another attack during the close phase is the Monks forming a large circle around Link.
- They will then all rush in to attack Link.
- Use of Urbosa's Fury is recommended here to quickly stop the attack
- A circular charged attack can do much the same effect if Fury is recharging.
- Just keep going through the cycle and fighting the clones.
- Another another third of Maz Koshia's health is gone, he will teleport into the area to begin the final phase of the fight.
- Even within the third phase there are 2 parts to it.
- Maz Koshia will grow to Talus size to begin.
- Koshia will likely begin with a Guardian Laser Burst.
- Focus in on this and attempt to reflect it back to do some damage and stun him.
- The second attack that Koshia is likely to use is to summon in 6 massive Sheikah Metal Bombs and hurl them at Link one at a time.
- These Bombs can be grabbed with Magnesis.
- While the platform is level, there is a very good chance the Monk will then infuse the local area with Lightning.
- Grab one of the metal bombs and bring it over by Maz Koshia to do damage to him and cause him to fall to the ground.
- Maz Koshia will demonstrate that he can move the platform itself, tilting it heavily in one direction or another.
- He will normally use large circular movements with both his arms before doing this.
- Run upslope and watch out for the appearance of more bombs that will come sliding at you.
- Remember that you need to drop the bombs (released from Magnesis) onto the Monk for them to do damage.
- If a large red glyph appears behind the Monk, the Ground Burst attack is being used.
- Jump and use the Paraglider to gain altitude which will allow you to use Focus Time and pelt the Massive Monk with arrows.
- When reduced to the Middle of the "O" in Monk, or in that area, Maz Koshia will start to fight on the ground a bit.
- This part will have him moving toward Link and trying to crush him.
- He can also summon 2 Shadow Clones from a swirl of talismans that he throws toward Link.
- These Shadow Clones use the same techniques and methods as before.
- Eliminate the clones quickly so you can focus on Maz Koshia.
- Keep up the attacks on the Monk and you will eventually beat him.
- For defeating Maz Koshia, Link will be rewarded another rune: Master Cycle 0 is added.
- Link can summon this motorcycle any time using his Sheikah Slate.


Rewards
- Having defeat Monk Maz Koshia, he will deem you worthy of a Divine Beast.
- Immediately a cinematic plays, granting Link a new Rune on his Sheikah Slate, Master Cycle Zero.
- Link will then be taken to just outside the Shrine of Resurrection where he will approach Kass.
- The traveling bard will share the song that he has finished with Link which sparks a memory.
- Link will remember the inaugration ceremony for the Champions.
- Kass will give him the Picture of the Champions for the help with the song.
- Zelda will contact Link, stating she is certain that Link can defeat Ganon.


Dialogue
Zelda: Link ... Link ... Link ... I have witnessed your journey. You have overcome every challenge laid before you. Ruta. Rudania. Medoh. Naboris. All the Divine Beast are now free. With the strength you have attained, I am certain you can unlock the powerful force hidden within. Go to the Shrine of Resurrection and return to the Sheikah Slate to its terminal.
Maz Koshia: I am Maz Koshia. I now address the one who wishes to master a Divine Beasts... To undertake this take requires unwavering dedication. That weapon defeats does with one hit. However, the reverse is also true, as its wielder will also fall to a single strike. You can use this weapon's ability only twice within a set period of time... only when it is glowing. When enough time passes, the weapon will regain its sheen along with its tower. At the four marked locations within the Great Plateau... defeat all monsters present to prove your power. If you are not up to the challenge, leave this plateau. The weapon will return here, and the trial will end.
Monk Maz Koshia: I am Maz Koshia. I must commend you for conquering the trial thus far. The door to the final trial is now open at the Shrine of Resurrection. Go, and face your destiny.
Monk Maz Koshia: To the brave soul who wishes to master a Divine Beast... You have done well to return to this place of beginnings. You have overcome many challenges thus far. Now, allow me to bestow upon you one final trial. Return the Sheikah Slate to the terminal you first obtained it from. Do so, and the final passageway will reveal itself.
Monk Maz Koshia: Welcome, hero. You have overcome many trials to reach me. Now it is time to face the final trial. This trial is a complex labyrinth. To start, you will need a map. You may obtain map information from the Guidance Stone.
Monk Maz Kosia: You faced that challenge with great courage. You have erased all doubt from my mind. You are a true hero. As such, you were destined to take hold of this ancient masterpiece.
Kass: Hm? Ah, it's you. I can't put my feather on it, but I get the feeling you're more accomplished than you were when we last met. I happen to have the perfect song for someone as esteemed as you. I would love to sing it for you. My teacher's unfinished song... the one I told you about... I finally completed the key verses! This lofty location is thew perfect stage to sing this special song. It takes place 100 years ago... at Hyrule Castle. Yes, the very castle you can still see over yonder. It's about the magnificent inauguration of the chosen Champions. If you would, please listen to this special song... The Champions' Ballad.
After this ceremony, they would all forever be known as Champions. My teacher always advised me to write song that transport the listen to the moment in time you're singing of. Now... I finally feel I understand what he meant... and the true power of music. By the way, I found this when I was looking through my teacher's notes. I was thinking... you should be the one to keep it. Your courageous heart reminds me of the indomitable spirit of the Champions. I know you'll treasure it.
A final thought... May the souls of the Champions who watch over Hyrule rest in peace.
Zelda: Link... Link... Link... I have watched your journey. Every step. You have overcome every challenge with great courage. With the power that you have attained... I am certain you can defeat Calamity Ganon. Truly...
Summary
Zelda's voice spoke to you...
She said because you have tamed all four Divine Beasts, you can now unlock the powerful force hidden within.
Head to the Shrine of Resurrection and return the Sheikah Slate to its terminal.
After returning the Sheikah Slate to the terminal in the Shrine of Resurrection, a mysterious weapon appeared out of nowhere.
You must due it to defeat all monsters at four locations within the Great Plateau.
The Trial will begin once you take hold of the weapon.

The One-Hit Obilerator, as the name suggests, can defeat enemies in one-hit. However, the wielder will also be defeated in one hit. Defeat the monsters at the locations marked on the map within the Great Plateau.
If you wish to quit this trial, simply leave the Great Plateau. The weapon will leave your hands and return to the Shrine of Resurrection.
There are four monster bases remaining. Conquer each Shrine that appears.

In the realm of memory, you defeated the powerful Phantom Ganons of the four Divine Beasts. You have also complete the four trials increased on the stone monument.
But this trial is far from over.
The door to the final trial in the Shrine of Resurrection has opened. Return there once more.

When you returned the Sheikah Slate to the terminal at the Shrine of Resurrection, the room shook and descended.
The shrine itself must have been designed to play a part in the trial... Once you reached the underground, an enormous space was revealed.
Conquer the labyrinth.

You reached the deepest area if the trial's labyrinth!
Before you could report your completion of the trial to Monk Maz Koshia, he rose before you and the final trial started!
Display your power by fighting Monk Maz Koshia and proving you are worthy of mastering a Divine Beast.

Video Walkthroughs
EX The Champions' Ballad - Forest of Spirits Enemy Camp Video Walkthrough
EX The Champions' Ballad - Eastern Abbey Enemy Camp Video Walkthrough
EX The Champions' Ballad - Temple of Time Enemy Camp Video Walkthrough
EX The Champions' Ballad - Mount Hylia Enemy Camp Video Walkthrough
EX The Champions' Ballad - Shrine of Resurrection Video Walkthrough
Maz Koshia Fight Video Walkthrough


