

The Trial of Power Trial is a Trial in the game The Legend of Zelda: Breath of the Wild.
This page has the walkthrough/solution to the Trial of Power Puzzle.
Contents
Location[edit]

Kaam Ya'tak Shrine
Shrine
Recommended Runes[edit]

NPCs[edit]

Walkthrough[edit]
- Head over to the right, either dropping over the ledge or using one of the ramps nearby.
- Approach the suspended stone pendulum above the water. Freeze it using the Stasis Rune.
- Pull out a weapon and hit it to build up momentum. Move away from the stone when stasis is about to wear off and let it smash through the door in front of you.
- This next section has 2 sets of spiked balls rolling around in front of you.
- For the first set, wait for the balls to roll past and then you can easily run through it.
- The second set does not have such forgiving timing. You can use Stasis to freeze them and run by easily.
- Go to the end of this hallway and turn left, away from the door on your right.
- Deal with the 2 Guardian Scouts with Swords.
- In this part of the hallway you will see a stone ball above you with leaves leading up to its wooden platform.
- To the right of the leaves on the ground you will see a chest. Inside there is an Edge of Duality
- There is a lantern just above the trial of leaves. Fire an arrow at the lantern to cause it to drop and ignite the leaves, releasing the stone ball to open the way forward.
- Go through the now open doors and head over to the left. You will see a ramp leading up to take you forward.
- To the left of the ramp going up is a chest with a Knight's Broadsword inside.
- Go up the ramp and follow the hallway to the right as it turns to the left.
- This will lead Link to a large stone door with a track running into the middle of it. In front of that door you will find 2 Guardian Scouts with Guardian Spears.
- Defeat them or rush across this room and down the stairs on the far side.
- Turn to the right around the next corner you will find a see-saw mechanism in front of you.
- Use Stasis on the mechanism to lock in place and let link cross safely. Use you can also sprint and jump across, just be sure to wait a short while to let the far end rise a little.
- Continue forward toward the next door.
- You will see some stairs leading to a platform with a device on the right, a ramp with a stone ball to the left, and past the ramp a chest. Inside the chest is an Ancient Core
- Head back to the stairs opposite the chest and interact with the device on top of it.
- This device allows you to directly control the hammer. You can swing it back and other either using the controller's thumbsticks or the tilt action of your controller (depending on your choice).
- You need to hit the ball by the hammer repeatedly to force the stone ball through the crates blocking its path.
- Try to reset the hammer to its initial position after each swing while the steel ball is rolling down its guides. And wait for the stone ball to stop moving before hitting it again.
- After the pair of wooden crates, get it up a short slope and through the hole at the far end. This will let it fall onto the ramp and bash open the door across from the ramp.
- Run through the newly opened doors and follow the corridor to the next puzzle.
- Go on up the stairs. You will find another wooden platform holding a Stone Ball that you will need to release.
- There are leaves underneath the platform which will let burn it down. You can use a Fire Arrow to ignite the leaves or, with your bow drawn, ignite a regular arrow and fire it into the leaves through the bars or by quickly running to the middle section and getting a shot from there.
- Doing this will start boulders rolling down the ramp.
- There are 2 things you need to do to open the next door: 1) Lock the see-saw mechanism with Stasis. 2) With proper timing, leading one of the boulders rolling down the slope onto the mechanism while it is locked so it can crash into the door beyond.
- Try to step on the switch as the boulder is beginning to roll onto the moveable ramp. It takes a second or so for the lift to activate so start it a little early.
- Go into the next section of the puzzle. There is a stone ram in front of you.
- Step on the pressure plate just behind the ram to the lower gate in front of it.
- Freeze the ram with Stasis and then hit it repeatedly with a weapon to trigger its launch when stasis wears off.
- It will launch forward and crash through the final door blocking your way to the Monk.
- The final chest is also found in this section, so go through the now open doors and up either set of stairs.
- Stand on the platform in front of the orange crystal and hit the crystal.
- While Link is in mid-air, use the Paraglider to land on the raised platform to the left, right or against the back wall.
- You can also just land back on the platform that launched you and jump/glider to the walls around it.
- Go behind the pillar to find an opening which lets you get to the chest. Inside the chest you will find a Diamond.
- Drop back to the base of the launcher and hit the crystal to reset it. Step on and launch yourself again. This time, at the peak of your height, use the Paraglider to land on the platform with the monk.
- Climb the stairs and interact with the Monk Kaam Ya'tak.


Strategy Guide/Tips[edit]
- Timing and careful use of stasis are key for clearing this trial.
- Remember that fire can ignite any wooden arrow (or other items) to light things on fire.
Video Walkthrough[edit]
Shrines of Trials Puzzles[edit]

Ja Baij Puzzle
Remote Bomb
Oman Au Puzzle
Magnesis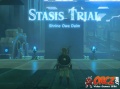
Owa Daim Puzzle
Stasis
Kaam Ya'tak Puzzle
Trial of Power


