
(→Johto Pokedex) |
|||
| (10 intermediate revisions by the same user not shown) | |||
| Line 1: | Line 1: | ||
[[:Category: Pokemon Go Wiki|Pokemon Go]] features the Kanto and Johtoregion Pokemon. They are presented in the Pokedex Format. | [[:Category: Pokemon Go Wiki|Pokemon Go]] features the Kanto and Johtoregion Pokemon. They are presented in the Pokedex Format. | ||
__TOC__ | __TOC__ | ||
| − | ==Kanto== | + | ==Kanto Pokedex== |
{| class="wikitable" | {| class="wikitable" | ||
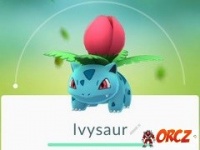
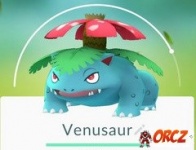
| [[File:PokemonGoBulbasaur.jpg|x150px|link=Pokemon Go: Bulbasaur]]<br><center>[[Pokemon Go: Bulbasaur|#001 Bulbasaur]]</center> ||[[File:PokemonGoIvysaur.jpg|x150px|link=Pokemon Go: Ivysaur]]<center>[[Pokemon Go: Ivysaur|#002 Ivysaur]]</center>||[[File:PokemonGoVenusaur.jpg|x150px|link=Pokemon Go: Venusaur]]<center>[[Pokemon Go: Venusaur|#003 Venusaur]]</center> | | [[File:PokemonGoBulbasaur.jpg|x150px|link=Pokemon Go: Bulbasaur]]<br><center>[[Pokemon Go: Bulbasaur|#001 Bulbasaur]]</center> ||[[File:PokemonGoIvysaur.jpg|x150px|link=Pokemon Go: Ivysaur]]<center>[[Pokemon Go: Ivysaur|#002 Ivysaur]]</center>||[[File:PokemonGoVenusaur.jpg|x150px|link=Pokemon Go: Venusaur]]<center>[[Pokemon Go: Venusaur|#003 Venusaur]]</center> | ||
| Line 210: | Line 210: | ||
==Johto Pokedex== | ==Johto Pokedex== | ||
{| class="wikitable" | {| class="wikitable" | ||
| − | | [[File:PokemonGoChikorita.jpg|x150px|link=Pokemon Go: Chikorita]]<br><center>[[Pokemon Go: Chikorita|#152 Chikorita]]</center> ||[[File:PokemonGoBayleef.jpg|x150px|link=Pokemon Go: Bayleef]]<center>[[Pokemon Go: Bayleef|#153 Bayleef]]</center> | + | | [[File:PokemonGoChikorita.jpg|x150px|link=Pokemon Go: Chikorita]]<br><center>[[Pokemon Go: Chikorita|#152 Chikorita]]</center> |
| + | ||[[File:PokemonGoBayleef.jpg|x150px|link=Pokemon Go: Bayleef]]<center>[[Pokemon Go: Bayleef|#153 Bayleef]]</center> | ||
||[[File:PokemonGoMeganium.jpg|x150px|link=Pokemon Go: Meganium]]<center>[[Pokemon Go: Meganium|#154 Meganium]]</center> | ||[[File:PokemonGoMeganium.jpg|x150px|link=Pokemon Go: Meganium]]<center>[[Pokemon Go: Meganium|#154 Meganium]]</center> | ||
|} | |} | ||
| Line 229: | Line 230: | ||
| [[File:PokemonGoSentret.jpg|x150px|link=Pokemon Go: Sentret]]<br><center>[[Pokemon Go: Sentret|#161 Sentret]]</center> | | [[File:PokemonGoSentret.jpg|x150px|link=Pokemon Go: Sentret]]<br><center>[[Pokemon Go: Sentret|#161 Sentret]]</center> | ||
||[[File:PokemonGoFurret.jpg|x150px|link=Pokemon Go: Furret]]<center>[[Pokemon Go: Furret|#162 Furret]]</center> | ||[[File:PokemonGoFurret.jpg|x150px|link=Pokemon Go: Furret]]<center>[[Pokemon Go: Furret|#162 Furret]]</center> | ||
| + | ||[[File:PokemonGoHoothoot.jpg|x150px|link=Pokemon Go: Hoothoot]]<br><center>[[Pokemon Go: Hoothoot|#163 Hoothoot]]</center> | ||
|} | |} | ||
{| class="wikitable" | {| class="wikitable" | ||
| − | + | | [[File:PokemonGoNoctowl.jpg|x150px|link=Pokemon Go: Noctowl]]<center>[[Pokemon Go: Noctowl|#164 Noctowl]]</center> | |
| − | + | ||[[File:PokemonGoLedyba.jpg|x150px|link=Pokemon Go: Ledyba]]<br><center>[[Pokemon Go: Ledyba|#165 Ledyba]]</center> | |
| − | | | + | |
| − | + | ||
| − | + | ||
| − | + | ||
| − | | [[File:PokemonGoLedyba.jpg|x150px|link=Pokemon Go: Ledyba]]<br><center>[[Pokemon Go: Ledyba|#165 Ledyba]]</center> | + | |
||[[File:PokemonGoLedian.jpg|x150px|link=Pokemon Go: Ledian]]<center>[[Pokemon Go: Ledian|#166 Ledian]]</center> | ||[[File:PokemonGoLedian.jpg|x150px|link=Pokemon Go: Ledian]]<center>[[Pokemon Go: Ledian|#166 Ledian]]</center> | ||
|} | |} | ||
| Line 251: | Line 248: | ||
| [[File:PokemonGoChinchou.jpg|x150px|link=Pokemon Go: Chinchou]]<br><center>[[Pokemon Go: Chinchou|#170 Chinchou]]</center> | | [[File:PokemonGoChinchou.jpg|x150px|link=Pokemon Go: Chinchou]]<br><center>[[Pokemon Go: Chinchou|#170 Chinchou]]</center> | ||
||[[File:PokemonGoLanturn.jpg|x150px|link=Pokemon Go: Lanturn]]<center>[[Pokemon Go: Lanturn|#171 Lanturn]]</center> | ||[[File:PokemonGoLanturn.jpg|x150px|link=Pokemon Go: Lanturn]]<center>[[Pokemon Go: Lanturn|#171 Lanturn]]</center> | ||
| + | ||[[File:PokemonGoPichu.jpg|x150px|link=Pokemon Go: Pichu]]<br><center>[[Pokemon Go: Pichu|#172 Pichu]]</center> | ||
|} | |} | ||
{| class="wikitable" | {| class="wikitable" | ||
| − | + | | [[File:PokemonGoCleffa.jpg|x150px|link=Pokemon Go: Cleffa]]<center>[[Pokemon Go: Cleffa|#173 Cleffa]]</center> | |
| − | | | + | ||[[File:PokemonGoIgglybuff.jpg|x150px|link=Pokemon Go: Igglybuff]]<center>[[Pokemon Go: Igglybuff|#174 Igglybuff]]</center> |
| − | + | ||[[File:PokemonGoTogepi.jpg|x150px|link=Pokemon Go: Togepi]]<br><center>[[Pokemon Go: Togepi|#175 Togepi]]</center> | |
| − | + | ||
| − | | [[File:PokemonGoTogepi.jpg|x150px|link=Pokemon Go: Togepi]]<br><center>[[Pokemon Go: Togepi|#175 Togepi]]</center> | + | |
||[[File:PokemonGoTogetic.jpg|x150px|link=Pokemon Go: Togetic]]<center>[[Pokemon Go: Togetic|#176 Togetic]]</center> | ||[[File:PokemonGoTogetic.jpg|x150px|link=Pokemon Go: Togetic]]<center>[[Pokemon Go: Togetic|#176 Togetic]]</center> | ||
|} | |} | ||
| Line 265: | Line 261: | ||
| [[File:PokemonGoNatu.jpg|x150px|link=Pokemon Go: Natu]]<br><center>[[Pokemon Go: Natu|#177 Natu]]</center> | | [[File:PokemonGoNatu.jpg|x150px|link=Pokemon Go: Natu]]<br><center>[[Pokemon Go: Natu|#177 Natu]]</center> | ||
||[[File:PokemonGoXatu.jpg|x150px|link=Pokemon Go: Xatu]]<center>[[Pokemon Go: Xatu|#178 Xatu]]</center> | ||[[File:PokemonGoXatu.jpg|x150px|link=Pokemon Go: Xatu]]<center>[[Pokemon Go: Xatu|#178 Xatu]]</center> | ||
| + | ||[[File:PokemonGoMareep.jpg|x150px|link=Pokemon Go: Mareep]]<br><center>[[Pokemon Go: Mareep|#179 Mareep]]</center> | ||
|} | |} | ||
{| class="wikitable" | {| class="wikitable" | ||
| − | | [[File: | + | | [[File:PokemonGoFlaaffy.jpg|x150px|link=Pokemon Go: Flaaffy]]<center>[[Pokemon Go: Flaaffy|#180 Flaaffy]]</center> |
| − | + | ||
||[[File:PokemonGoAmpharos.jpg|x150px|link=Pokemon Go: Ampharos]]<center>[[Pokemon Go: Ampharos|#181 Ampharos]]</center> | ||[[File:PokemonGoAmpharos.jpg|x150px|link=Pokemon Go: Ampharos]]<center>[[Pokemon Go: Ampharos|#181 Ampharos]]</center> | ||
| + | ||[[File:PokemonGoBellossom.jpg|x150px|link=Pokemon Go: Bellossom]]<br><center>[[Pokemon Go: Bellossom|#182 Bellossom]]</center> | ||
|} | |} | ||
{| class="wikitable" | {| class="wikitable" | ||
| − | + | |[[File:PokemonGoMarill.jpg|x150px|link=Pokemon Go: Marill]]<center>[[Pokemon Go: Marill|#183 Marill]]</center> | |
| − | + | ||
||[[File:PokemonGoAzumarill.jpg|x150px|link=Pokemon Go: Azumarill]]<center>[[Pokemon Go: Azumarill|#183 Azumarill]]</center> | ||[[File:PokemonGoAzumarill.jpg|x150px|link=Pokemon Go: Azumarill]]<center>[[Pokemon Go: Azumarill|#183 Azumarill]]</center> | ||
| + | ||[[File:PokemonGoSudowoodo.jpg|x150px|link=Pokemon Go: Sudowoodo]]<br><center>[[Pokemon Go: Sudowoodo|#185 Sudowoodo]]</center> | ||
|} | |} | ||
{| class="wikitable" | {| class="wikitable" | ||
| − | + | | [[File:PokemonGoPolitoed.jpg|x150px|link=Pokemon Go: Politoed]]<center>[[Pokemon Go: Politoed|#186 Politoed]]</center> | |
| − | + | ||[[File:PokemonGoHoppip.jpg|x150px|link=Pokemon Go: Hoppip]]<br><center>[[Pokemon Go: Hoppip|#187 Hoppip]]</center> | |
| − | | | + | |
| − | + | ||
| − | + | ||
| − | | [[File:PokemonGoHoppip.jpg|x150px|link=Pokemon Go: Hoppip]]<br><center>[[Pokemon Go: Hoppip|#187 Hoppip]]</center> | + | |
||[[File:PokemonGoSkiploom.jpg|x150px|link=Pokemon Go: Skiploom]]<center>[[Pokemon Go: Skiploom|#188 Skiploom]]</center> | ||[[File:PokemonGoSkiploom.jpg|x150px|link=Pokemon Go: Skiploom]]<center>[[Pokemon Go: Skiploom|#188 Skiploom]]</center> | ||
| − | |||
|} | |} | ||
{| class="wikitable" | {| class="wikitable" | ||
| − | | [[File:PokemonGoAipom.jpg|x150px|link=Pokemon Go: Aipom]]<br><center>[[Pokemon Go: Aipom|#190 Aipom]]</center> | + | | [[File:PokemonGoJumpluff.jpg|x150px|link=Pokemon Go: Jumpluff]]<center>[[Pokemon Go: Jumpluff|#189 Jumpluff]]</center> |
| + | ||[[File:PokemonGoAipom.jpg|x150px|link=Pokemon Go: Aipom]]<br><center>[[Pokemon Go: Aipom|#190 Aipom]]</center> | ||
||[[File:PokemonGoSunkern.jpg|x150px|link=Pokemon Go: Sunkern]]<center>[[Pokemon Go: Sunkern|#191 Sunkern]]</center> | ||[[File:PokemonGoSunkern.jpg|x150px|link=Pokemon Go: Sunkern]]<center>[[Pokemon Go: Sunkern|#191 Sunkern]]</center> | ||
| − | |||
|} | |} | ||
| + | |||
{| class="wikitable" | {| class="wikitable" | ||
| − | | [[File:PokemonGoYanma.jpg|x150px|link=Pokemon Go: Yanma]]<br><center>[[Pokemon Go: Yanma|#193 Yanma]]</center> | + | | [[File:PokemonGoSunflora.jpg|x150px|link=Pokemon Go: Sunflora]]<center>[[Pokemon Go: Sunflora|#192 Sunflora]]</center> |
| + | ||[[File:PokemonGoYanma.jpg|x150px|link=Pokemon Go: Yanma]]<br><center>[[Pokemon Go: Yanma|#193 Yanma]]</center> | ||
||[[File:PokemonGoWooper.jpg|x150px|link=Pokemon Go: Wooper]]<center>[[Pokemon Go: Wooper|#194 Wooper]]</center> | ||[[File:PokemonGoWooper.jpg|x150px|link=Pokemon Go: Wooper]]<center>[[Pokemon Go: Wooper|#194 Wooper]]</center> | ||
| − | |||
|} | |} | ||
| − | |||
{| class="wikitable" | {| class="wikitable" | ||
| − | | [[File:PokemonGoEspeon.jpg|x150px|link=Pokemon Go: Espeon]]<br><center>[[Pokemon Go: Espeon|#196 Espeon]]</center> | + | | [[File:PokemonGoQuagsire.jpg|x150px|link=Pokemon Go: Quagsire]]<center>[[Pokemon Go: Quagsire|#195 Quagsire]]</center> |
| + | ||[[File:PokemonGoEspeon.jpg|x150px|link=Pokemon Go: Espeon]]<br><center>[[Pokemon Go: Espeon|#196 Espeon]]</center> | ||
||[[File:PokemonGoUmbreon.jpg|x150px|link=Pokemon Go: Umbreon]]<center>[[Pokemon Go: Umbreon|#197 Umbreon]]</center> | ||[[File:PokemonGoUmbreon.jpg|x150px|link=Pokemon Go: Umbreon]]<center>[[Pokemon Go: Umbreon|#197 Umbreon]]</center> | ||
|} | |} | ||
| Line 316: | Line 309: | ||
{| class="wikitable" | {| class="wikitable" | ||
| [[File:PokemonGoUnown.jpg|x150px|link=Pokemon Go: Unown]]<br><center>[[Pokemon Go: Unown|#201 Unown]]</center> | | [[File:PokemonGoUnown.jpg|x150px|link=Pokemon Go: Unown]]<br><center>[[Pokemon Go: Unown|#201 Unown]]</center> | ||
| − | ||[[File: | + | ||[[File:PokemonGoWobbuffet.jpg|x150px|link=Pokemon Go: Wobbuffet]]<center>[[Pokemon Go: Wobbuffet|#202 Wobbuffet]]</center> |
||[[File:PokemonGoGirafarig.jpg|x150px|link=Pokemon Go: Girafarig]]<center>[[Pokemon Go: Girafarig|#203 Girafarig]]</center> | ||[[File:PokemonGoGirafarig.jpg|x150px|link=Pokemon Go: Girafarig]]<center>[[Pokemon Go: Girafarig|#203 Girafarig]]</center> | ||
|} | |} | ||
| Line 324: | Line 317: | ||
| [[File:PokemonGoPineco.jpg|x150px|link=Pokemon Go: Pineco]]<br><center>[[Pokemon Go: Pineco|#204 Pineco]]</center> | | [[File:PokemonGoPineco.jpg|x150px|link=Pokemon Go: Pineco]]<br><center>[[Pokemon Go: Pineco|#204 Pineco]]</center> | ||
||[[File:PokemonGoForretress.jpg|x150px|link=Pokemon Go: Forretress]]<center>[[Pokemon Go: Forretress|#205 Forretress]]</center> | ||[[File:PokemonGoForretress.jpg|x150px|link=Pokemon Go: Forretress]]<center>[[Pokemon Go: Forretress|#205 Forretress]]</center> | ||
| + | ||[[File:PokemonGoDunsparce.jpg|x150px|link=Pokemon Go: Dunsparce]]<br><center>[[Pokemon Go: Dunsparce|#206 Dunsparce]]</center> | ||
|} | |} | ||
{| class="wikitable" | {| class="wikitable" | ||
| − | + | | [[File:PokemonGoGligar.jpg|x150px|link=Pokemon Go: Gligar]]<center>[[Pokemon Go: Gligar|#207 Gligar]]</center> | |
| − | + | ||
||[[File:PokemonGoSteelix.jpg|x150px|link=Pokemon Go: Steelix]]<center>[[Pokemon Go: Steelix|#208 Steelix]]</center> | ||[[File:PokemonGoSteelix.jpg|x150px|link=Pokemon Go: Steelix]]<center>[[Pokemon Go: Steelix|#208 Steelix]]</center> | ||
| + | ||[[File:PokemonGoSnubbull.jpg|x150px|link=Pokemon Go: Snubbull]]<br><center>[[Pokemon Go: Snubbull|#209 Snubbull]]</center> | ||
|} | |} | ||
{| class="wikitable" | {| class="wikitable" | ||
| − | | [[File: | + | |[[File:PokemonGoGranbull.jpg|x150px|link=Pokemon Go: Granbull]]<center>[[Pokemon Go: Granbull|#210 Granbull]]</center> |
| − | ||[[File: | + | ||[[File:PokemonGoQwilfish.jpg|x150px|link=Pokemon Go: Qwilfish]]<center>[[Pokemon Go: Qwilfish|#211 Qwilfish]]</center> |
| + | ||[[File:PokemonGoScizor.jpg|x150px|link=Pokemon Go: Scizor]]<br><center>[[Pokemon Go: Scizor|#212 Scizor]]</center> | ||
|} | |} | ||
{| class="wikitable" | {| class="wikitable" | ||
| − | |||
| − | |||
||[[File:PokemonGoShuckle.jpg|x150px|link=Pokemon Go: Shuckle]]<center>[[Pokemon Go: Shuckle|#213 Shuckle]]</center> | ||[[File:PokemonGoShuckle.jpg|x150px|link=Pokemon Go: Shuckle]]<center>[[Pokemon Go: Shuckle|#213 Shuckle]]</center> | ||
| − | | | + | ||[[File:PokemonGoHeracross.jpg|x150px|link=Pokemon Go: Heracross]]<center>[[Pokemon Go: Heracross|#214 Heracross]]</center> |
| − | + | ||
| − | + | ||
| − | |[[File:PokemonGoHeracross.jpg|x150px|link=Pokemon Go: Heracross]]<center>[[Pokemon Go: Heracross|#214 Heracross]]</center> | + | |
||[[File:PokemonGoSneasel.jpg|x150px|link=Pokemon Go: Sneasel]]<br><center>[[Pokemon Go: Sneasel|#215 Sneasel]]</center> | ||[[File:PokemonGoSneasel.jpg|x150px|link=Pokemon Go: Sneasel]]<br><center>[[Pokemon Go: Sneasel|#215 Sneasel]]</center> | ||
|} | |} | ||
| Line 351: | Line 341: | ||
| [[File:PokemonGoTeddiursa.jpg|x150px|link=Pokemon Go: Teddiursa]]<br><center>[[Pokemon Go: Teddiursa|#216 Teddiursa]]</center> | | [[File:PokemonGoTeddiursa.jpg|x150px|link=Pokemon Go: Teddiursa]]<br><center>[[Pokemon Go: Teddiursa|#216 Teddiursa]]</center> | ||
||[[File:PokemonGoUrsaring.jpg|x150px|link=Pokemon Go: Ursaring]]<center>[[Pokemon Go: Ursaring|#217 Ursaring]]</center> | ||[[File:PokemonGoUrsaring.jpg|x150px|link=Pokemon Go: Ursaring]]<center>[[Pokemon Go: Ursaring|#217 Ursaring]]</center> | ||
| + | ||[[File:PokemonGoSlugma.jpg|x150px|link=Pokemon Go: Slugma]]<br><center>[[Pokemon Go: Slugma|#218 Slugma]]</center> | ||
|} | |} | ||
{| class="wikitable" | {| class="wikitable" | ||
| − | + | | [[File:PokemonGoMagcargo.jpg|x150px|link=Pokemon Go: Magcargo]]<center>[[Pokemon Go: Magcargo|#219 Magcargo]]</center> | |
| − | + | ||[[File:PokemonGoSwinub.jpg|x150px|link=Pokemon Go: Swinub]]<br><center>[[Pokemon Go: Swinub|#220 Swinub]]</center> | |
| − | | | + | |
| − | + | ||
| − | + | ||
| − | | [[File:PokemonGoSwinub.jpg|x150px|link=Pokemon Go: Swinub]]<br><center>[[Pokemon Go: Swinub|#220 Swinub]]</center> | + | |
||[[File:PokemonGoPiloswine.jpg|x150px|link=Pokemon Go: Piloswine]]<center>[[Pokemon Go: Piloswine|#221 Piloswine]]</center> | ||[[File:PokemonGoPiloswine.jpg|x150px|link=Pokemon Go: Piloswine]]<center>[[Pokemon Go: Piloswine|#221 Piloswine]]</center> | ||
|} | |} | ||
| Line 384: | Line 371: | ||
| [[File:PokemonGoPhanpy.jpg|x150px|link=Pokemon Go: Phanpy]]<br><center>[[Pokemon Go: Phanpy|#231 Phanpy]]</center> | | [[File:PokemonGoPhanpy.jpg|x150px|link=Pokemon Go: Phanpy]]<br><center>[[Pokemon Go: Phanpy|#231 Phanpy]]</center> | ||
||[[File:PokemonGoDonphan.jpg|x150px|link=Pokemon Go: Donphan]]<center>[[Pokemon Go: Donphan|#232 Donphan]]</center> | ||[[File:PokemonGoDonphan.jpg|x150px|link=Pokemon Go: Donphan]]<center>[[Pokemon Go: Donphan|#232 Donphan]]</center> | ||
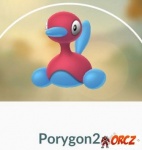
| + | ||[[File:PokemonGoPorygon2.jpg|x150px|link=Pokemon Go: Porygon 2]]<br><center>[[Pokemon Go: Porygon 2|#233 Porygon2]]</center> | ||
|} | |} | ||
{| class="wikitable" | {| class="wikitable" | ||
| − | | [[File: | + | | [[File:PokemonGoStantler.jpg|x150px|link=Pokemon Go: Stantler]]<center>[[Pokemon Go: Stantler|#234 Stantler]]</center> |
| − | + | ||
||[[File:PokemonGoSmeargle.jpg|x150px|link=Pokemon Go: Smeargle]]<center>[[Pokemon Go: Smeargle|#235 Smeargle]]</center> | ||[[File:PokemonGoSmeargle.jpg|x150px|link=Pokemon Go: Smeargle]]<center>[[Pokemon Go: Smeargle|#235 Smeargle]]</center> | ||
| + | ||[[File:PokemonGoTyrogue.jpg|x150px|link=Pokemon Go: Tyrogue]]<br><center>[[Pokemon Go: Tyrogue|#236 Tyrogue]]</center> | ||
|} | |} | ||
{| class="wikitable" | {| class="wikitable" | ||
| − | | [[File: | + | |[[File:PokemonGoHitmontop.jpg|x150px|link=Pokemon Go: Hitmontop]]<center>[[Pokemon Go: Hitmontop|#237 Hitmontop]]</center> |
| − | ||[[File: | + | ||[[File:PokemonGoSmoochum.jpg|x150px|link=Pokemon Go: Smoochum]]<center>[[Pokemon Go: Smoochum|#238 Smoochum]]</center> |
| + | ||[[File:PokemonGoElekid.jpg|x150px|link=Pokemon Go: Elekid]]<br><center>[[Pokemon Go: Elekid|#239 Elekid]]</center> | ||
|} | |} | ||
{| class="wikitable" | {| class="wikitable" | ||
| − | + | | [[File:PokemonGoMagby.jpg|x150px|link=Pokemon Go: Magby]]<center>[[Pokemon Go: Magby|#240 Magby]]</center> | |
| − | + | ||[[File:PokemonGoMiltank.jpg|x150px|link=Pokemon Go: Miltank]]<br><center>[[Pokemon Go: Miltank|#241 Miltank]]</center> | |
| − | | | + | |
| − | + | ||
| − | + | ||
| − | | [[File:PokemonGoMiltank.jpg|x150px|link=Pokemon Go: Miltank]]<br><center>[[Pokemon Go: Miltank|#241 Miltank]]</center> | + | |
||[[File:PokemonGoBlissey.jpg|x150px|link=Pokemon Go: Blissey]]<center>[[Pokemon Go: Blissey|#242 Blissey]]</center> | ||[[File:PokemonGoBlissey.jpg|x150px|link=Pokemon Go: Blissey]]<center>[[Pokemon Go: Blissey|#242 Blissey]]</center> | ||
|} | |} | ||
| Line 426: | Line 411: | ||
| + | ==Hoenn Pokedex== | ||
| + | {| class="wikitable" | ||
| + | | [[File:PokemonGoTreecko.jpg|x150px|link=Pokemon Go: Treecko]]<br><center>[[Pokemon Go: Treecko|#252 Treecko]]</center> ||[[File:PokemonGoGrovyle.jpg|x150px|link=Pokemon Go: Grovyle]]<center>[[Pokemon Go: Grovyle|#253 Grovyle]]</center>||[[File:PokemonGoSceptile.jpg|x150px|link=Pokemon Go: Sceptile]]<center>[[Pokemon Go: Sceptile|#254 Sceptile]]</center> | ||
| + | |} | ||
| + | |||
| + | {| class="wikitable" | ||
| + | | [[File:PokemonGoTorchic.jpg|x150px|link=Pokemon Go: Torchic]]<br><center>[[Pokemon Go: Torchic|#255 Torchic]]</center> | ||
| + | ||[[File:PokemonGoCombusken.jpg|x150px|link=Pokemon Go: Combusken]]<center>[[Pokemon Go: Combusken|#256 Combusken]]</center> | ||
| + | ||[[File:PokemonGoBlaziken.jpg|x150px|link=Pokemon Go: Blaziken]]<center>[[Pokemon Go: Blaziken|#257 Blaziken]]</center> | ||
| + | |} | ||
| + | |||
| + | |||
| + | {| class="wikitable" | ||
| + | | [[File:PokemonGoMudkip.jpg|x150px|link=Pokemon Go: Mudkip]]<br><center>[[Pokemon Go: Mudkip|#258 Mudkip]]</center> | ||
| + | ||[[File:PokemonGoMarshtomp.jpg|x150px|link=Pokemon Go: Marshtomp]]<center>[[Pokemon Go: Marshtomp|#259 Marshtomp]]</center> | ||
| + | ||[[File:PokemonGoSwampert.jpg|x150px|link=Pokemon Go: Swampert]]<center>[[Pokemon Go: Swampert|#260 Swampert]]</center> | ||
| + | |} | ||
| + | |||
| + | |||
| + | {| class="wikitable" | ||
| + | | [[File:PokemonGoPoochyena.jpg|x150px|link=Pokemon Go: Poochyena]]<br><center>[[Pokemon Go: Poochyena|#261 Poochyena]]</center> | ||
| + | ||[[File:PokemonGoMightyena.jpg|x150px|link=Pokemon Go: Mightyena]]<center>[[Pokemon Go: Mightyena|#262 Mightyena]]</center> | ||
| + | |} | ||
| + | |||
| + | {| class="wikitable" | ||
| + | | [[File:PokemonGoZigzagoon.jpg|x150px|link=Pokemon Go: Zigzagoon]]<br><center>[[Pokemon Go: Zigzagoon|#263 Zigzagoon]]</center> | ||
| + | ||[[File:PokemonGoLinoone.jpg|x150px|link=Pokemon Go: Linoone]]<center>[[Pokemon Go: Linoone|#264 Linoone]]</center> | ||
| + | |} | ||
| + | |||
| + | {| class="wikitable" | ||
| + | | [[File:PokemonGoWurmple.jpg|x150px|link=Pokemon Go: Wurmple]]<br><center>[[Pokemon Go: Wurmple|#265 Wurmple]]</center> | ||
| + | ||[[File:PokemonGoSilcoon.jpg|x150px|link=Pokemon Go: Silcoon]]<center>[[Pokemon Go: Silcoon|#266 Silcoon]]</center> | ||
| + | ||[[File:PokemonGoBeautifly.jpg|x150px|link=Pokemon Go: Beautifly]]<center>[[Pokemon Go: Beautifly|#267 Beautiful]]</center> | ||
| + | ||[[File:PokemonGoCascoon.jpg|x150px|link=Pokemon Go: Cascoon]]<center>[[Pokemon Go: Cascoon|#268 Cascoon]]</center> | ||
| + | ||[[File:PokemonGoDustox.jpg|x150px|link=Pokemon Go: Dustox]]<center>[[Pokemon Go: Dustox|#269 Dustox]]</center> | ||
| + | |} | ||
| + | |||
| + | {| class="wikitable" | ||
| + | | [[File:PokemonGoLotad.jpg|x150px|link=Pokemon Go: Lotad]]<br><center>[[Pokemon Go: Lotad|#270 Lotad]]</center> | ||
| + | ||[[File:PokemonGoLombre.jpg|x150px|link=Pokemon Go: Lombre]]<center>[[Pokemon Go: Lombre|#271 Lombre]]</center> | ||
| + | ||[[File:PokemonGoLudicolo.jpg|x150px|link=Pokemon Go: Ludicolo]]<center>[[Pokemon Go: Ludicolo|#272 Ludicolo]]</center> | ||
| + | |} | ||
| + | |||
| + | {| class="wikitable" | ||
| + | | [[File:PokemonGoSeedot.jpg|x150px|link=Pokemon Go: Seedot]]<br><center>[[Pokemon Go: Seedot|#273 Seedot]]</center> | ||
| + | ||[[File:PokemonGoNuzleaf.jpg|x150px|link=Pokemon Go: Nuzleaf]]<center>[[Pokemon Go: Nuzleaf|#274 Nuzleaf]]</center> | ||
| + | ||[[File:PokemonGoShiftry.jpg|x150px|link=Pokemon Go: Shiftry]]<center>[[Pokemon Go: Shiftry|#275 Shiftry]]</center> | ||
| + | |} | ||
| + | |||
| + | {| class="wikitable" | ||
| + | | [[File:PokemonGoTaillow.jpg|x150px|link=Pokemon Go: Taillow]]<br><center>[[Pokemon Go: Taillow|#276 Taillow]]</center> | ||
| + | ||[[File:PokemonGoSwellow.jpg|x150px|link=Pokemon Go: Swellow]]<center>[[Pokemon Go: Swellow|#277 Swellow]]</center> | ||
| + | |} | ||
| + | |||
| + | {| class="wikitable" | ||
| + | | [[File:PokemonGoWingull.jpg|x150px|link=Pokemon Go: Wingull]]<br><center>[[Pokemon Go: Wingull|#278 Wingull]]</center> | ||
| + | ||[[File:PokemonGoPelipper.jpg|x150px|link=Pokemon Go: Pelipper]]<center>[[Pokemon Go: Pelipper|#279 Pelipper]]</center> | ||
| + | |} | ||
| + | |||
| + | {| class="wikitable" | ||
| + | | [[File:PokemonGoRalts.jpg|x150px|link=Pokemon Go: Ralts]]<br><center>[[Pokemon Go: Ralts|#280 Ralts]]</center> | ||
| + | ||[[File:PokemonGoKirlia.jpg|x150px|link=Pokemon Go: Kirlia]]<center>[[Pokemon Go: Kirlia|#281 Kirlia]]</center> | ||
| + | ||[[File:PokemonGoGardevoir.jpg|x150px|link=Pokemon Go: Gardevoir]]<center>[[Pokemon Go: Gardevoir|#282 Gardevoir]]</center> | ||
| + | |} | ||
| + | |||
| + | {| class="wikitable" | ||
| + | | [[File:PokemonGoSurskit.jpg|x150px|link=Pokemon Go: Surskit]]<br><center>[[Pokemon Go: Surskit|#283 Surskit]]</center> | ||
| + | ||[[File:PokemonGoMasquerain.jpg|x150px|link=Pokemon Go: Masquerain]]<center>[[Pokemon Go: Masquerain|#284 Masquerain]]</center> | ||
| + | |} | ||
| + | |||
| + | {| class="wikitable" | ||
| + | | [[File:PokemonGoShroomish.jpg|x150px|link=Pokemon Go: Shroomish]]<br><center>[[Pokemon Go: Shroomish|#285 Shroomish]]</center> | ||
| + | ||[[File:PokemonGoBreloom.jpg|x150px|link=Pokemon Go: Breloom]]<center>[[Pokemon Go: Breloom|#286 Breloom]]</center> | ||
| + | |} | ||
| + | |||
| + | {| class="wikitable" | ||
| + | | [[File:PokemonGoSlakoth.jpg|x150px|link=Pokemon Go: Slakoth]]<br><center>[[Pokemon Go: Slakoth|#287 Slakoth]]</center> | ||
| + | ||[[File:PokemonGoVigoroth.jpg|x150px|link=Pokemon Go: Vigoroth]]<center>[[Pokemon Go: Vigoroth|#288 Vigoroth]]</center> | ||
| + | ||[[File:PokemonGoSlaking.jpg|x150px|link=Pokemon Go: Slaking]]<center>[[Pokemon Go: Slaking|#289 Slaking]]</center> | ||
| + | |} | ||
| + | |||
| + | {| class="wikitable" | ||
| + | | [[File:PokemonGoNincada.jpg|x150px|link=Pokemon Go: Nincada]]<br><center>[[Pokemon Go: Nincada|#290 Nincada]]</center> | ||
| + | ||[[File:PokemonGoNinjask.jpg|x150px|link=Pokemon Go: Ninjask]]<center>[[Pokemon Go: Ninjask|#291 Ninjask]]</center> | ||
| + | ||[[File:PokemonGoShedinja.jpg|x150px|link=Pokemon Go: Shedinja]]<center>[[Pokemon Go: Shedinja|#292 Shedinja]]</center> | ||
| + | |} | ||
| + | |||
| + | {| class="wikitable" | ||
| + | | [[File:PokemonGoWhismur.jpg|x150px|link=Pokemon Go: Whismur]]<br><center>[[Pokemon Go: Whismur|#293 Whismur]]</center> | ||
| + | ||[[File:PokemonGoLoudred.jpg|x150px|link=Pokemon Go: Loudred]]<center>[[Pokemon Go: Loudred|#294 Loudred]]</center> | ||
| + | ||[[File:PokemonGoExploud.jpg|x150px|link=Pokemon Go: Exploud]]<center>[[Pokemon Go: Exploud|#295 Exploud]]</center> | ||
| + | |} | ||
| + | |||
| + | {| class="wikitable" | ||
| + | | [[File:PokemonGoMakuhita.jpg|x150px|link=Pokemon Go: Makuhita]]<br><center>[[Pokemon Go: Makuhita|#296 Makuhita]]</center> | ||
| + | ||[[File:PokemonGoHariyama.jpg|x150px|link=Pokemon Go: Hariyama]]<center>[[Pokemon Go: Hariyama|#297 Hariyama]]</center> | ||
| + | |} | ||
| + | |||
| + | {| class="wikitable" | ||
| + | | [[File:PokemonGoAzurill.jpg|x150px|link=Pokemon Go: Azurill]]<br><center>[[Pokemon Go: Azurill|#298 Azurill]]</center> | ||
| + | |} | ||
| + | |||
| + | {| class="wikitable" | ||
| + | | [[File:PokemonGoNosepass.jpg|x150px|link=Pokemon Go: Nosepass]]<br><center>[[Pokemon Go: Nosepass|#299 Nosepass]]</center> | ||
| + | |} | ||
| + | |||
| + | {| class="wikitable" | ||
| + | | [[File:PokemonGoSkitty.jpg|x150px|link=Pokemon Go: Skitty]]<br><center>[[Pokemon Go: Skitty|#300 Skitty]]</center> | ||
| + | ||[[File:PokemonGoDelcatty.jpg|x150px|link=Pokemon Go: Delcatty]]<center>[[Pokemon Go: Delcatty|#301 Delcatty]]</center> | ||
| + | |} | ||
| + | |||
| + | {| class="wikitable" | ||
| + | | [[File:PokemonGoSableye.jpg|x150px|link=Pokemon Go: Sableye]]<br><center>[[Pokemon Go: Sableye|#302 Sableye]]</center> | ||
| + | |} | ||
| + | |||
| + | {| class="wikitable" | ||
| + | | [[File:PokemonGoMawile.jpg|x150px|link=Pokemon Go: Mawile]]<br><center>[[Pokemon Go: Mawile|#303 Mawile]]</center> | ||
| + | |} | ||
| + | |||
| + | {| class="wikitable" | ||
| + | | [[File:PokemonGoAron.jpg|x150px|link=Pokemon Go: Aron]]<br><center>[[Pokemon Go: Aron|#304 Aron]]</center> | ||
| + | ||[[File:PokemonGoLairon.jpg|x150px|link=Pokemon Go: Lairon]]<center>[[Pokemon Go: Lairon|#305 Lairon]]</center> | ||
| + | ||[[File:PokemonGoAggron.jpg|x150px|link=Pokemon Go: Aggron]]<center>[[Pokemon Go: Aggron|#306 Aggron]]</center> | ||
| + | |} | ||
| + | |||
| + | {| class="wikitable" | ||
| + | | [[File:PokemonGoMeditite.jpg|x150px|link=Pokemon Go: Meditite]]<br><center>[[Pokemon Go: Meditite|#307 Meditite]]</center> | ||
| + | ||[[File:PokemonGoMedicham.jpg|x150px|link=Pokemon Go: Medicham]]<center>[[Pokemon Go: Medicham|#308 Medicham]]</center> | ||
| + | |} | ||
| + | |||
| + | {| class="wikitable" | ||
| + | | [[File:PokemonGoElectrike.jpg|x150px|link=Pokemon Go: Electrike]]<br><center>[[Pokemon Go: Electrike|#309 Electrike]]</center> | ||
| + | ||[[File:PokemonGoManectric.jpg|x150px|link=Pokemon Go: Manectric]]<center>[[Pokemon Go: Manectric|#310 Manectric]]</center> | ||
| + | |} | ||
| + | |||
| + | {| class="wikitable" | ||
| + | | [[File:PokemonGoPlusle.jpg|x150px|link=Pokemon Go: Plusle]]<br><center>[[Pokemon Go: Plusle|#311 Plusle]]</center> | ||
| + | |} | ||
| + | |||
| + | {| class="wikitable" | ||
| + | | [[File:PokemonGoMinum.jpg|x150px|link=Pokemon Go: Minun]]<br><center>[[Pokemon Go: Minun|#312 Minun]]</center> | ||
| + | |} | ||
| + | |||
| + | {| class="wikitable" | ||
| + | | [[File:PokemonGoVolbeat.jpg|x150px|link=Pokemon Go: Volbeat]]<br><center>[[Pokemon Go: Volbeat|#313 Volbeat]]</center> | ||
| + | |} | ||
| + | |||
| + | {| class="wikitable" | ||
| + | | [[File:PokemonGoIllumise.jpg|x150px|link=Pokemon Go: Illumise]]<br><center>[[Pokemon Go: Illumise|#314 Illumise]]</center> | ||
| + | |} | ||
| + | |||
| + | {| class="wikitable" | ||
| + | | [[File:PokemonGoRoselia.jpg|x150px|link=Pokemon Go: Roselia]]<br><center>[[Pokemon Go: Roselia|#315 Roselia]]</center> | ||
| + | |} | ||
| + | |||
| + | {| class="wikitable" | ||
| + | | [[File:PokemonGoGulpin.jpg|x150px|link=Pokemon Go: Gulpin]]<br><center>[[Pokemon Go: Gulpin|#316 Gulpin]]</center> | ||
| + | ||[[File:PokemonGoSwalot.jpg|x150px|link=Pokemon Go: Swalot]]<center>[[Pokemon Go: Swalot|#317 Swalot]]</center> | ||
| + | |} | ||
| + | |||
| + | {| class="wikitable" | ||
| + | | [[File:PokemonGoCarvanha.jpg|x150px|link=Pokemon Go: Carvanha]]<br><center>[[Pokemon Go: Carvanha|#318 Carvanha]]</center> | ||
| + | ||[[File:PokemonGoSharpedo.jpg|x150px|link=Pokemon Go: Sharpedo]]<center>[[Pokemon Go: Sharpedo|#319 Sharpedo]]</center> | ||
| + | |} | ||
| + | |||
| + | {| class="wikitable" | ||
| + | | [[File:PokemonGoWailmer.jpg|x150px|link=Pokemon Go: Wailmer]]<br><center>[[Pokemon Go: Wailmer|#320 Wailmer]]</center> | ||
| + | ||[[File:PokemonGoWailord.jpg|x150px|link=Pokemon Go: Wailord]]<center>[[Pokemon Go: Wailord|#321 Wailord]]</center> | ||
| + | |} | ||
| + | |||
| + | {| class="wikitable" | ||
| + | | [[File:PokemonGoNumel.jpg|x150px|link=Pokemon Go: Numel]]<br><center>[[Pokemon Go: Numel|#322 Numel]]</center> | ||
| + | ||[[File:PokemonGoCamerupt.jpg|x150px|link=Pokemon Go: Camerupt]]<center>[[Pokemon Go: Camerupt|#323 Camerupt]]</center> | ||
| + | |} | ||
| + | |||
| + | {| class="wikitable" | ||
| + | | [[File:PokemonGoTorkoal.jpg|x150px|link=Pokemon Go: Torkoal]]<br><center>[[Pokemon Go: Torkoal|#324 Torkoal]]</center> | ||
| + | |} | ||
| + | |||
| + | {| class="wikitable" | ||
| + | | [[File:PokemonGoSpoink.jpg|x150px|link=Pokemon Go: Spoink]]<br><center>[[Pokemon Go: Spoink|#325 Spoink]]</center> | ||
| + | ||[[File:PokemonGoGrumpig.jpg|x150px|link=Pokemon Go: Grumpig]]<center>[[Pokemon Go: Grumpig|#326 Grumpig]]</center> | ||
| + | |} | ||
| + | |||
| + | {| class="wikitable" | ||
| + | | [[File:PokemonGoSpinda.jpg|x150px|link=Pokemon Go: Spinda]]<br><center>[[Pokemon Go: Spinda|#327 Spinda]]</center> | ||
| + | |} | ||
| + | |||
| + | {| class="wikitable" | ||
| + | | [[File:PokemonGoTrapinch.jpg|x150px|link=Pokemon Go: Trapinch]]<br><center>[[Pokemon Go: Trapinch|#328 Trapinch]]</center> | ||
| + | ||[[File:PokemonGoVibrava.jpg|x150px|link=Pokemon Go: Vibrava]]<center>[[Pokemon Go: Vibrava|#329 Vibrava]]</center> | ||
| + | ||[[File:PokemonGoFlygon.jpg|x150px|link=Pokemon Go: Flygon]]<center>[[Pokemon Go: Flygon|#330 Flygon]]</center> | ||
| + | |} | ||
| + | |||
| + | {| class="wikitable" | ||
| + | | [[File:PokemonGoCacnea.jpg|x150px|link=Pokemon Go: Cacnea]]<br><center>[[Pokemon Go: Cacnea|#331 Cacnea]]</center> | ||
| + | ||[[File:PokemonGoCacturne.jpg|x150px|link=Pokemon Go: Cacturne]]<center>[[Pokemon Go: Cacturne|#332 Cacturne]]</center> | ||
| + | |} | ||
| + | |||
| + | {| class="wikitable" | ||
| + | | [[File:PokemonGoSwablu.jpg|x150px|link=Pokemon Go: Swablu]]<br><center>[[Pokemon Go: Swablu|#333 Swablu]]</center> | ||
| + | ||[[File:PokemonGoAltaria.jpg|x150px|link=Pokemon Go: Altaria]]<center>[[Pokemon Go: Altaria|#334 Altaria]]</center> | ||
| + | |} | ||
| + | |||
| + | |||
| + | {| class="wikitable" | ||
| + | |[[File:PokemonGoZangoose.jpg|x150px|link=Pokemon Go: Zangoose]]<center>[[Pokemon Go: Zangoose|#335 Zangoose]]</center> | ||
| + | ||[[File:PokemonGoSeviper.jpg|x150px|link=Pokemon Go: Seviper]]<center>[[Pokemon Go: Seviper|#336 Seviper]]</center> | ||
| + | |} | ||
| + | |||
| + | {| class="wikitable" | ||
| + | |[[File:PokemonGoLunatone.jpg|x150px|link=Pokemon Go: Lunatone]]<center>[[Pokemon Go: Lunatone|#337 Lunatone]]</center> | ||
| + | ||[[File:PokemonGoSolrock.jpg|x150px|link=Pokemon Go: Solrock]]<center>[[Pokemon Go: Solrock|#338 Solrock]]</center> | ||
| + | |} | ||
| + | |||
| + | {| class="wikitable" | ||
| + | |[[File:PokemonGoBarboach.jpg|x150px|link=Pokemon Go: Barboach]]<center>[[Pokemon Go: Barboach|#339 Barboach]]</center> | ||
| + | ||[[File:PokemonGoWhiscash.jpg|x150px|link=Pokemon Go: Whiscash]]<center>[[Pokemon Go: Whiscash|#340 Whiscash]]</center> | ||
| + | |} | ||
| + | |||
| + | {| class="wikitable" | ||
| + | |[[File:PokemonGoCorphish.jpg|x150px|link=Pokemon Go: Corphish]]<center>[[Pokemon Go: Corphish|#341 Corphish]]</center> | ||
| + | ||[[File:PokemonGoCrawdaunt.jpg|x150px|link=Pokemon Go: Crawdaunt]]<center>[[Pokemon Go: Crawdaunt|#342 Crawdaunt]]</center> | ||
| + | |} | ||
| + | |||
| + | {| class="wikitable" | ||
| + | |[[File:PokemonGoBaltoy.jpg|x150px|link=Pokemon Go: Baltoy]]<center>[[Pokemon Go: Baltoy|#343 Baltoy]]</center> | ||
| + | ||[[File:PokemonGoClaydol.jpg|x150px|link=Pokemon Go: Claydol]]<center>[[Pokemon Go: Claydol|#344 Claydol]]</center> | ||
| + | |} | ||
| + | |||
| + | {| class="wikitable" | ||
| + | |[[File:PokemonGoLileep.jpg|x150px|link=Pokemon Go: Lileep]]<center>[[Pokemon Go: Lileep|#345 Lileep]]</center> | ||
| + | ||[[File:PokemonGoCradily.jpg|x150px|link=Pokemon Go: Cradily]]<center>[[Pokemon Go: Cradily|#346 Cradily]]</center> | ||
| + | |} | ||
| + | |||
| + | {| class="wikitable" | ||
| + | |[[File:PokemonGoAnorith.jpg|x150px|link=Pokemon Go: Anorith]]<center>[[Pokemon Go: Anorith|#347 Anorith]]</center> | ||
| + | ||[[File:PokemonGoArmaldo.jpg|x150px|link=Pokemon Go: Armaldo]]<center>[[Pokemon Go: Armaldo|#348 Armaldo]]</center> | ||
| + | |} | ||
| + | |||
| + | {| class="wikitable" | ||
| + | |[[File:PokemonGoFeebas.jpg|x150px|link=Pokemon Go: Feebas]]<center>[[Pokemon Go: Feebas|#349 Feebas]]</center> | ||
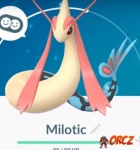
| + | ||[[File:PokemonGoMilotic.jpg|x150px|link=Pokemon Go: Milotic]]<center>[[Pokemon Go: Milotic|#350 Milotic]]</center> | ||
| + | |} | ||
| + | |||
| + | {| class="wikitable" | ||
| + | |[[File:PokemonGoCastform.jpg|x150px|link=Pokemon Go: Castform]]<center>[[Pokemon Go: Castform|#351 Castform]]</center> | ||
| + | |} | ||
| + | |||
| + | {| class="wikitable" | ||
| + | |[[File:PokemonGoKecleon.jpg|x150px|link=Pokemon Go: Kecleon]]<center>[[Pokemon Go: Kecleon|#352 Kecleon]]</center> | ||
| + | |} | ||
| + | |||
| + | {| class="wikitable" | ||
| + | |[[File:PokemonGoShuppet.jpg|x150px|link=Pokemon Go: Shuppet]]<center>[[Pokemon Go: Shuppet|#353 Shuppet]]</center> | ||
| + | ||[[File:PokemonGoBanette.jpg|x150px|link=Pokemon Go: Banette]]<center>[[Pokemon Go: Banette|#354 Banette]]</center> | ||
| + | |} | ||
| + | |||
| + | |||
| + | {| class="wikitable" | ||
| + | |[[File:PokemonGoDuskull.jpg|x150px|link=Pokemon Go: Duskull]]<center>[[Pokemon Go: Duskull|#355 Duskull]]</center> | ||
| + | ||[[File:PokemonGoDusclops.jpg|x150px|link=Pokemon Go: Dusclops]]<center>[[Pokemon Go: Dusclops|#356 Dusclops]]</center> | ||
| + | |} | ||
| + | |||
| + | |||
| + | {| class="wikitable" | ||
| + | |[[File:PokemonGoTropius.jpg|x150px|link=Pokemon Go: Tropius]]<center>[[Pokemon Go: Tropius|#357 Tropius]]</center> | ||
| + | |} | ||
| + | |||
| + | |||
| + | {| class="wikitable" | ||
| + | |[[File:PokemonGoChimecho.jpg|x150px|link=Pokemon Go: Chimecho]]<center>[[Pokemon Go: Chimecho|#358 Chimecho]]</center> | ||
| + | |} | ||
| + | |||
| + | |||
| + | {| class="wikitable" | ||
| + | |[[File:PokemonGoAbsol.jpg|x150px|link=Pokemon Go: Absol]]<center>[[Pokemon Go: Absol|#359 Absol]]</center> | ||
| + | |} | ||
| + | |||
| + | {| class="wikitable" | ||
| + | |[[File:PokemonGoWynaut.jpg|x150px|link=Pokemon Go: Wynaut]]<center>[[Pokemon Go: Wynaut|#360 Wynaut]]</center> | ||
| + | |} | ||
| + | |||
| + | {| class="wikitable" | ||
| + | |[[File:PokemonGoSnorunt.jpg|x150px|link=Pokemon Go: Snorunt]]<center>[[Pokemon Go: Snorunt|#361 Snorunt]]</center> | ||
| + | ||[[File:PokemonGoGlalie.jpg|x150px|link=Pokemon Go: Glalie]]<center>[[Pokemon Go: Glalie|#362 Glalie]]</center> | ||
| + | |} | ||
| + | |||
| + | {| class="wikitable" | ||
| + | |[[File:PokemonGoSpheal.jpg|x150px|link=Pokemon Go: Spheal]]<center>[[Pokemon Go: Spheal|#363 Spheal]]</center> | ||
| + | ||[[File:PokemonGoSealeo.jpg|x150px|link=Pokemon Go: Sealeo]]<center>[[Pokemon Go: Sealeo|#364 Sealeo]]</center> | ||
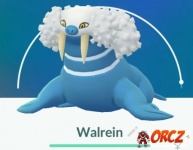
| + | ||[[File:PokemonGoWalrein.jpg|x150px|link=Pokemon Go: Walrein]]<center>[[Pokemon Go: Walrein|#365 Walrein]]</center> | ||
| + | |} | ||
| + | |||
| + | {| class="wikitable" | ||
| + | |[[File:PokemonGoClamperl.jpg|x150px|link=Pokemon Go: Clamperl]]<center>[[Pokemon Go: Clamperl|#366 Clamperl]]</center> | ||
| + | ||[[File:PokemonGoHuntail.jpg|x150px|link=Pokemon Go: Huntail]]<center>[[Pokemon Go: Huntail|#367 Huntail]]</center> | ||
| + | ||[[File:PokemonGoGorebyss.jpg|x150px|link=Pokemon Go: Gorebyss]]<center>[[Pokemon Go: Gorebyss|#368 Gorebyss]]</center> | ||
| + | |} | ||
| + | |||
| + | {| class="wikitable" | ||
| + | |[[File:PokemonGoRelicanth.jpg|x150px|link=Pokemon Go: Relicanth]]<center>[[Pokemon Go: Relicanth|#369 Relicanth]]</center> | ||
| + | |} | ||
| + | |||
| + | {| class="wikitable" | ||
| + | |[[File:PokemonGoLuvdisc.jpg|x150px|link=Pokemon Go: Luvdisc]]<center>[[Pokemon Go: Luvdisc|#370 Luvdisc]]</center> | ||
| + | |} | ||
| + | |||
| + | {| class="wikitable" | ||
| + | |[[File:PokemonGoBagon.jpg|x150px|link=Pokemon Go: Bagon]]<center>[[Pokemon Go: Bagon|#371 Bagon]]</center> | ||
| + | ||[[File:PokemonGoShelgon.jpg|x150px|link=Pokemon Go: Shelgon]]<center>[[Pokemon Go: Shelgon|#372 Shelgon]]</center> | ||
| + | ||[[File:PokemonGoSalamence.jpg|x150px|link=Pokemon Go: Salamence]]<center>[[Pokemon Go: Salamence|#373 Salamence]]</center> | ||
| + | |} | ||
| + | |||
| + | {| class="wikitable" | ||
| + | |[[File:PokemonGoBeldum.jpg|x150px|link=Pokemon Go: Beldum]]<center>[[Pokemon Go: Beldum|#374 Beldum]]</center> | ||
| + | ||[[File:PokemonGoMetang.jpg|x150px|link=Pokemon Go: Metang]]<center>[[Pokemon Go: Metang|#375 Metang]]</center> | ||
| + | ||[[File:PokemonGoMetagross.jpg|x150px|link=Pokemon Go: Metagross]]<center>[[Pokemon Go: Metagross|#376 Metagross]]</center> | ||
| + | |} | ||
| + | |||
| + | {| class="wikitable" | ||
| + | |[[File:PokemonGoRegirock.jpg|x150px|link=Pokemon Go: Regirock]]<center>[[Pokemon Go: Regirock|#377 Regirock]]</center> | ||
| + | ||[[File:PokemonGoRegice.jpg|x150px|link=Pokemon Go: Regice]]<center>[[Pokemon Go: Regice|#378 Regice]]</center> | ||
| + | ||[[File:PokemonGoRegisteel.jpg|x150px|link=Pokemon Go: Registeel]]<center>[[Pokemon Go: Registeel|#379 Registeel]]</center> | ||
| + | |} | ||
| + | |||
| + | {| class="wikitable" | ||
| + | |[[File:PokemonGoLatias.jpg|x150px|link=Pokemon Go: Latias]]<center>[[Pokemon Go: Latias|#380 Latias]]</center> | ||
| + | ||[[File:PokemonGoLatios.jpg|x150px|link=Pokemon Go: Latios]]<center>[[Pokemon Go: Latios|#381 Latios]]</center> | ||
| + | |} | ||
| + | |||
| + | {| class="wikitable" | ||
| + | |[[File:PokemonGoKyogre.jpg|x150px|link=Pokemon Go: Kyogre]]<center>[[Pokemon Go: Kyogre|#382 Kyogre]]</center> | ||
| + | ||[[File:PokemonGoGroudon.jpg|x150px|link=Pokemon Go: Groudon]]<center>[[Pokemon Go: Groudon|#383 Groudon]]</center> | ||
| + | |} | ||
| + | |||
| + | {| class="wikitable" | ||
| + | |[[File:PokemonGoRayquaza.jpg|x150px|link=Pokemon Go: Rayquaza]]<center>[[Pokemon Go: Rayquaza|#384 Rayquaza]]</center> | ||
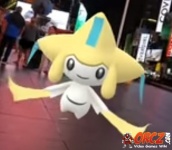
| + | ||[[File:PokemonGoJirachi.jpg|x150px|link=Pokemon Go: Jirachi]]<center>[[Pokemon Go: Jirachi|#385 Jirachi]]</center> | ||
| + | ||[[File:PokemonGoDeoxys.jpg|x150px|link=Pokemon Go: Deoxys]]<center>[[Pokemon Go: Deoxys|#386 Deoxys]]</center> | ||
| + | |} | ||
| + | |||
| + | ==Alolan Pokedex== | ||
| + | {| class="wikitable" | ||
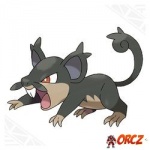
| + | | [[File:AlolanRattata.jpg|x150px|link=Pokemon Go: Alolan Rattata]]<br><center>[[Pokemon Go: Alolan Rattata|#019 Alolan Rattata]]</center> ||[[File:AlolanRaticate.jpg|x150px|link=Pokemon Go: Alolan Raticate]]<br><center>[[Pokemon Go: Alolan Raticate|#020 Alolan Raticate]]</center> | ||
| + | |} | ||
| + | |||
| + | {| class="wikitable" | ||
| + | | [[File:AlolanRaichu.jpg|x150px|link=Pokemon Go: Alolan Raichu]]<br><center>[[Pokemon Go: Alolan Raichu|#026 Alolan Raichu]]</center> | ||
| + | |} | ||
| + | |||
| + | {| class="wikitable" | ||
| + | | [[File:AlolanSandshrew.jpg|x150px|link=Pokemon Go: Alolan Sandshrew]]<br><center>[[Pokemon Go: Alolan Sandshrew|#027 Alolan Sandshrew]]</center> ||[[File:AlolanSandslash.jpg|x150px|link=Pokemon Go: Alolan Sandslash]]<br><center>[[Pokemon Go: Alolan Sandslash|#028 Alolan Sandslash]]</center> | ||
| + | |} | ||
| + | |||
| + | {| class="wikitable" | ||
| + | | [[File:AlolanVulpix.jpg|x150px|link=Pokemon Go: Alolan Vulpix]]<br><center>[[Pokemon Go: Alolan Vulpix|#037 Alolan Vulpix]]</center> ||[[File:AlolanNinetales.jpg|x150px|link=Pokemon Go: Alolan Ninetails]]<br><center>[[Pokemon Go: Alolan Ninetails|#038 Alolan Ninetails]]</center> | ||
| + | |} | ||
| + | |||
| + | {| class="wikitable" | ||
| + | | [[File:AlolanDiglett.jpg|x150px|link=Pokemon Go: Alolan Diglett]]<br><center>[[Pokemon Go: Alolan Diglett|#050 Alolan Diglett]]</center> ||[[File:AlolanDugtrio.jpg|x150px|link=Pokemon Go: Alolan Dugtrio]]<br><center>[[Pokemon Go: Alolan Dugtrio|#051 Alolan Dugtrio]]</center> | ||
| + | |} | ||
| + | |||
| + | {| class="wikitable" | ||
| + | | [[File:AlolanMeowth.jpg|x150px|link=Pokemon Go: Alolan Meowth]]<br><center>[[Pokemon Go: Alolan Meowth|#052 Alolan Meowth]]</center> ||[[File:AlolanPersian.jpg|x150px|link=Pokemon Go: Alolan Persian]]<br><center>[[Pokemon Go: Alolan Persian|#053 Alolan Persian]]</center> | ||
| + | |} | ||
| + | |||
| + | {| class="wikitable" | ||
| + | | [[File:AlolanGeodude.jpg|x150px|link=Pokemon Go: Alolan Geodude]]<br><center>[[Pokemon Go: Alolan Geodude|#074 Alolan Geodude]]</center> ||[[File:AlolanGraveler.jpg|x150px|link=Pokemon Go: Alolan Graveler]]<br><center>[[Pokemon Go: Alolan Graveler|#075 Alolan Graveler]]</center> | ||
| + | ||[[File:AlolanGolem.jpg|x150px|link=Pokemon Go: Alolan Golem]]<br><center>[[Pokemon Go: Alolan Golem|#076 Alolan Golem]]</center> | ||
| + | |} | ||
| + | |||
| + | {| class="wikitable" | ||
| + | | [[File:AlolanGrimer.jpg|x150px|link=Pokemon Go: Alolan Grimer]]<br><center>[[Pokemon Go: Alolan Grimer|#088 Alolan Grimer]]</center> ||[[File:AlolanMuk.jpg|x150px|link=Pokemon Go: Alolan Muk]]<br><center>[[Pokemon Go: Alolan Muk|#089 Alolan Muk]]</center> | ||
| + | |} | ||
| + | |||
| + | {| class="wikitable" | ||
| + | | [[File:AlolanExeggutor.jpg|x150px|link=Pokemon Go: Alolan Exeggutor]]<br><center>[[Pokemon Go: Alolan Exeggutor|#103 Alolan Exeggutor]]</center> | ||
| + | |} | ||
| + | |||
| + | {| class="wikitable" | ||
| + | | [[File:AlolanMarowak.jpg|x150px|link=Pokemon Go: Alolan Marowak]]<br><center>[[Pokemon Go: Alolan Marowak|#105 Alolan Marowak]]</center> | ||
| + | |} | ||
[[Category: Pokemon Go Wiki]] | [[Category: Pokemon Go Wiki]] | ||
Latest revision as of 14:50, 22 June 2018
Pokemon Go features the Kanto and Johtoregion Pokemon. They are presented in the Pokedex Format.
Kanto Pokedex[edit]
 |
 |
 |
 |
 |
 |
 |
 |
 |
 |
 |
 |
 |
 |
 |
 |
 |
 |
 |
 |
 |
 |
 |
 |
 |
 |
 |
 |
 |
 |
 |
 |
 |
 |
 |
 |
 |
 |
 |
 |
 |
 |
 |
 |
 |
 |
 |
 |
 |
 |
 |
 |
 |
 |
 |
 |
 |
 |
 |
 |
 |
 |
 |
 |
 |
 |
 |
 |
 |
 |
 |
 |
 |
 |
 |
 |
 |
 |
 |
 |
 |
 |
 |
 |
 |
 |
 |
 |
 |
 |
 |
 |
 |
 |
 |
 |
 |
 |
 |
 |
 |
 |
 |
 |
 |
 |
 |
 |
 |
 |
 |
 |
 |
 |
 |
 |
 |
 |
 |
 |
 |
 |
 |
 |
 |
 |
 |
 |
 |
 |
 |
 |
 |
 |
 |
 |
 |
 |
 |
 |
 |
 |
 |
 |
 |
 |
 |
 |
 |
 |
 |
Johto Pokedex[edit]
 |
 |
 |
 |
 |
 |
 |
 |
 |
 |
 |
 |
 |
 |
 |
 |
 |
 |
 |
 |
 |
 |
 |
 |
 |
 |
 |
 |
 |
 |
 |
 |
 |
 |
 |
 |
 |
 |
 |
 |
 |
 |
 |
 |
 |
 |
 |
 |
 |
 |
 |
 |
 |
 |
 |
 |
 |
 |
 |
 |
 |
 |
 |
 |
 |
 |
 |
 |
 |
 |
 |
 |
 |
 |
 |
 |
 |
 |
 |
 |
 |
 |
 |
 |
 |
 |
 |
 |
 |
 |
 |
 |
 |
 |
 |
 |
 |
 |
 |
 |
Hoenn Pokedex[edit]
 |
 |
 |
 |
 |
 |
 |
 |
 |
 |
 |
 |
 |
 |
 |
 |
 |
 |
 |
 |
 |
 |
 |
 |
| x150px |
x150px |
| x150px |
x150px |
 |
 |
 |
| x150px |
x150px |
 |
 |
 |
 |
 |
| x150px |
x150px |
x150px |
| x150px |
x150px |
x150px |
 |
 |
 |
| x150px |
 |
 |
 |
 |
| x150px |
x150px |
x150px |
 |
 |
 |
 |
 |
 |
| x150px |
| x150px |
 |
 |
 |
 |
 |
 |
 |
| x150px |
x150px |
| x150px |
 |
 |
| x150px |
| x150px |
x150px |
x150px |
| x150px |
x150px |
| x150px |
x150px |
| x150px |
x150px |
| x150px |
x150px |
 |
 |
 |
 |
| x150px |
x150px |
| x150px |
x150px |
| x150px |
x150px |
 |
 |
| x150px |
| x150px |
 |
 |
 |
 |
| x150px |
| x150px |
 |
| x150px |
 |
 |
 |
 |
 |
| x150px |
x150px |
x150px |
 |
 |
| x150px |
x150px |
x150px |
| x150px |
x150px |
x150px |
| x150px |
x150px |
x150px |
| x150px |
x150px |
 |
 |
| x150px |
 |
x150px |
Alolan Pokedex[edit]
 |
 |
 |
 |
 |
 |
 |
 |
 |
 |
 |
 |
 |
 |
 |
 |
 |
 |
Subcategories
This category has the following 2 subcategories, out of 2 total.
Pages in category "Pokemon Go Pokemon"
The following 200 pages are in this category, out of 418 total.
(previous 200) (next 200)(previous 200) (next 200)


