

BitterPearl Shader can be found in the Vault of Glass.
The Bitterpearl Shader is a Shader that can be unlocked through the Vault of Glass
Contents
- 1 Description
- 2 Shard Locations
- 2.1 Shard 1 - Entrance
- 2.2 Shard 2 - Entrance
- 2.3 Shard 3 - Trial of Kabr
- 2.4 Shard 4 - Trial of Kabr
- 2.5 Shard 5 - Templar's Well
- 2.6 Shard 6 - Templar's Well
- 2.7 Shard 7 - Templar's Well
- 2.8 Shard 8 - The Gorgon's Labyrinth
- 2.9 Shard 9 - The Gorgon's Labyrinth
- 2.10 Shard 10 - The Chasm
- 2.11 Shard 11 - The Chasm
- 2.12 Shard 12 - The Chasm
Description[edit]
There are 12 hidden Collectible Shards scattered throughout the Vault. Each will need to be gathered to unlock the Shader.
Shard Locations[edit]
Shard 1 - Entrance[edit]
- Either having completed the Spire encounter or just before, this is where you can find the first shard.
- Start by going along the ground and finding the tunnel in the back left.
- Go into this cave and stay along the straight path to the back of it.
- In this back section, on the left-hand side, is the first shard collectible.


Shard 2 - Entrance[edit]
- The second shard is found to the right of the entrance area.
- Go past the stone wall from the Spire location and look for a tree against the right-hand wall.
- Finding this tree, go to the far side of it.
- Look at its roots to find the Collectible Shard.


Shard 3 - Trial of Kabr[edit]
- Just after the fireteam enters the Trial of Kabr, before the path levels out with the ledge, is the place to start searching for the next shard.
- Just before the second set of stonework, go into the small area there.
- Look in the rocks to the left to find a shallow hidden passage.
- Just head into the small alcove and look on the right-hand side for the shard.


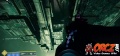
Shard 4 - Trial of Kabr[edit]
- Make your way to Secret Chest 2, using the hidden passage in the Trial of Kabr.
- When you reach the secret chest, you are nearby the shard itself.
- Go to the ledge on the front of the pillar (facing where you entered).
- Look into the branches of the tree to find the shard.
- To reach it, just do a running jump toward it to find a ledge just below it.


- Destiny2VaultofGlassHiddenChests12.jpg


Shard 5 - Templar's Well[edit]
- This shard is found on the normal path to the Templar's Well.
- If you took the secret path, DO NOT DROP down into the Well itself.
- Instead, you will want to climb back up and pass on through the large archway.
- Go forward until you reach the first corner of this path.
- Head to the side overlooking the Well itself, and look over the edge.
- Below is a narrow ledge that any Guardian can drop down to.
- Go around the corner to the left and look for the lowest part of this platform.
- In the dirt, tucked away in the corner, is the Shard.


Shard 6 - Templar's Well[edit]
- This Shard is found once the Fireteam has defeated the Templar.
- With the boss defeated, a secret path will open on the left-hand side.
- Just before the stairs leading toward the top of this side, where all the Vex were coming from, there is a small opening in the wall here.
- Jump up into it.
- In the first room of this secret path, turn to the right.
- Jump up onto the ledge here and look to the far side of it, closer to the wall.
- Here you will find the collectible.


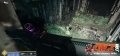
Shard 7 - Templar's Well[edit]
- Follow the Secret Path out of Templar's Well almost to its termination.
- On the landing before the final ledge, look for the narrow opening in the back right part of it.
- Go into this small cave and head to the end of it.
- You will find a destroyed Vex archway here.
- In the middle of it is the shard you are looking for

- Destiny2ShardCollectible38.jpg


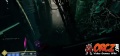
Shard 8 - The Gorgon's Labyrinth[edit]
- This shard is found within the Gorgon's Labyrinth.
- Remember to be careful moving throughout this maze since the Gorgons are sound-sensitive.
- Just as you are entering the area, go over to the right-hand side.
- Carefully go forward, looking toward the middle.
- Go past the second pillar and start moving toward the third.
- Look up toward the middle of the area and over to the right.
- Toward the top of one of the pillars is the shard.


Shard 9 - The Gorgon's Labyrinth[edit]
- This chest is found within the Gorgon's Labyrinth.
- Remember to be careful moving throughout this maze since the Gorgons are sound-sensitive.
- This makes this chest a bit challenging to get, so be warned.
- Once in the open area at the start of the maze itself, it is time to start the access to this chest.
- Look to the right just after you get past the rock in the middle of the shallow streams.
- To the right of the slanted rock pillar, there is a floating Vex Obelisk.
- Shoot it until it disappears.
- After that, turn to the left and go into the darker path by going between the large rock and the smaller one to its left.
- Walk close to the large rock on your right for now.
- Go around to the far side of this rock, being very mindful of the Gorgons.
- On the far side of the large rock, head directly across from it, toward the humped rock.
- Reaching the humped rock, go over to the left, heading up the slope there.
- Climb to the top of the rock and jump over to the ledge to the left.
- From there, go over to the right, jumping to the next slanted rock.
- Go to the middle of this rock.
- On this rock, look to the wall to the left.
- Under the ledge, about the chip in it, is the next Vex Obelisk to shoot.
- Wait for the nearby Gorgon to move away then jump to the open top of the pillar to the right of the rock you are on.
- Carefully drop from there down to the ground and move carefully along the right-hand side.
- Just past the first large rock on the right, turn to the left, and look toward the base of the overhang.
- Just under there is the shard.


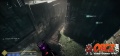
Shard 10 - The Chasm[edit]
- This shard is found within the Chasm, just as you are entering it, before going onto ANY of the Vex Platforms.
- Go over to the left, jumping along the ledges here toward the edge.
- Get to the end of this path CAREFULLY since it ends abruptly there and this little but the void for rushing forward.
- At the end of the ledge, look down, where you will just be able to see a ledge below you.
- Drop down to the ledge.
- Once on it, just on forward into the open path leading into the wall.
- Go into the small alcove it leads to so you can find the Shard.


Shard 11 - The Chasm[edit]
- This path is found along the normal route along the Chasm.
- Get to the far end of the wall you need to jump along to finish traversing the Chasm.
- Along this path, there are a number of notches along the wall.
- Before the corner, there is an outcropping you can drop to.
- Continue forward to the next illuminated notch in the wall.
- Go inside it.
- Head to the back right and look on the floor to find the shard.


Shard 12 - The Chasm[edit]
- This final shard is found outside the room of the final encounter.
- Head up along the walkway toward the triangle doorway leading into the final room.
- Stop on the stairs, where you will need to climb the walls.
- Jump over to the wall on the right and find a ledge.
- From there,


