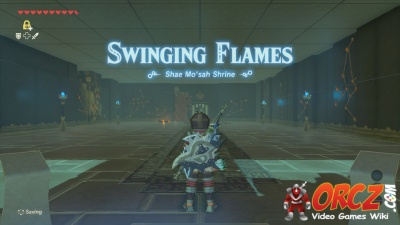
The Swinging Flames Trial is a Trial in the game The Legend of Zelda: Breath of the Wild.
This page has the walkthrough/solution to the Swinging Flames Puzzle.
Contents
Location[edit]
Shae Mo'sah Shrine
Shrine
Recommended Runes[edit]
NPCs[edit]
Walkthrough[edit]
- Go forward when you arrive in the shrine.
- Go to the barred doorway, moving to either side and look up.
- Above you is a lantern. Take careful aim and shoot it down using your Bow.
- This will ignite the leaves below the lantern (or quickly allow you to light a torch to do just that).
- The leaves will burn away a wooden platform to the left of the barred doorway., dropping a heavy barrel.
- Pick up the barrel and place it on the nearby pressure plate.
- The bars will lift, allowing you to move into the next room.
- Go to the left to find a Brazier and a very short hallway with a chest in it. In that chest you will find a Stone Smasher.
- Head to the right of the door now to deal with the enemies there.
- There are a number of Guardian Scouts to deal with in this area. 1 has a Guardian Sword and the other 2 will just shoot beams at Link.
- Look along the side of the ramp in the back of this room to find a chest with a Ruby inside it.
- Go back to the Brazier by the chest and light your Torch.
- Go on up the ramp behind the chest to reach the second floor of this Shrine.
- At the top of the ramp, turn to the right and then left, going up the stairs just past the closed off chamber.
- At the top of the stairs, throw your torch at the wall to have it light the vines there on fire. This will drop a metallic ball onto the track below.
- If you do not have a torch or Fire Arrows, simply use Magnesis to control the lantern and bring it over to the wall.
- Drop over the ledge here on the same side that you just throw the torch.
- Behind you, next to the platform you just dropped off, is a chest. Inside it you will find Ice Arrow x10.
- Go straight away from the chest, underneath the platform you were just on
- Turn left after you pass underneath the platform.
- Follow the hallway around to the left.
- This will lead you to a pressure plate that will lift a gate and cause the metal ball to roll down a ramp and swing the mechanical wheel at its base.
- The wheel spinning will raise the gate on the doorway across from you, run through this open doorway.
- Turn to the right inside this new area to find a chest with a Small Key inside it.
- Go up the ramp to the left of the chest if the doorway has closed, otherwise you can head out the still open doorway itself.
- Go back to the right, to where you first come up to this level.
- You can use your key to open door to bring you to the final part of this Shrine's challenge.
- Go up the stairs and stand on the pressure plate to reveal a pair of hanging lanterns.
- Once again, you can either use your bow and arrow to cut the rope and cause one to fall onto the leaves or head down to the lower level to light a torch and return to this room to light the vines on fire.
- Grab the barrel that drops and set it on the pressure plate nearby.
- This will lift the gate blocking your way to the Monk.
- Go on through the gateway to the Monk's chamber.
- Climb the stairs and interact with the Monk Shae Mo'sah.
Strategy Guide/Tips[edit]
- Fire Arrows and thrown torches can go a long way to complete this trial.
Video Walkthrough[edit]
Swinging Flames Video Walkththrough
Shrines of Trials Puzzles[edit]
Ja Baij Puzzle
Remote BombOman Au Puzzle
MagnesisOwa Daim Puzzle
Stasis


