

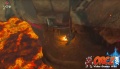
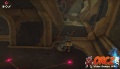
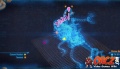
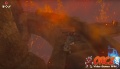
Divine Beast Vah Rudania in Breath of the Wild.
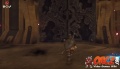
Divine Beast Vah Rudania is found in Eldin
Contents
NPCs


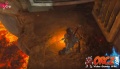
Location
- BreathoftheWildEldin.jpg
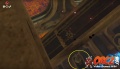
Nearby Locations
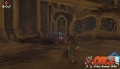
- BreathoftheWildEldinBridge.jpg
Enemies

Guardian Scout
Monsters
Guardian Sentry
Monsters
Cursed Moblin
Monsters
Cursed Bokoblin
Monsters
Cursed Lizalfos
Monsters

Items
- BreathoftheWild.jpg
[[Breath of the Wild: |]]
- BreathoftheWild.jpg
[[Breath of the Wild: |]]
- BreathoftheWild.jpg
[[Breath of the Wild: |]]
- BreathoftheWild.jpg
[[Breath of the Wild: |]]
- BreathoftheWild.jpg
[[Breath of the Wild: |]]
Boulder Breaker
Reward
Daruk's Protection
Reward


Map

Walkthrough
- Make your way back to the Eldin Bridge leading to Death Mountain itself.
- There are at least 2 Moblins attacking Yunobo. Defeat them to talk with the Goron.
- He will explain you will need to help him get to the Divine Beast by bringing down the bridge... by firing him at it.
- He will jump in. Hit the nearby switch and it will move the cannon to face the Bridge of Eldin.
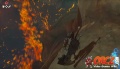
- Go across the now lowered bridge
- On the far side of the bridge, Divine Beast Vah Rudania will release a number of Guardian Drones into the air.
- Link can now tell Yunobo to either follow you or stay in place. This will be critical to your success.
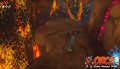
- Go forward and over to the right along the path in front of you.
- In front of you is a Sentry patrolling the path with an overhang on the right-hand side of the path.
- Wait for Yunobo to catch up with Link.
- Once he has, move forward and get both Link and Yunobo underneath the overhang when the Sentry has gone past it to the far side.
- Wait for the Sentry to pass overhead and then the pair should move forward.
- Your path forward will be blocked a little by some boulders.
- Push the boulders in front you to clear the path, but be mindful of the Sentry.
- Whistle to have Yunobo pause.
- Link will need to either climb above the Sentry and along the nearby ledge.
- There are a few boulders on this ledger. Link just needs to push the boulders onto the Sentry that is blocking your path forward.
- Call Yunobo forward and continue forward up the slope.
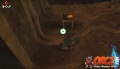
- On the right is the first Cannon. Go over to it and wait for Yunobo.
- Have him get in the Cannon and fire him at Divine Beast Vah Rudania. To do that, hit the switch nearby and then detonate a Remote Bomb to send Yunobo into Rudania.
- Rudania will start moving along Death Mountain to another spot.
- Continue along the path upward to the next set of Sentries.
- Have Yunobo wait at the end of the patrol.
- Climb up the Northern cliff-face. The ledge above has a few metal boxes.
- Use Magnesis to lift and slam the metal boxes into the Sentries. Flicking the motion controls downward is a great way to do high damage quickly. Otherwise, move the crates into the sides of the sentry to damage them.
- You can also hit the Sentries on the bottom to do damage as well.
- Use the crates to destroy the 2 sentries in front of you.
- Drop down onto the path you have been following and call Yunobo over to you.
- Approach the break ion the mountain in front of you with the Sentry hovering directly above it.
- Link can either use a Metal Crate from the ledge to destroy the Sentry or use one of the metal slabs nearby to do the same job.
- Link can also simply lay the metal slab across the break in the stone to block the Sentry's field of vision.
- Turn to the left after that and head on up the path.
- Close to the top of the path you will encounter a Moblin.
- Just pat the moblin you will find the next cannon. Head over to it.
- Yunobo will jump into the cannon. Fire it at Rudania with a Remote Bomb, to force Rudiana farther along Death Mountain.
- Continue along the path to the Northeast. There are 2 more Sentries.
- 1 will be stationary, 1 will be following a circular pattern.
- Bring Yunobo to the rocks just before the updraft with the 2 Sentry.
- Slip past them and then use the updraft to reach the ledge above.
- Go forward to the metal crates just ahead. Use Magnesis to grab it.
- Use the Metal Crate to smash all the nearby Sentries.
- With the sentries destroyed, return to the path below and call over Yunobo.
- Continue along this path, looking to the right. You will see another cannon guarded by a pair of Moblins.
- You can easily defeat these Moblins by knocking them off the ledge that the cannon is set on.
- Have Yunoboget in the cannon by approaching it.
- Arm the cannon with a Remote Bomb and then aim and fire it at the Divine Beast.
- This third assault will send Rudania into the caldera of Death Mountain.
- Automatically you will be taken to the Divine Beast itself.


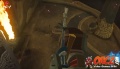
On Board Divine Beast Vah Rudania
- After the cutscene with Daruk, turn around.
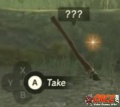
- Go to the end of the tail to find a chest with an Ancient Screw.
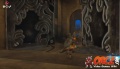
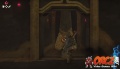
- Go forward through the door into the main body of the Divine Beast.
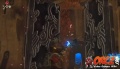
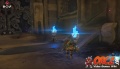
- It will immediately become dark inside the Divine Beast.
- Just ahead to the left you will see a Malice Eye. There is another just ahead on the right as well.
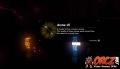
- Destroy both of them with a quick arrow shot.
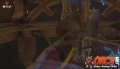
- Look up after that to find another Malice eye next to a Cursed Mouth. Destroy this one quickly as well.
- The two on the floor will reveal chests. The Malice eye closest to the entrance has a Dragonbone Boko Club. The two farther in have Ice Arrows x5 and a Torch.
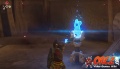
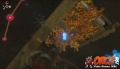
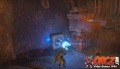
- Continue toward the back of the room, where you see the blue flames.
- Use the Torch, lighting it with the blue flames to illuminate the area around Link.
- Head back toward the entrance and over to the right to find an unlit brazier.
- Light the brazier using the torch and go through the newly opened door.
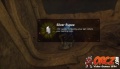
- Inside the new room you will see a Guardian Scout.
- Ahead on the left you can see another set of Malice Eyes to hit.
- Go forward and look to the right past a Malice Barrier.
- Just past the barrier you can see another Malice Eye.
- Destroying this eye and its barrier will reveal 2 chests. The closer one has Arrow x5 and the farther one has Arrows x5.
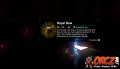
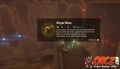
- Head toward the next chest dropped by the farthest Malice Eye. This chest has a Royal Bow.
- Head back to the entrance of the room and re-light your torch.
- Go to the back left part of the room you opened, and use the lit torch to ignite the brazier to lift the bars and allow you to access the room beyond it.
- Go into this room to find the map terminal for the Divine Beast.
- Interact with it to get the map and see the surrounding area.
- This will allow Link to adjust the angle that the Divine Beast is moving at, letting Link access different parts of the Divine Beast.
- This allows Link to tilt the Divine Beast 90 degrees. It also will open the shutters on top of Rudania, allowing light inside the beast.
- Head back toward the teleport point of the Divine Beast.
- Go to the torches at the base of the ramp, pull out an arrow or a wooden weapon and light it using the torch.
- Fire (or throw) your weapon at the metal door with the Wooden bar and vines on it to the left of the entrance (with Link facing the teleport point of the Divine Beast).
- Use Magnesis to open the door here.
- Go forward to the terminal in front of you and activate it.
- With that done, step back to the main hall, light another arrow or weapon using the Blue Flame.
- Look back into the room with the first terminal. You can see some dried vines holding a chest against the ceiling. Fire the arrow or throw the weapon onto the vines to light them and cause the chest to drop.
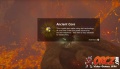
- Inside this chest you will find an Ancient Gear.
- Once again, head to the blue flames at the base of the entrance.
- Light an arrow and head over to the right.
- You will see a door with an eye-shaped opening.
- Fire the arrow through the eye to hit the brazier on the other side.
- This will raise the door to let Link through it.
- Light an arrow using the brazier inside the room and head toward the tail entrance.
- Look upward to the ceiling to see dried vines and wood. Fire the lit arrow into them to reveal a Metal Block.
- Use Magnesis to lift the metal block.
- Use that to block the flame jets that are preventing Link from moving forward.
- With the block in place, get close to the metal block and then use your map to shift Rudania 90 degrees to let Link get past the flame jets.
- Once past the flame jets, reset Rudania to access the terminal in this room. This will also turn off the flame jets.
- Head back to the main chamber, and light your Torch. Position Link just past the large doorway on his left.
- Tilt the Divine Beast and wait for it to stop moving.
- Head for the ramp with the small metal block at its base.
- Go on up the ramp to the top of it.
- At the top, go to the left and look down. You will see an unlit brazier ahead of you.
- Slide down the slide of the Divine Beast to this brazier and light it with your Torch.
- This will open a cage that is holding a small Shiekah Sphere.
- Tilt the Divine Beast back to its default position.
- Head back along the Divine Beast and go back to the doorway you just came through. Stand just outside it, near where the Shiekah Sphere is.
- Tilt the Divine Beast once again. It is time to get the Shiekah Sphere into position.
- Watch the Sphere roll down along the ramp to the bottom of it.
- Pause a short distance down the ramp, looking along the right-hand side of it.
- You can find a chest along this ramp. Look down.
- Below the ramp you can find the next Terminal.
- Drop off the ramp and glide over to the terminal. Activate it.
- Now, head to the base of the ramp that you were just on.
- Use Magnesis to lift the small metal block to allow the Shiekah Sphere to fall into the room below you.
- If needed, drop into the room below you and place the Shiekah Sphere in the middle of its reciprocal.
- This will raise the nearby bars and allow you to access the next terminal.
- Interact with the terminal to get close to the end.
- Reset Rudania to its default position and head on out of the room with this terminal back into the main hallway.
- Reposition Link to climb up the ramp and tilt Rudania.
- Go back up the ramp and drop off the ledge at the top to the left. This time, head to the right after you drop from the ledge.
- Go forward and then over to the right, toward the belly of Rudania.
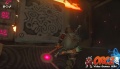
- Be cautious going forward because of the Cursed Mouth which can spawn Cursed Bokoblins, Cursed Moblins and Cursed Lizalfos.
- Continue toward the underside of Rudania.
- Look to the right and snipe the Malice Eye as soon as you can from a distance to close the Cursed Mouth.
- Drop down to the platform where the Cursed Mouth was and head toward the tail of the Divine Beast.
- Jump off the ledge and glide over to the chamber on the underside of Rudania.
- Glide into the open door to enter a chamber.
- Inside the chamber you will find a chest with a Silver Rupee inside it.
- Go diagonally across the chamber to the crystal switch. Activate it to open the door directly across from the chest.
- Go through the doorway and drop down.
- In this small chamber, reset Rudania.
- Head through the door going toward the tail of the Divine Beast.
- Go to the ramp once more and climb it to the top.
- Once again, drop off the ledge and slide down to the brazier you lit toward the top of Rudania.
- Go to the left, past the brazier this time.
- You will find Malice blocking your way with the Eye plainly visible close to the middle. Take out the Malice Eye with an arrow.
- Go along the spines on the back of Rudania and to the edge of the first set. Look underneath the next set to see another Malice Eye. Take it out with an arrow.
- Climb onto the arch supporting the spines and head toward the spine with the chest on it.
- Jump the railing to reach the spine and approach the chest to open it. Inside it is an Ancient Core.
- Get close to the ridge on the spine.
- Tilt Rudania back to drop onto the ridge properly.
- Head toward Rudania's head to find the final terminal.
- Activate the terminal and then turn to the right and glide over to the right to drop onto the shoulder joint of the front right leg.
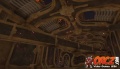
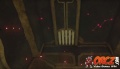
- Look to the middle of the Divine Beast to spot the main control unit.
- Drop into the opening in front of you to land on the ramp below you and reach the last chest. Inside the chest is a Royal Bow.
- Head on out of the main chamber toward the tail and go over to the left.
- Make your way to either side of the Divine Beast. Go up the side and head to the center of Rudania's back.
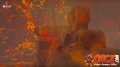
- Heal up then approach and interact with the Main Control Unit to begin the fight with Fireblight Ganon.


- BreathoftheWildDivineBeastVahRudania77.jpg


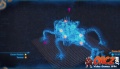


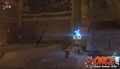


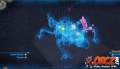


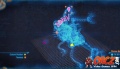


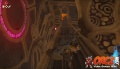


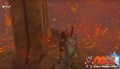


Fighting Fireblight Ganon
- The first phase of Fireblight Ganon, Link wants to move in close to it and attack.
- Be mindful of the Massive Guardian Sword that it uses. Dodge or parry its attacks.
- If you are more distance from it, it will also fling fireballs at you. Use the nearby pillars to evade the fireballs.
- Keep in close to avoid most of its attacks.
- Getting it below 50% health will trigger the second phase.
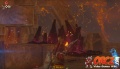
- During this second phase, it will start to use a single massive fireball.
- These fireballs can be destroyed with a single Ice Arrow. Otherwise take cover behind a pillar.
- While Fireblight Ganon is glowing orange, it is almost invulnerable.
- Wait for the Fireblight to begin using its Vacuum ability to pull in fire.
- While it is doing this, use either Remote Bomb and hurl it toward the Fireblight and then detonate it when it gets close.
- It will stun the Fireblight and it will drop to ground. Rush it and attack with your weapon.
- It will recover and, if Link is close, attack with its sword and some flames on the ground.
- Stun and damage it to complete the fight.


Strategy Guide/Tips
- The first phase of Fireblight Ganon, Link wants to move in close to it and attack.
- Be mindful of the Massive Guardian Sword that it uses. Dodge or parry its attacks.
- If you are more distance from it, it will also fling fireballs at you. Use the nearby pillars to evade the fireballs.
- Keep in close to avoid most of its attacks.
- Getting it below 50% health will trigger the second phase.
- During this second phase, it will start to use a single massive fireball.
- These fireballs can be destroyed with a single Ice Arrow. Otherwise take cover behind a pillar.
- While Fireblight Ganon is glowing orange, it is almost invulnerable.
- Wait for the Fireblight to begin using its Vacuum ability to pull in fire.
- While it is doing this, use either Remote Bomb and hurl it toward the Fireblight and then detonate it when it gets close.
- It will stun the Fireblight and it will drop to ground. Rush it and attack with your weapon.
- It will recover and, if Link is close, attack with its sword and some flames on the ground.
- Stun and damage it to complete the fight.


