
(Created page with "These are Generation 2 Pokemon, 80 additional Pokemon have been added as of 2/16/2017. {| class="wikitable" | File:PokemonGoChikorita.jpg|x150px|link=Pokemon Go: Chikorita...") |
|||
| (2 intermediate revisions by the same user not shown) | |||
| Line 3: | Line 3: | ||
{| class="wikitable" | {| class="wikitable" | ||
| − | | [[File:PokemonGoChikorita.jpg|x150px|link=Pokemon Go: Chikorita]]<br><center>[[Pokemon Go: Chikorita|#152 Chikorita]]</center> ||[[File:PokemonGoBayleef.jpg|x150px|link=Pokemon Go: Bayleef]]<center>[[Pokemon Go: Bayleef|#153 Bayleef]]</center> | + | | [[File:PokemonGoChikorita.jpg|x150px|link=Pokemon Go: Chikorita]]<br><center>[[Pokemon Go: Chikorita|#152 Chikorita]]</center> |
| + | ||[[File:PokemonGoBayleef.jpg|x150px|link=Pokemon Go: Bayleef]]<center>[[Pokemon Go: Bayleef|#153 Bayleef]]</center> | ||
||[[File:PokemonGoMeganium.jpg|x150px|link=Pokemon Go: Meganium]]<center>[[Pokemon Go: Meganium|#154 Meganium]]</center> | ||[[File:PokemonGoMeganium.jpg|x150px|link=Pokemon Go: Meganium]]<center>[[Pokemon Go: Meganium|#154 Meganium]]</center> | ||
|} | |} | ||
| Line 22: | Line 23: | ||
| [[File:PokemonGoSentret.jpg|x150px|link=Pokemon Go: Sentret]]<br><center>[[Pokemon Go: Sentret|#161 Sentret]]</center> | | [[File:PokemonGoSentret.jpg|x150px|link=Pokemon Go: Sentret]]<br><center>[[Pokemon Go: Sentret|#161 Sentret]]</center> | ||
||[[File:PokemonGoFurret.jpg|x150px|link=Pokemon Go: Furret]]<center>[[Pokemon Go: Furret|#162 Furret]]</center> | ||[[File:PokemonGoFurret.jpg|x150px|link=Pokemon Go: Furret]]<center>[[Pokemon Go: Furret|#162 Furret]]</center> | ||
| + | ||[[File:PokemonGoHoothoot.jpg|x150px|link=Pokemon Go: Hoothoot]]<br><center>[[Pokemon Go: Hoothoot|#163 Hoothoot]]</center> | ||
|} | |} | ||
{| class="wikitable" | {| class="wikitable" | ||
| − | + | | [[File:PokemonGoNoctowl.jpg|x150px|link=Pokemon Go: Noctowl]]<center>[[Pokemon Go: Noctowl|#164 Noctowl]]</center> | |
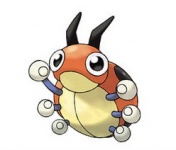
| − | + | ||[[File:PokemonGoLedyba.jpg|x150px|link=Pokemon Go: Ledyba]]<br><center>[[Pokemon Go: Ledyba|#165 Ledyba]]</center> | |
| − | | | + | |
| − | + | ||
| − | + | ||
| − | + | ||
| − | | [[File:PokemonGoLedyba.jpg|x150px|link=Pokemon Go: Ledyba]]<br><center>[[Pokemon Go: Ledyba|#165 Ledyba]]</center> | + | |
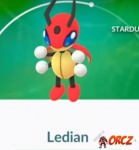
||[[File:PokemonGoLedian.jpg|x150px|link=Pokemon Go: Ledian]]<center>[[Pokemon Go: Ledian|#166 Ledian]]</center> | ||[[File:PokemonGoLedian.jpg|x150px|link=Pokemon Go: Ledian]]<center>[[Pokemon Go: Ledian|#166 Ledian]]</center> | ||
|} | |} | ||
| Line 44: | Line 41: | ||
| [[File:PokemonGoChinchou.jpg|x150px|link=Pokemon Go: Chinchou]]<br><center>[[Pokemon Go: Chinchou|#170 Chinchou]]</center> | | [[File:PokemonGoChinchou.jpg|x150px|link=Pokemon Go: Chinchou]]<br><center>[[Pokemon Go: Chinchou|#170 Chinchou]]</center> | ||
||[[File:PokemonGoLanturn.jpg|x150px|link=Pokemon Go: Lanturn]]<center>[[Pokemon Go: Lanturn|#171 Lanturn]]</center> | ||[[File:PokemonGoLanturn.jpg|x150px|link=Pokemon Go: Lanturn]]<center>[[Pokemon Go: Lanturn|#171 Lanturn]]</center> | ||
| + | ||[[File:PokemonGoPichu.jpg|x150px|link=Pokemon Go: Pichu]]<br><center>[[Pokemon Go: Pichu|#172 Pichu]]</center> | ||
|} | |} | ||
{| class="wikitable" | {| class="wikitable" | ||
| − | + | | [[File:PokemonGoCleffa.jpg|x150px|link=Pokemon Go: Cleffa]]<center>[[Pokemon Go: Cleffa|#173 Cleffa]]</center> | |
| − | | | + | ||[[File:PokemonGoIgglybuff.jpg|x150px|link=Pokemon Go: Igglybuff]]<center>[[Pokemon Go: Igglybuff|#174 Igglybuff]]</center> |
| − | + | ||[[File:PokemonGoTogepi.jpg|x150px|link=Pokemon Go: Togepi]]<br><center>[[Pokemon Go: Togepi|#175 Togepi]]</center> | |
| − | + | ||
| − | | [[File:PokemonGoTogepi.jpg|x150px|link=Pokemon Go: Togepi]]<br><center>[[Pokemon Go: Togepi|#175 Togepi]]</center> | + | |
||[[File:PokemonGoTogetic.jpg|x150px|link=Pokemon Go: Togetic]]<center>[[Pokemon Go: Togetic|#176 Togetic]]</center> | ||[[File:PokemonGoTogetic.jpg|x150px|link=Pokemon Go: Togetic]]<center>[[Pokemon Go: Togetic|#176 Togetic]]</center> | ||
|} | |} | ||
| Line 58: | Line 54: | ||
| [[File:PokemonGoNatu.jpg|x150px|link=Pokemon Go: Natu]]<br><center>[[Pokemon Go: Natu|#177 Natu]]</center> | | [[File:PokemonGoNatu.jpg|x150px|link=Pokemon Go: Natu]]<br><center>[[Pokemon Go: Natu|#177 Natu]]</center> | ||
||[[File:PokemonGoXatu.jpg|x150px|link=Pokemon Go: Xatu]]<center>[[Pokemon Go: Xatu|#178 Xatu]]</center> | ||[[File:PokemonGoXatu.jpg|x150px|link=Pokemon Go: Xatu]]<center>[[Pokemon Go: Xatu|#178 Xatu]]</center> | ||
| + | ||[[File:PokemonGoMareep.jpg|x150px|link=Pokemon Go: Mareep]]<br><center>[[Pokemon Go: Mareep|#179 Mareep]]</center> | ||
|} | |} | ||
{| class="wikitable" | {| class="wikitable" | ||
| − | + | | [[File:PokemonGoFlaaffy.jpg|x150px|link=Pokemon Go: Flaaffy]]<center>[[Pokemon Go: Flaaffy|#180 Flaaffy]]</center> | |
| − | + | ||
||[[File:PokemonGoAmpharos.jpg|x150px|link=Pokemon Go: Ampharos]]<center>[[Pokemon Go: Ampharos|#181 Ampharos]]</center> | ||[[File:PokemonGoAmpharos.jpg|x150px|link=Pokemon Go: Ampharos]]<center>[[Pokemon Go: Ampharos|#181 Ampharos]]</center> | ||
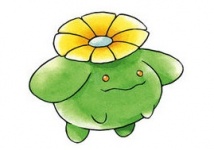
| + | ||[[File:PokemonGoBellossom.jpg|x150px|link=Pokemon Go: Bellossom]]<br><center>[[Pokemon Go: Bellossom|#182 Bellossom]]</center> | ||
|} | |} | ||
{| class="wikitable" | {| class="wikitable" | ||
| − | + | |[[File:PokemonGoMarill.jpg|x150px|link=Pokemon Go: Marill]]<center>[[Pokemon Go: Marill|#183 Marill]]</center> | |
| − | + | ||
||[[File:PokemonGoAzumarill.jpg|x150px|link=Pokemon Go: Azumarill]]<center>[[Pokemon Go: Azumarill|#183 Azumarill]]</center> | ||[[File:PokemonGoAzumarill.jpg|x150px|link=Pokemon Go: Azumarill]]<center>[[Pokemon Go: Azumarill|#183 Azumarill]]</center> | ||
| + | ||[[File:PokemonGoSudowoodo.jpg|x150px|link=Pokemon Go: Sudowoodo]]<br><center>[[Pokemon Go: Sudowoodo|#185 Sudowoodo]]</center> | ||
|} | |} | ||
{| class="wikitable" | {| class="wikitable" | ||
| − | + | | [[File:PokemonGoPolitoed.jpg|x150px|link=Pokemon Go: Politoed]]<center>[[Pokemon Go: Politoed|#186 Politoed]]</center> | |
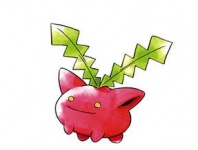
| − | + | ||[[File:PokemonGoHoppip.jpg|x150px|link=Pokemon Go: Hoppip]]<br><center>[[Pokemon Go: Hoppip|#187 Hoppip]]</center> | |
| − | | | + | |
| − | + | ||
| − | + | ||
| − | | [[File:PokemonGoHoppip.jpg|x150px|link=Pokemon Go: Hoppip]]<br><center>[[Pokemon Go: Hoppip|#187 Hoppip]]</center> | + | |
||[[File:PokemonGoSkiploom.jpg|x150px|link=Pokemon Go: Skiploom]]<center>[[Pokemon Go: Skiploom|#188 Skiploom]]</center> | ||[[File:PokemonGoSkiploom.jpg|x150px|link=Pokemon Go: Skiploom]]<center>[[Pokemon Go: Skiploom|#188 Skiploom]]</center> | ||
| − | |||
|} | |} | ||
{| class="wikitable" | {| class="wikitable" | ||
| − | | [[File:PokemonGoAipom.jpg|x150px|link=Pokemon Go: Aipom]]<br><center>[[Pokemon Go: Aipom|#190 Aipom]]</center> | + | | [[File:PokemonGoJumpluff.jpg|x150px|link=Pokemon Go: Jumpluff]]<center>[[Pokemon Go: Jumpluff|#189 Jumpluff]]</center> |
| + | ||[[File:PokemonGoAipom.jpg|x150px|link=Pokemon Go: Aipom]]<br><center>[[Pokemon Go: Aipom|#190 Aipom]]</center> | ||
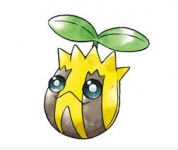
||[[File:PokemonGoSunkern.jpg|x150px|link=Pokemon Go: Sunkern]]<center>[[Pokemon Go: Sunkern|#191 Sunkern]]</center> | ||[[File:PokemonGoSunkern.jpg|x150px|link=Pokemon Go: Sunkern]]<center>[[Pokemon Go: Sunkern|#191 Sunkern]]</center> | ||
| − | |||
|} | |} | ||
| + | |||
{| class="wikitable" | {| class="wikitable" | ||
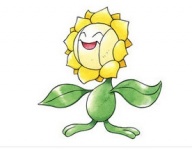
| − | | [[File:PokemonGoYanma.jpg|x150px|link=Pokemon Go: Yanma]]<br><center>[[Pokemon Go: Yanma|#193 Yanma]]</center> | + | | [[File:PokemonGoSunflora.jpg|x150px|link=Pokemon Go: Sunflora]]<center>[[Pokemon Go: Sunflora|#192 Sunflora]]</center> |
| + | ||[[File:PokemonGoYanma.jpg|x150px|link=Pokemon Go: Yanma]]<br><center>[[Pokemon Go: Yanma|#193 Yanma]]</center> | ||
||[[File:PokemonGoWooper.jpg|x150px|link=Pokemon Go: Wooper]]<center>[[Pokemon Go: Wooper|#194 Wooper]]</center> | ||[[File:PokemonGoWooper.jpg|x150px|link=Pokemon Go: Wooper]]<center>[[Pokemon Go: Wooper|#194 Wooper]]</center> | ||
| − | |||
|} | |} | ||
| − | |||
{| class="wikitable" | {| class="wikitable" | ||
| − | | [[File:PokemonGoEspeon.jpg|x150px|link=Pokemon Go: Espeon]]<br><center>[[Pokemon Go: Espeon|#196 Espeon]]</center> | + | | [[File:PokemonGoQuagsire.jpg|x150px|link=Pokemon Go: Quagsire]]<center>[[Pokemon Go: Quagsire|#195 Quagsire]]</center> |
| + | ||[[File:PokemonGoEspeon.jpg|x150px|link=Pokemon Go: Espeon]]<br><center>[[Pokemon Go: Espeon|#196 Espeon]]</center> | ||
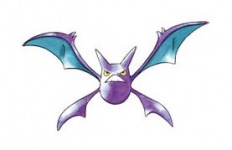
||[[File:PokemonGoUmbreon.jpg|x150px|link=Pokemon Go: Umbreon]]<center>[[Pokemon Go: Umbreon|#197 Umbreon]]</center> | ||[[File:PokemonGoUmbreon.jpg|x150px|link=Pokemon Go: Umbreon]]<center>[[Pokemon Go: Umbreon|#197 Umbreon]]</center> | ||
|} | |} | ||
| Line 117: | Line 110: | ||
| [[File:PokemonGoPineco.jpg|x150px|link=Pokemon Go: Pineco]]<br><center>[[Pokemon Go: Pineco|#204 Pineco]]</center> | | [[File:PokemonGoPineco.jpg|x150px|link=Pokemon Go: Pineco]]<br><center>[[Pokemon Go: Pineco|#204 Pineco]]</center> | ||
||[[File:PokemonGoForretress.jpg|x150px|link=Pokemon Go: Forretress]]<center>[[Pokemon Go: Forretress|#205 Forretress]]</center> | ||[[File:PokemonGoForretress.jpg|x150px|link=Pokemon Go: Forretress]]<center>[[Pokemon Go: Forretress|#205 Forretress]]</center> | ||
| + | ||[[File:PokemonGoDunsparce.jpg|x150px|link=Pokemon Go: Dunsparce]]<br><center>[[Pokemon Go: Dunsparce|#206 Dunsparce]]</center> | ||
|} | |} | ||
{| class="wikitable" | {| class="wikitable" | ||
| − | + | | [[File:PokemonGoGligar.jpg|x150px|link=Pokemon Go: Gligar]]<center>[[Pokemon Go: Gligar|#207 Gligar]]</center> | |
| − | + | ||
||[[File:PokemonGoSteelix.jpg|x150px|link=Pokemon Go: Steelix]]<center>[[Pokemon Go: Steelix|#208 Steelix]]</center> | ||[[File:PokemonGoSteelix.jpg|x150px|link=Pokemon Go: Steelix]]<center>[[Pokemon Go: Steelix|#208 Steelix]]</center> | ||
| + | ||[[File:PokemonGoSnubbull.jpg|x150px|link=Pokemon Go: Snubbull]]<br><center>[[Pokemon Go: Snubbull|#209 Snubbull]]</center> | ||
|} | |} | ||
{| class="wikitable" | {| class="wikitable" | ||
| − | | [[File: | + | |[[File:PokemonGoGranbull.jpg|x150px|link=Pokemon Go: Granbull]]<center>[[Pokemon Go: Granbull|#210 Granbull]]</center> |
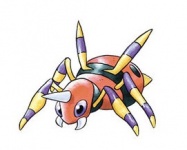
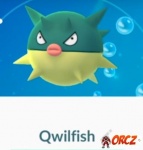
| − | ||[[File: | + | |[[File:PokemonGoQwilfish.jpg|x150px|link=Pokemon Go: Qwilfish]]<center>[[Pokemon Go: Qwilfish|#211 Qwilfish]]</center> |
| + | ||[[File:PokemonGoScizor.jpg|x150px|link=Pokemon Go: Scizor]]<br><center>[[Pokemon Go: Scizor|#212 Scizor]]</center> | ||
|} | |} | ||
{| class="wikitable" | {| class="wikitable" | ||
| − | |||
| − | |||
||[[File:PokemonGoShuckle.jpg|x150px|link=Pokemon Go: Shuckle]]<center>[[Pokemon Go: Shuckle|#213 Shuckle]]</center> | ||[[File:PokemonGoShuckle.jpg|x150px|link=Pokemon Go: Shuckle]]<center>[[Pokemon Go: Shuckle|#213 Shuckle]]</center> | ||
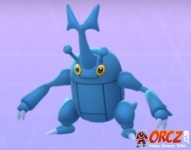
| − | | | + | ||[[File:PokemonGoHeracross.jpg|x150px|link=Pokemon Go: Heracross]]<center>[[Pokemon Go: Heracross|#214 Heracross]]</center> |
| − | + | ||
| − | + | ||
| − | |[[File:PokemonGoHeracross.jpg|x150px|link=Pokemon Go: Heracross]]<center>[[Pokemon Go: Heracross|#214 Heracross]]</center> | + | |
||[[File:PokemonGoSneasel.jpg|x150px|link=Pokemon Go: Sneasel]]<br><center>[[Pokemon Go: Sneasel|#215 Sneasel]]</center> | ||[[File:PokemonGoSneasel.jpg|x150px|link=Pokemon Go: Sneasel]]<br><center>[[Pokemon Go: Sneasel|#215 Sneasel]]</center> | ||
|} | |} | ||
| Line 144: | Line 134: | ||
| [[File:PokemonGoTeddiursa.jpg|x150px|link=Pokemon Go: Teddiursa]]<br><center>[[Pokemon Go: Teddiursa|#216 Teddiursa]]</center> | | [[File:PokemonGoTeddiursa.jpg|x150px|link=Pokemon Go: Teddiursa]]<br><center>[[Pokemon Go: Teddiursa|#216 Teddiursa]]</center> | ||
||[[File:PokemonGoUrsaring.jpg|x150px|link=Pokemon Go: Ursaring]]<center>[[Pokemon Go: Ursaring|#217 Ursaring]]</center> | ||[[File:PokemonGoUrsaring.jpg|x150px|link=Pokemon Go: Ursaring]]<center>[[Pokemon Go: Ursaring|#217 Ursaring]]</center> | ||
| + | ||[[File:PokemonGoSlugma.jpg|x150px|link=Pokemon Go: Slugma]]<br><center>[[Pokemon Go: Slugma|#218 Slugma]]</center> | ||
|} | |} | ||
{| class="wikitable" | {| class="wikitable" | ||
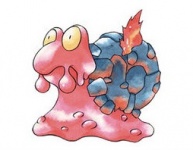
| − | + | | [[File:PokemonGoMagcargo.jpg|x150px|link=Pokemon Go: Magcargo]]<center>[[Pokemon Go: Magcargo|#219 Magcargo]]</center> | |
| − | + | ||[[File:PokemonGoSwinub.jpg|x150px|link=Pokemon Go: Swinub]]<br><center>[[Pokemon Go: Swinub|#220 Swinub]]</center> | |
| − | | | + | |
| − | + | ||
| − | + | ||
| − | | [[File:PokemonGoSwinub.jpg|x150px|link=Pokemon Go: Swinub]]<br><center>[[Pokemon Go: Swinub|#220 Swinub]]</center> | + | |
||[[File:PokemonGoPiloswine.jpg|x150px|link=Pokemon Go: Piloswine]]<center>[[Pokemon Go: Piloswine|#221 Piloswine]]</center> | ||[[File:PokemonGoPiloswine.jpg|x150px|link=Pokemon Go: Piloswine]]<center>[[Pokemon Go: Piloswine|#221 Piloswine]]</center> | ||
|} | |} | ||
| Line 177: | Line 164: | ||
| [[File:PokemonGoPhanpy.jpg|x150px|link=Pokemon Go: Phanpy]]<br><center>[[Pokemon Go: Phanpy|#231 Phanpy]]</center> | | [[File:PokemonGoPhanpy.jpg|x150px|link=Pokemon Go: Phanpy]]<br><center>[[Pokemon Go: Phanpy|#231 Phanpy]]</center> | ||
||[[File:PokemonGoDonphan.jpg|x150px|link=Pokemon Go: Donphan]]<center>[[Pokemon Go: Donphan|#232 Donphan]]</center> | ||[[File:PokemonGoDonphan.jpg|x150px|link=Pokemon Go: Donphan]]<center>[[Pokemon Go: Donphan|#232 Donphan]]</center> | ||
| + | ||[[File:PokemonGoPorygon2.jpg|x150px|link=Pokemon Go: Porygon 2]]<br><center>[[Pokemon Go: Porygon 2|#233 Porygon2]]</center> | ||
|} | |} | ||
{| class="wikitable" | {| class="wikitable" | ||
| − | + | | [[File:PokemonGoStanler.jpg|x150px|link=Pokemon Go: Stanler]]<center>[[Pokemon Go: Stanler|#234 Stanler]]</center> | |
| − | + | ||
||[[File:PokemonGoSmeargle.jpg|x150px|link=Pokemon Go: Smeargle]]<center>[[Pokemon Go: Smeargle|#235 Smeargle]]</center> | ||[[File:PokemonGoSmeargle.jpg|x150px|link=Pokemon Go: Smeargle]]<center>[[Pokemon Go: Smeargle|#235 Smeargle]]</center> | ||
| + | ||[[File:PokemonGoTyrogue.jpg|x150px|link=Pokemon Go: Tyrogue]]<br><center>[[Pokemon Go: Tyrogue|#236 Tyrogue]]</center> | ||
|} | |} | ||
{| class="wikitable" | {| class="wikitable" | ||
| − | + | |[[File:PokemonGoHitmontop.jpg|x150px|link=Pokemon Go: Hitmontop]]<center>[[Pokemon Go: Hitmontop|#237 Hitmontop]]</center> | |
| − | + | ||[[File:PokemonGoSmoochum.jpg|x150px|link=Pokemon Go: Smoochum]]<center>[[Pokemon Go: Smoochum|#238 Smoochum]]</center> | |
| − | | | + | ||[[File:PokemonGoElekid.jpg|x150px|link=Pokemon Go: Elekid]]<br><center>[[Pokemon Go: Elekid|#239 Elekid]]</center> |
| − | + | ||
| − | + | ||
| − | | [[File:PokemonGoSmoochum.jpg|x150px|link=Pokemon Go: Smoochum]]<center>[[Pokemon Go: Smoochum|#238 Smoochum]]</center> | + | |
| − | ||[[File:PokemonGoElekid.jpg|x150px|link=Pokemon Go: Elekid]]<br><center>[[Pokemon Go: Elekid|#239 Elekid | + | |
|} | |} | ||
{| class="wikitable" | {| class="wikitable" | ||
| − | | [[File:PokemonGoMiltank.jpg|x150px|link=Pokemon Go: Miltank]]<br><center>[[Pokemon Go: Miltank|#241 Miltank]]</center> | + | | [[File:PokemonGoMagby.jpg|x150px|link=Pokemon Go: Magby]]<center>[[Pokemon Go: Magby|#240 Magby]]</center> |
| + | ||[[File:PokemonGoMiltank.jpg|x150px|link=Pokemon Go: Miltank]]<br><center>[[Pokemon Go: Miltank|#241 Miltank]]</center> | ||
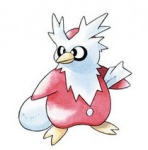
||[[File:PokemonGoBlissey.jpg|x150px|link=Pokemon Go: Blissey]]<center>[[Pokemon Go: Blissey|#242 Blissey]]</center> | ||[[File:PokemonGoBlissey.jpg|x150px|link=Pokemon Go: Blissey]]<center>[[Pokemon Go: Blissey|#242 Blissey]]</center> | ||
|} | |} | ||
Latest revision as of 14:26, 23 February 2017
These are Generation 2 Pokemon, 80 additional Pokemon have been added as of 2/16/2017.
 |
 |
 |
 |
 |
 |
 |
 |
 |
 |
 |
 |
 |
 |
 |
 |
 |
 |
 |
 |
 |
 |
 |
 |
 |
 |
 |
 |
 |
 |
 |
 |
 |
 |
 |
 |
 |
 |
 |
 |
 |
 |
 |
 |
 |
 |
 |
 |
 |
 |
 |
 |
 |
 |
 |
 |
 |
 |
 |
 |
 |
 |
 |
 |
 |
 |
 |
 |
 |
 |
 |
 |
 |
 |
 |
 |
 |
 |
 |
 |
 |
 |
 |
 |
 |
 |
 |
 |
 |
 |
 |
 |
 |
 |
 |
 |
 |
 |
 |
 |


