Figments of an Answer is a triumph in Destiny 2: Season of the Chosen.
Figments of an Answer is a triumph in Destiny 2: Season of the Chosen.
Description[edit]
- Uncover clues aboard the Glykon
- Clues: 5
- Presage Completed
- Each set of clues is locked to 1 set a week, even with multiple characters.
- Progress is saved once a clue is scanned.
Walkthrough[edit]
Clue 1[edit]
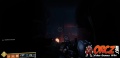
- The first clue is found just after passing through the first Ereogore Gate.
- Head through the barrier and look to the front of the growth in the middle of the room.
- There is a Cabal Legionary suspended in a plant that the Guardian can scan.

Clue 2[edit]
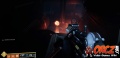
- Found in the first portion of the Electrical Room.
- Jump across the gap from where you land in the Electrical Room.
- On the other side, in front of where the Eregore Gate is, look to the right of the doorway.
- On the ground, you will find a Broken Scorn Totem on the ground to scan.


Clue 3[edit]
- The next clue is found in the massive hangar where the Guardian encountered (and defeated) the 2 Abominations.
- Go across the whole of the hangar to the ship on the far side by the large open bay.
- You will find a recognizable ship here that can be scanned.


Clue 4[edit]
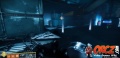
- This clue is found in the room with the second set of electrical walls.
- Deactivate the Electrical Wall by activating the switch and blasting the fuse to turn off the Electrical Wall above the floor.
- Once there, get past the Electrical Wall and turn over to the left through the next doorway.
- Just through the doorway, look in the back right of this hallway to find some cylinders on the ground.
- Approach and scan these for the next clues.


Clue 5[edit]
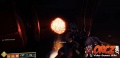
- Found just after you have defeated the boss of the area, Locus of Communication.
- Go through the door leading toward the end of the mission.
- Drop through the opening in the floor.
- Once you land, immediately turn around.
- Jump over the crates to find an orange projection of Calus.
- Approach and scan it to complete this first set of clues.


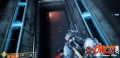

Turn AROUND!