

The Objective, “Anomaly Collapse” in Destiny 2.
Anomaly Collapse is an Objective in the Quest The Whisper in Destiny 2.
Contents
Summary[edit]
Complete the challenge of the Anomaly before it collapses.
Walkthrough[edit]
Jumping Puzzle[edit]
Movement boosting Exotics are key for the Jumping Puzzle portion and make it very easy to speed up portions of the run.
- Recommended Equipment:


- Once inside the Lost Sector: Grove of Ulan-Tan, you will see the normal Vex, but they will quickly vanish.
- Make your way up to the Cache at the end of the Lost Sector itself.
- You can bypass the whole Lost Sector with the augmented Jumping with the Lion Rampart and ST0MP-EE5
- You can jump onto the rocks to the left of the cache beyond the tree nearby it.
- From the cache, look across and you will see a new pathway in front of you
- Jump across to the new passage
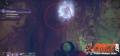
- Inside this passage, you will find a Taken Blight blocking your passage forward.
- Run into the Blight and destroy it.
- From there, you will have find an opening in the floor below where the Blight was.
- Start by running forward and through the openings in front of you.
- After the 2 openings, you reach the first jump across a pit and through the narrow opening in front of you.
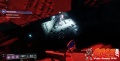
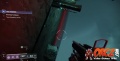
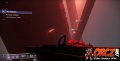
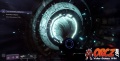
- This leads to the red lit room.
- The red light will mostly be your guide to know where to go throughout this puzzle, but there are times it will mislead you.
- Jump down to the red lit ledge in front of you.
- Land on the ledge, run and slide under the low opening to progress forward.
- As you approach the edge of the ledge, you will need to worry about a hidden small piston that can knock you off the ledge.
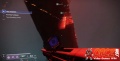
- Jump over to the ledge in the red light and look down to see the next red lit ledge with more pistons that can push you off.
- Run past the first 3 pistons and then look down and to the left.
- You will see a walkway beyond you, jump over to it.
- Turn to the left and run off the ledge, going from there over to the 2 red-lit platforms.
- Jump from one to the next and then over to the red-lit landing over to the right.
- Continue to the ledge in front of you.
- Jump around the corner and turn to the right.
- Jump again to reach the ledge above you and onto the blue-lit landing.
- Go forward and get over to the left-hand ledge.
- You now need to crouch and then go along the ledge being mindful of the sliding blocks.
- Proceed along the ledge one block at a time and get to the far end.
- At the far end, you can stand back up.
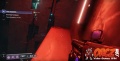
- Look across the gap to see the red lit ledge with the 2 half-domes above it, coming from the wall.
- Head over to the right, where you will see a Vex Block on the wall that you can jump onto.
- This piece acts as an elevator.
- Warlocks and Titans can jump onto the right-hand semi-dome and simply jump up to the next blue-lit ledge you need to reach.
- On this ledge, turn to the left with the platform, DO NOT FOLLOW THE RED LIGHT!
- Go forward having turned left on the ledge to reach the passage that will lead you onward.
- Go inside and follow it to the right.
- This will lead you into a diamond shaped corridor you will need to cross through.
- The Blue-lit section is stationary, but as soon as you enter the red-lit section, there are moving pieces.
- There are 2 large pistons on the bottom right that will rise and fall.
- Just past them, from the top left, are other pistons that will fall, blocking your path.
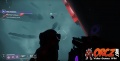
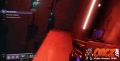
- Quickly transverse this area and continue into the vast open chamber in front of you.
- Here, you will see narrow ledges with Taken Burst Spots (the blast that can cause the Guardian be thrown away from it).
- Jump over to the left-hand ledge first, attempting to land there just as the burst.
- Quickly jump over to the next ledge on the right, again trying to land there after the burst.
- Be careful as you approach the third ledge, Sniper Vandal will spawn behind you!
- Land on the third platform and immediately slide under the overhang, dodging the Taken Burst.
- Continue forward to the fourth and fifth platforms.
- These are "guarded" by a Taken Knight.
- You can also see a blue-lit opening ahead of you.
- Run and jump over to the blue-light.
- Go down this short hallway, jumping over the gap in front of you onto the walkway beyond it.
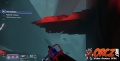
- Go to the end of the red-lit ledge.
- Turn to the right and look toward the half-domes.
- Run and jump over to those half-domes and on tothe ledge just above the first set.
- From there, head all the way to the end of the ledges.
- Go to the back right portal and jump through it.
- Slide on down it and get to the next section.
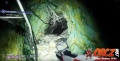
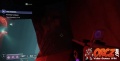
- Run into the light into the "Moss Room."
- There are 2 paths through the Moss room, below is the fastest way out.
- Once in this room, drop over the first ledge and STOP!
- Turn around and crouch, this will let you get underneath the stones in front of you and into the dark area.
- Ghost will appear and lit up the area.
- Go forward, over to the right, dropping over the ledge there and then forward across the gap there.
- Turn to the right just after that, going up the stairs there.
- Keep to the right, going past the long corner and then forward toward the opening.
- You will see the narrow ledge on the left.
- You will want to run along the ledge to the far side of it.
- This leads to another platform standing over a pit.
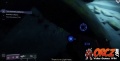
- Look down and across from you to spot a white-lit doorway.
- Run and jump to reach this doorway well below you.
- Go over the pit in front of you, but be mindful of the small section of moving stone above the target ledge!
- Head to the back and turn to the left.
- Jump onto the left-hand ledge in front of you.
- Go to the end of the ledge and then jump across to either the small ledge or simply straight into the red-lit opening in the back left.
- Go through this last red-lit room and turn to the right.
- Go into the white-lit section and drop over the ledge.
- Change your equipment to your combat set-up.
- This will lead you into the first encounter room.
- Destiny2AnomalyCollapseTheWhisper2.jpg
- Destiny2AnomalyCollapseTheWhisper3.jpg
- Destiny2AnomalyCollapseTheWhisper4.jpg


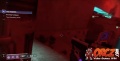


Encounter Room 1[edit]
Attempt to reach this section with 15 minutes to spare to have lots of time for the encounters.
- This first encounter room requires that you clear it for you to progress on through.
- There are a number of hovering Taken Grenades, 4-5 Blights and a number of taken foes scattered around.
- The first grenade is just in front of you as you enter
- Behind it to the left is a Blight.
- In the back left, in the upper area, you will encounter a Taken Captain.
- In the very back left you will find 1 of 2 Sniper Taken Vandals.
- Another Sniper Taken Vandal is in the very back right.
- Also in the back right is a Taken Captain.
- Scattered throughout the room you will encounter Taken Thralls.
- Getting through the first wave, you will have a second one spawn in.
- This one has Taken Goblins and Vandals inside it.
- In the middle you will find a grouping of Taken Vandals.
- Defeating all of the enemies in this room will cause the Darkness Webbing over the back door to manifest, allowing the Guardian to destroy it.


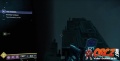
Encounter Room 2[edit]
- This is a much smaller room, but it presents a greater threat for it.
- Inside you will encounter 2 Taken Captains, and a number of Taken Vandals.
- It is recommended for someone to use their Super here to quickly eliminate the Taken Captains here, opening the way forward.


- Destiny2AnomalyCollapseTheWhisper111.jpg


Encounter Room 3[edit]
- Once again, you are in a large room with a number of Taken you will need to defeat.
- On a ledge on the left you will see a Taken Knight you will want to prioritize.
- Move over to the left from there and look straight back.
- There you will see 1 of 3 Wizards that are in this room that you will want to defeat.
- Move to the platform that had that first Knight after that.
- Look to the right-hand side, across the way, to spot another Taken Knight.
- Look down a little from that ledge to find another of the Taken Wizards.
- Go up and to the left from there to take on the Taken Hobgoblin nearby.
- Continue to move forward and look over to the left, toward the back left.
- There, you will find another Taken Hobgoblin you need to defeat.
- Nearby them, you can see the final Taken Wizard.
- This one is quick to duck into a cave in the very back left of this room.
- There are at least 4 Blights scattered throughout the room.
- Throughout the room you will need to worry about a few Taken Acolytes.
- In the front right of the room you will encounter a Taken Knight with a few Taken Acolytes.
- Defeat all of the Taken and the Taken Webbing in the very back of the room, where the last Blight is, will manifest.
- Destroy it and move into the last corridor.


Encounter Room 4[edit]
- This is the final room before the boss room, and it can be a little tricky.
- The minimum you need to do to progress is eliminate the Taken Hobgoblins in the area.
- The first is almost straight across from you.
- The second Hobgoblin is on top of the nearest pillar.
- Turn around at this point to deal with a pair of Taken Centurions that are attempting to flank you.
- Look to the left and up to the next straight pillar to the left to find the next Hobgoblin.
- Next, it is recommended to star clearing all of the Taken Psions in the area.
- Having cleared them out, turn your focus to the Taken Webbing that appears over the opening in the middle of the floor.
- Shoot the center of the web to break it.
- Drop down here to reach the final room.


Boss Room[edit]
Opening Wave[edit]
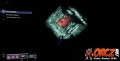
- Before triggering the encounter, time to focus on clearing 2 of the Blights to make eliminating the bosses easier.
- Go to the first Blight on the Left and attack its core.
- Destroy it and then it is time to move onto the next Blight.
- Go to the next Blight past the middle on the right-hand side.
- Rush into it and destroy the Blight.
- With the preparations complete, it is time to defeat all of the Taken Phalanx and Taken Centurions.
- If you have a Hunter Arcstrider with the Raiden Flux armor, they can quickly destroy most, if not all of the Phalanx.
- Once you clear all of the basic adds, return to where you entered this large chamber.


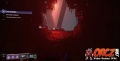
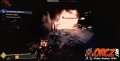
The Bosses[edit]
- These Bosses you encounter are Urzok, Aspect of Hate, Drevis, Aspect of Darkness, and Ta'aurc, Aspect of War.
- You can either fight all 3 at once by going into the main area or limit it to 1 at a time with careful movement to pull them in.
- The first boss, Drevis, Aspect of Darkness is the Taken Captain who will be the closest to where you are in cover.
- Drevis, while you are at range, will constantly be attacking with the Darkness Balls that can blind you.
- Moving in is risky because you will also need to deal with the Arc Taken Shrapnel Launcher.
- Drevis will mostly move left and right in the front area of this arena.
- The next boss is Ta'aurc, Aspect of War.
- This Taken Centurion will mostly attack with its Axiom Bolts if you are in cover.
- given the chance, it will use its gun.
- Most of the time, it will be moving around the middle of the arena.
- Given enough time, Ta'aurc will move to the back of the arena and start attacking from the far back Blight.
- The final boss to encounter is Urzok, Aspect of Hate, likes to be in the middle left portion of the arena.
- There is a nearby cave that you can hide in to avoid most of its attacks and have a safe space to attack from.
- Be aware that throughout this encounter, additional enemies will be spawning in.
- This includes Taken Centurions, Taken Minotaurs and Taken Psions.
- Work with your team and coordinate to make it through this section.


- Destiny2AnomalyCollapseTheWhisper165.jpg


Objectives[edit]

Anomaly Collapse


