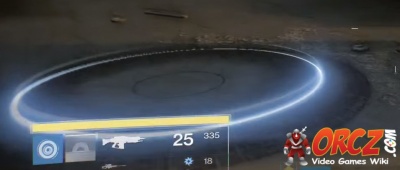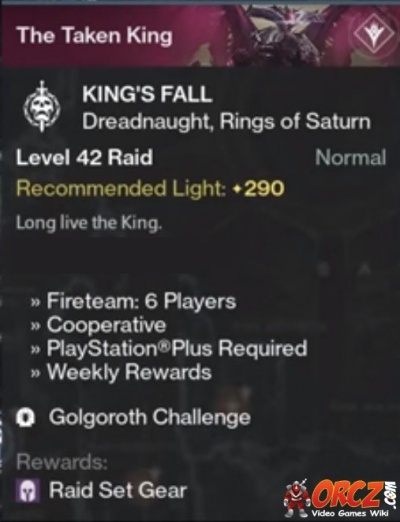
The Challenges are special conditions that need to be met while fighting a Boss within the raid King's Fall. Completing the challenge will give extra rewards and unique emblems for your trials.
Contents
Challenges[edit]
War Priest[edit]
Completing this challenge requires that each round a different person hold the Aura during any damage phase. There is no limit on the number of damage phases that can be triggered in the fight. No single Guardian can hold the aura consecutively during this challenge mode.
The War Priest will be aggressive with their attacking. More difficult enemies will spawn in the battle.
Completing the challenge will net 320+ Weapons/Armor/Artifact.
Completing this challenge will give you Calcified Fragment XLIV
Completing this challenge requires that each round a different person hold the Aura of the Initiate during any damage phase. There is no limit on the number of damage phases that can be triggered in the fight. No single Guardian can hold the aura twice during this challenge mode.
The War Priest will be aggressive with their attacking. More difficult enemies will spawn in the battle.
In this arena you will find 3 plates. One is in the middle, one on the right-hand side on a platform and one of the left-hand side on a high platform. To trigger the boss fight, a Guardian needs to stand on each plate in the room. This will cause the Warpriest to appear. For now, the Warpriest is invulnerable and you will be unable to damage him. However, it will not be too long before you have the chance.
Standing on the plates will cause waves of Hive to spawn and start rushing the plates. When each group has cleared most of their wave, a Hallowed Knight will appear nearby each plate. The guardians by the plate need to kill it. This will begin the Glyph sequence which will allow the Guardians to hurt the Warpriest.
One of the Guardians will need to head to the far side of the room at this point to see the lights on the sides of the platform shine. This will let the Guardians know the sequence the plates need to be activated in.
The Guardian standing on the Third Plate in the sequence will be granted the buff Aura of the Initiate. They and any Guardians nearby them will be able to damage the Warpriest. Holding the Brand is a dangerous thing but very enabling. The Brand starts with a 10 second timer. When it expires, it will kill the Guardian who has it. However, if the Guardian manages to kill an enemy in the time span, the timer will reset. To maximize the time of the Aura, it is recommended to wait to close to the end of the timer (between 1-2 seconds) to refresh it. It will harmlessly expire after the 5th time it is reset.
When the Aura expires after the Holder has made 5 kills, the Warpriest will loose a very powerful attack that will kill any Guardian not in the shadow of the Monument or any shadow in the room in front of him.
When the Oculus has finished glowing, 1 of the 3 Monuments will be destroyed. It will still function for the Glyph sequence but you will not be able to hide behind it again. You must repeat this sequence each time to damage and defeat the Warpriest.
Warpriest Video Walkthrough[edit]
King's Fall Warpriest Gameplay Walkthrough
Golgoroth[edit]
During each round of Golgoroth casting his gaze, each member of the fire team must have held it for any duration. There must be 6 different Gaze Holders.
Completing the challenge will net 320+ Weapons/Armor/Artifact. You will also get the emblem: Devourer of Light
Completing this challenge will give you Calcified Fragment XLIV
There are a number of different strategies that can be used to complete this challenge. The pre-requiste for the challenge itself is that each time Golgoroth cast his gaze, each member of the 6 person fireteam must hold the Gaze for a short period of time.
If someone dies before they have held the gaze, the team will need to wipe and restart the challenge. If a player dies after they have held the gaze, then revive them cautiously as normal for the fight with its 6 death limit.
Completing this challenge takes a lot of coordination because every member of the Fireteam needs to hold the Gaze. There are a number of strategies that can be used. Each person should be given a number (1-6). This is the order in which the gaze will be captured. Using this method, those less comfortable holding the gaze should be clear about it so the gaze can quickly shift. This will limit.
Start the fight as usual. Drop the orb which holds Golgoroth and have the team split in half. 3 members of the fireteam are going to be on the platform and 3 will want to head into the pit when it is time.
The first 3 people will announce 10 and 5 second counts on the Gaze. Below 5 seconds, the next person in the cycle needs to fire on Golgoroth's second weak point (his back) to capture the gaze.
Drop an orb and stand in the Pool of Reclaimed Light. Begin firing on his weak point (belly) and be ready for when the third person capture's Golgorth's gaze. When the third Gaze Holder captures the Gaze, the fireteam in the pit will immediately want to get out.
There are a few ways to manage the final 3 members of the fireteam. Most suggest that you simply cycle throughout each of the player's in turn.
The final 2 to hold the gaze have the option of passing the Gaze between each other. This will make it a bit easier for the rest of the team to stay in the Pit in keep doing damage to Golgoroth after they have captured his gaze.
Oryx[edit]
To complete the Oryx challenge, 16 Corrupted Lights must be detonated in a single instance.
Completing the challenge will net 320+ Weapons/Armor/Artifact.
Completing this challenge will give you Calcified Fragment XLV The time has come to face down the Taken King himself. Again, this is a coordinated activity and it will take a lot of communication to be sure that the team can make it through the encounter. Someone will be Torn Between Dimenions once again. Most of the team will be helping reach their goal while the remainder of the members guard the middle and help with clearing adds and important targets.
Team members will need to assigned numbers so they know which platform to head to. These platforms are the same set up that you were dealing with the Daughters of Oryx. This encounter has the team needing to once again aid a member Torn Between Dimensions navigate the phantom platforms. The first person will be going up onto the platform just before the Guardian torn between dimensions (the Runner) immediately after Oryx has hit it. The second and third Guardians need to be on the next platforms that are counter-clockwise (to the left) from the platform Oryx has hit. This does mean the third person will be diagonal from the first platform. The remaining 2 Guardians will be running "mid". They will be managing the adds in the fight and helping people kill off the Light-Eater Ogres that will be appearing.
To trigger the fight, someone will need to approach the mote of taken energy at the far end of the arena.
This will trigger the mote flying over the ledge and a large number of Thralls rushing toward the group. One person should stand between the last pillars and draw the Thralls over to them. Have someone expend their super and decimate the Thralls to generate Orbs for the other members of your Fireteam. This can help a lot for the Defender Titans to have their Ward of Dawn later in the fight. This will be very helpful for some of the later portions of the fight. After a short while, 2 Taken Knights will appear on the platforms in the far portion of the area. Quickly eliminate them as well.
Now it is time to actually start working on defeating Oryx himself.
The Taken King will move to any of the left or right-hand platforms. Where he slams his fist, as stated earlier, is the starting platform for the Runner Guardian who will be Torn Between Dimensions. Needless to say, be sure that no Guardians are on the top of the platform where Oryx is floating.
Immediately after Oryx slams his fist down on the platform, the Runner and the Guardian with them need to jump up onto the platform. This will start the platforming sequence for the phase. Once again, the Runner will need to be quick and precise in their jumps. The rest of the Guardians nearby the platforms need to jump up onto their platforms and stay there. As soon as the Guardian steps onto their platform a Light-Eater Ogre will emerge from the bile on the ground nearby. Throw a grenade at the Ogre and then quickly kill the Ogre. They will leave behind a sphere of Corrupted Light. Stay on your platform until the Runner has gotten the artifact. They called it out clearly. Once they have, head for the middle.
The Runner will need to successfully navigate the platforms and reach their target mote. They will get the status Brand Claimer. Once they do, they will be able to steal the Aura of Immortality from the Vessel of Oryx below. They need to immediately head to the rest of the team who have gathered in the center of the arena. While this aura is activate and protecting the Guardians, they will not take damage from most sources. Oryx himself will still be able to kill the team though.
With the Aura of Immortality the fireteam needs to pull out their Sniper Rifles, Machine guns and any other decent impact high fire rate weapons. Oryx will start to "Call upon the Darkness". The team needs to start firing on his once his chest/stomach start to glow. If you do not stagger him, his attack will wipe the team. After that, turn your focus onto all the Hive that are shooting at the Fireteam. Ignore the Thralls that are gathering around the team.
When Oryx has regained the favor of the Darkness, have someone use their Super to quickly wipe out the remaining Thralls in the area. Turn to the front and eliminate the Taken Knights that spawn in on the platforms. Oryx will create a sphere that draws Guardians into it. One at a time, 5 members of the fireteam are pulled into the sphere where a Shade of Oryx moves just outside a barrier. Those inside the sphere need to quickly kill the Shade. While inside they will be under the status Darkness Dimension. This will stop the inherent health recover that Guardians enjoy. They need to kill it off before the Shade has time to finish its spell and kill everyone.
Those outside the sphere that Oryx has created have another job. They need to focus their fire on stopping the Thralls and other Taken trying to enter the sphere. This makes it a lot easier for the team inside to focus on their objective of dealing with Oryx. Quickly eliminate the Taken Knights outside the sphere and then focus on the Taken Thralls.
Damaging Oryx[edit]
With Oryx staggered, it is time to do the next thing to hurt him. This, for the challenge, will need to be done on the 4th round of combat against Oryx. Each of the Ogres dropped a sphere of Corrupted Light and the people on the platforms (and one of the middle players) need to rush into the Corrupted Light and stand in its sphere of influence for several seconds. This can only be done on the 4th round. Those in the middle (including the Runner) need to start attacking Oryx to stun him one more time and allow the Light to damage Oryx.
When the light is triggered, a massive and deadly blast of Light will emerge from it. Any Guardians caught in the blast will die. To ensure that everyone can make it back in time, someone on the team needs to give a short countdown for the other guardians to enter the Corrupted Light at about the same time. When the light is triggered, each player's name will be announced on screen. They need to immediately rush back to the Guardian with the Aura of Immortality. This is the only way to survive the resulting blast from the Light.
Killing Oryx[edit]
When Oryx is reduced now to 1% or less, he will make his final stand. The Fireteam needs to turn to where the battle started. The heavy weapons and special weapons need to be pulled out and fired at Oryx. He will be charging up a final spell. The fireteam needs to do enough damage to finish him off before he can finish this spell.

