Oblivion Remastered: Mages Guild – Ambush Guide
Stop Falcar and take the Colossal Black Soul Gem in this Oblivion Remastered Ambush guide featuring Silorn walkthrough tips, loot locations, and Battlemage assignments.
This is part of the Mages Guild Questline. It is the penultimate quest of the story.
Walkthrough
Advancement
To begin this quest, you need to be sure to advance to “Master-Wizard.” So, you will need to talk with Raminus Polus to do this.
Talk with Hannibal Traven
With the advancement done, return to Hannibal Traven. He’ll explain that the Mages Guild has a vital task for you. Ask him about “Task” to learn more. You are being sent to grab whatever specific gem is being made in the Ayleid Ruins of Silorn. You can learn more about the Gem and his source of knowledge, or just choose “Go on” to advance. He’s sending you with Battlemages to Silorn to this end.
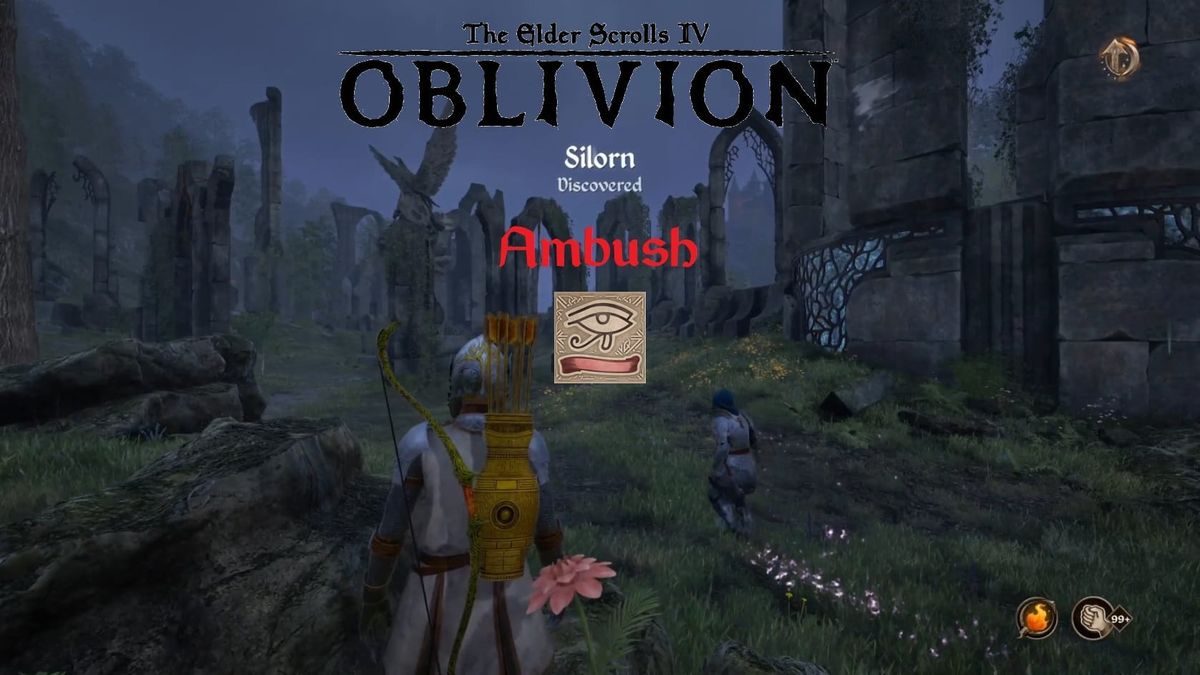
Travel to Silorn
Silorn, the Ayleid Ruin, is found to the Southeast of Skingrad. It’s only a short distance away, making it an easy trek from there. Get to the Southern end of it where you will find a trio of Battlemages awaiting the Hero. You are directed to talk to Thalfin, who generally leads the squad.
Talk to Thalfin
After you arrive, Thalfin will take you to an observation point nearby to see the lay of the land and formulate a plan to deal with the necromancers.
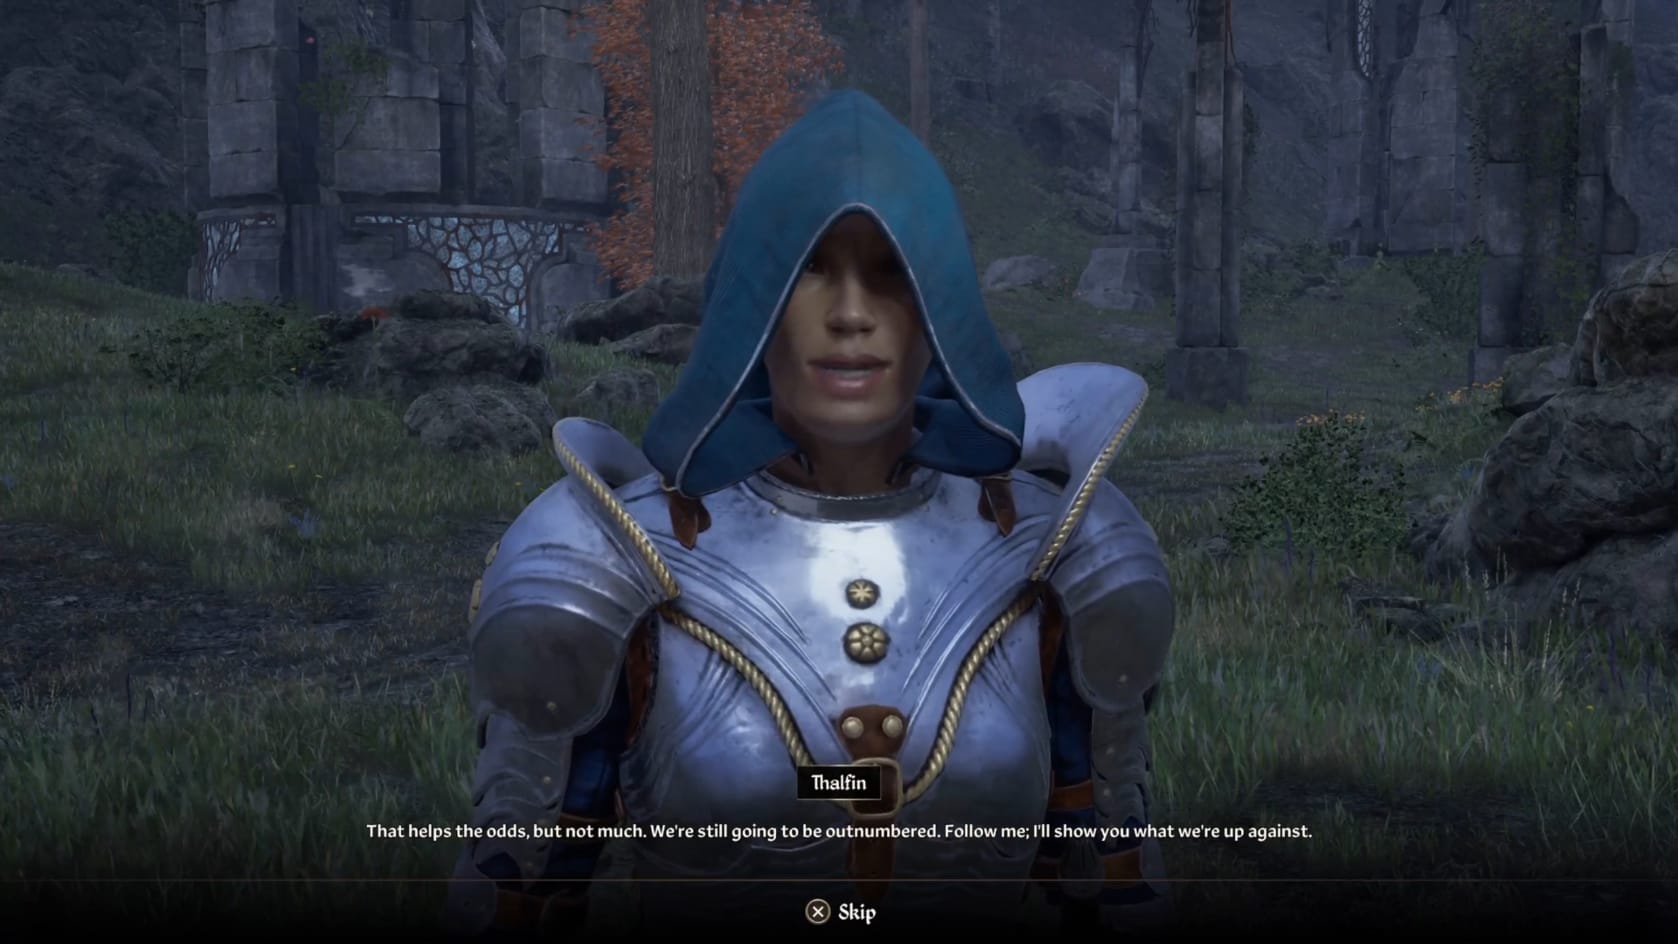
Assign Roles
When you talk with Thalfin, she will let you assign her and her squad roles, setting their positions. She is also clear that each of them has a focus and that it’s important to listen.
Talk to Thalfin, Iver and Merete in turn. They can do almost any role you assign them, but given them their preferred role will ensure their survival in the coming battle.
- Thalfin remarks: “I have to admit, I’m better with an axe than I am with Magic. I’ve been working on spellcasting, but I still feel better with a weapon in hand.”
- Merete remarks: “Well, I excelled in my studies in magic, especially large-scale spells. I’m pretty accurate with them ,too. More accurate than swinging a sword.
- Iver remarks: “I can manage with a weapon or with spells. I’ve really been working on healing lately. I’m getting pretty good at it.
Battlemage |
Positioning |
Thalfin |
Close |
Iver |
Close |
Merete |
Far |
Ambush the Necromancers
It’s time to attempt an ambush. It’s best for the Hero to wait with 1 of the 2 ambush groups. Just like them, think about your playstyle and position accordingly. You can also just disregard this and charge straight in.
It’s a group of 4 Necromancers along with Falcar who emerge from the ruins. If you can manage to blast down Falcar, you can skip going into the ruins. But he’s making straight for Silorn the moment there’s violence.

Silorn
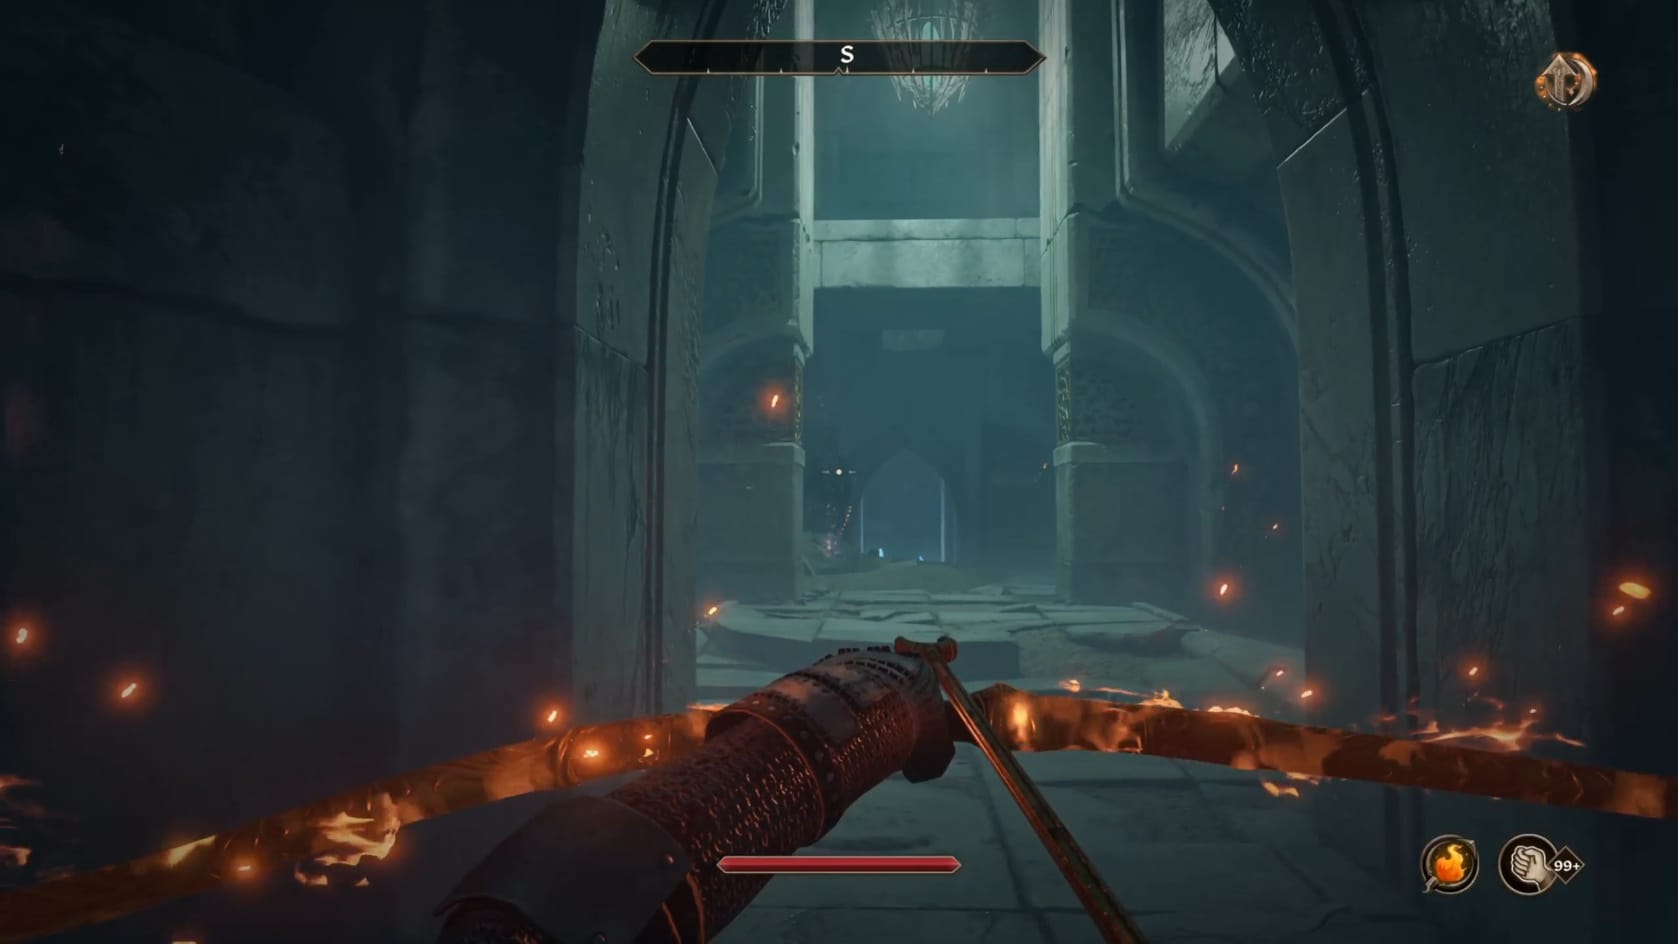
Inside the Ayleid Ruins Silorn, it’s time to find Falcar. Just inside, at the first landing, is likely a Necromancer. Pick them off and continue down the stairs. This repeats at the next landing as you continue down the corridor.
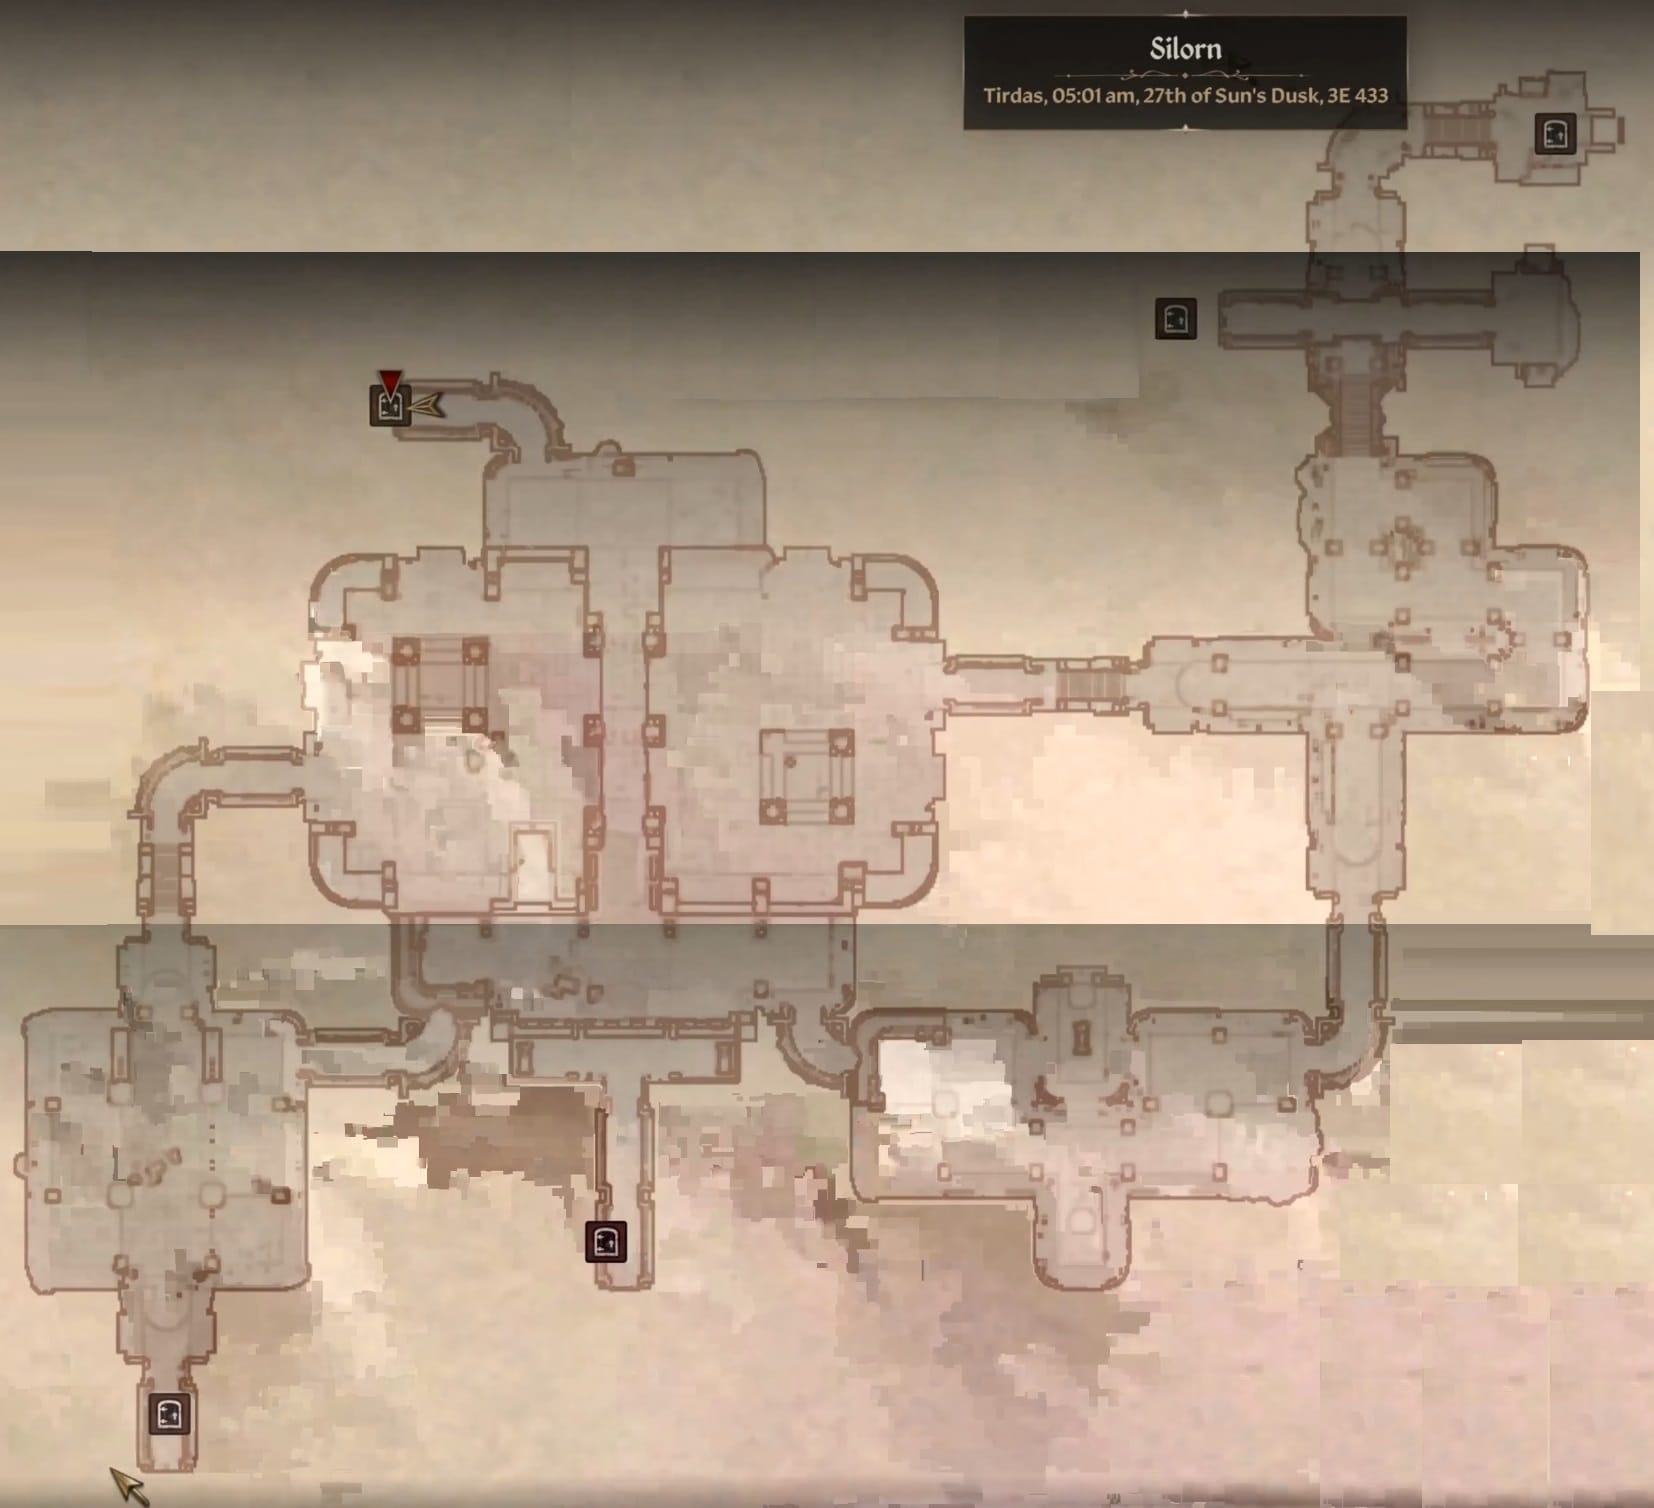
Getting to the bottom of the third set of stairs, angle to the left and head forward through the pillars. The room continues to the left and bends back to the West after that. This back portion has a pair of Necromancers patrolling it.
In the middle of it, you can find a Locked Gate (Hard). Pick it and head through to find a bit of a shortcut. Go to the Southern wall and follow it to the West. You’ll find a statue in an alcove. Go into the alcove and to the back of the statue to find a Push Block Switch. Activate it to open up the walls nearby to the North, giving access to an Ayleid Relqiuary.
Go to the West from there and through the hallway there. This will bring you into the large chamber of this level. While there is a walkway, it’s blocked by a closed gate. Head to the West and into the Southwestern corridor connected. Be mindful since there are a few Necromancers in the area below the walkway who will summon their zombies and attack.
Follow the Southwest corridor into the connecting room. There’s another Necromancer in here to deal with. But it also has a door you want in its Southern wall. Go to the door with the glowing tree to head down into Silorn Sedorseli.
Silorn Sedorseli
Silorn Sedorseli is the second portion of these Ruins and where you’ll ultimately find Falcar. He’s just toward the back behind even more Necromancers and their Undead.
Go forward and to the right into the long chamber. Along its right-hand side you can find a Necromancer about the middle. Another stands in the back left of the area. And in the middle of the Southern wall is the doorway into the next corridor.
In this corridor, look to the right for a shelf with an Ayleid Chest and the left-hand shelf for an Ayleid Cask. Go through the open gate in front of you after that.
Go down the corridor and take the stairs up after that corner. At the top of the stairs is a larger chamber with more Necromancers inside it. You can also see a make-shift alchemy lab nearby a stone pillar with an Ayleid Chest sitting inside it (which you should loot). The other Necromancer is likely standing against the Eastern wall in front of the door leading into the adjoining hallway. Take him out, and you can open the Locked Gate (Hard).
Before that, take a little time to explore the room to find the Push Block Switch in the Southwestern corner of the room on the nearby pillar. Pushing it will open the nearby Southern wall. Go down the stairs and through the doorway into the next chamber.
Through the gate, turn to the North and follow the corridor around the corner. There’s a Necromancer patrolling around here so be on guard. Follow the corridor around the next corner and down the stairs. A Necromancer is patrolling by the base of these stairs.
Both lead to a large room with a massive pool in the middle. Just head to the Eastern end of the room. Take a moment to claim the valuable Varla Stones on the metal towers nearby the Eastern end of the pool.
Continue around the pool to the Northwestern side where the Necromancer (likely) was. Take the stairs there up and follow the connected corridor. There’s a Locked Ayleid Chest (Average) sitting on a shelf at the corner. Another Ayleid Cask sits on the right-hand shelf. The important thing to do here is step on the pressure plate at the “dead-end.” Doing this will lower the Western wall, letting you keep going forward.
Follow the corridor you’re in to the Northwest and take the staircase down. Step on the pressure plate to lower the gate in front of you. The bridge you’re on is over a pool with some Slaughterfish in it, so be warned. Just head to the North across the bridge. There is a Necromancer patrolling at the foot of the bridge, so watch out for them.
Take the stairs up and go through the door into a different section of Silorn.
Silorn (Part 2)
Through the door, you’re closing on your target. Go up to the railing and to the Push Block. Activate the Push Block. Be sure to look to the East (Right) to find an Ayleid Chest sitting on a shelf. After that, head to the West for an Ayleid Cask to loot.
Hop the railing after that and head forward to the North across the walkway. Across from the foot of the bridge is another Ayleid Chest. Turn to the left at the end of it and head through the corridor there to the door. This will bring you to Silorn Buroseli.
Silorn Buroseli
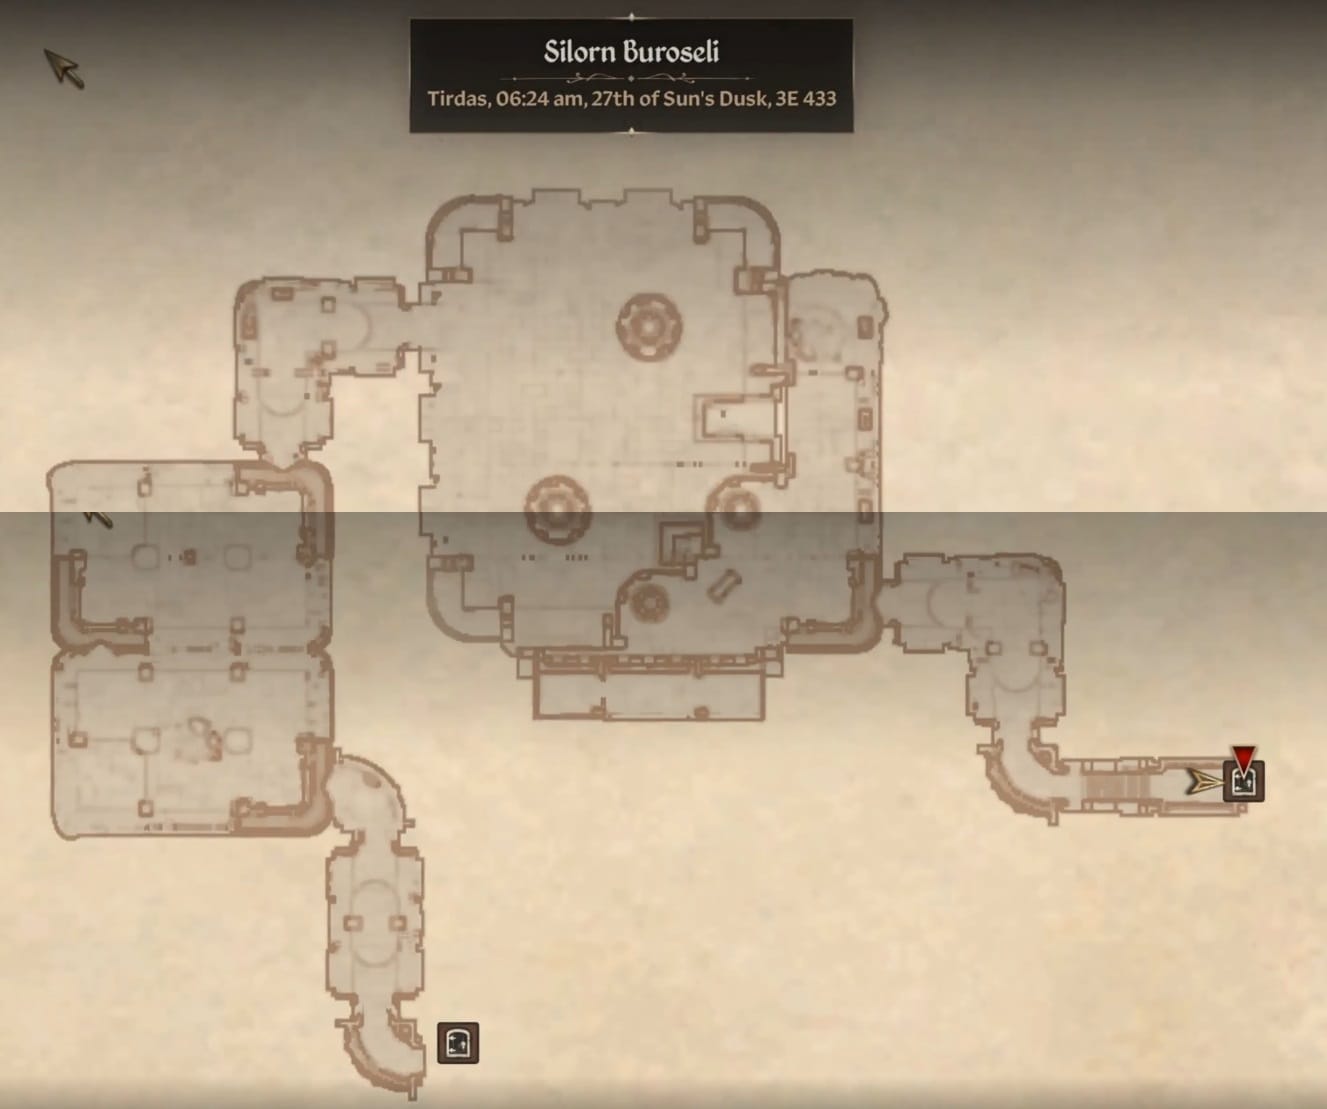
Inside this new area, head forward, around the corner and into the next room. On the Western end is a Necromancer. Deal with them and head to the North into the next room. A Necromancer patrols this one as well. Take them out. Go over to the Right-Hand pillar to find a Push Block on the Southern side of it. Activate it to reveal a Varla Stone on the Stone Podium in the middle of the room.
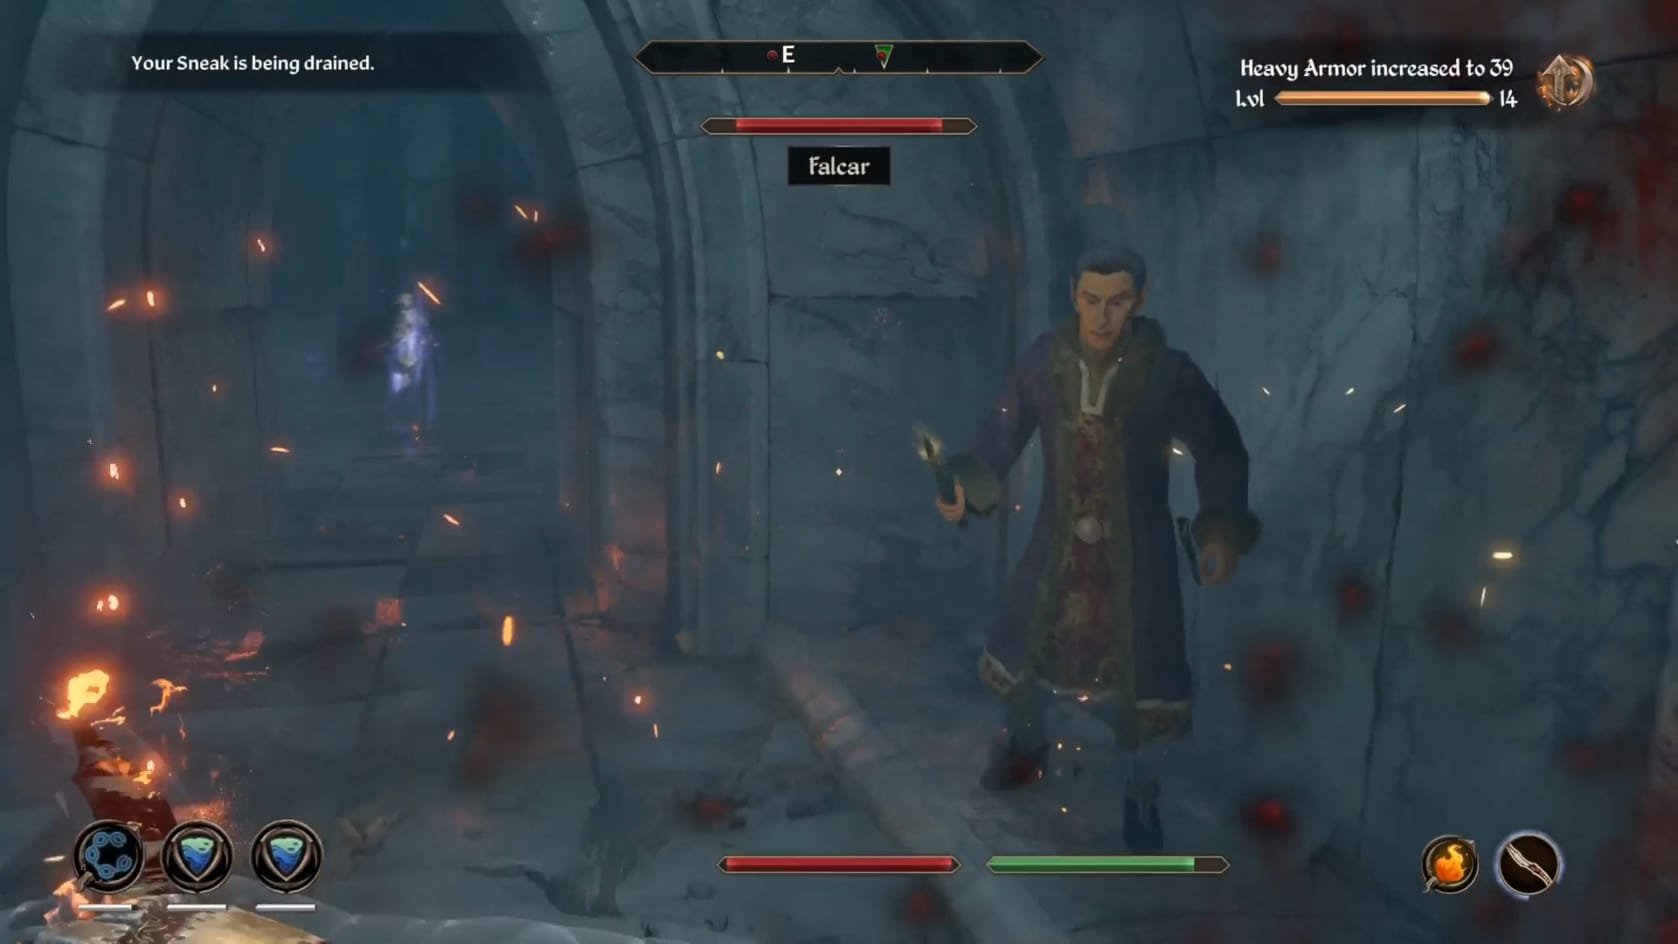
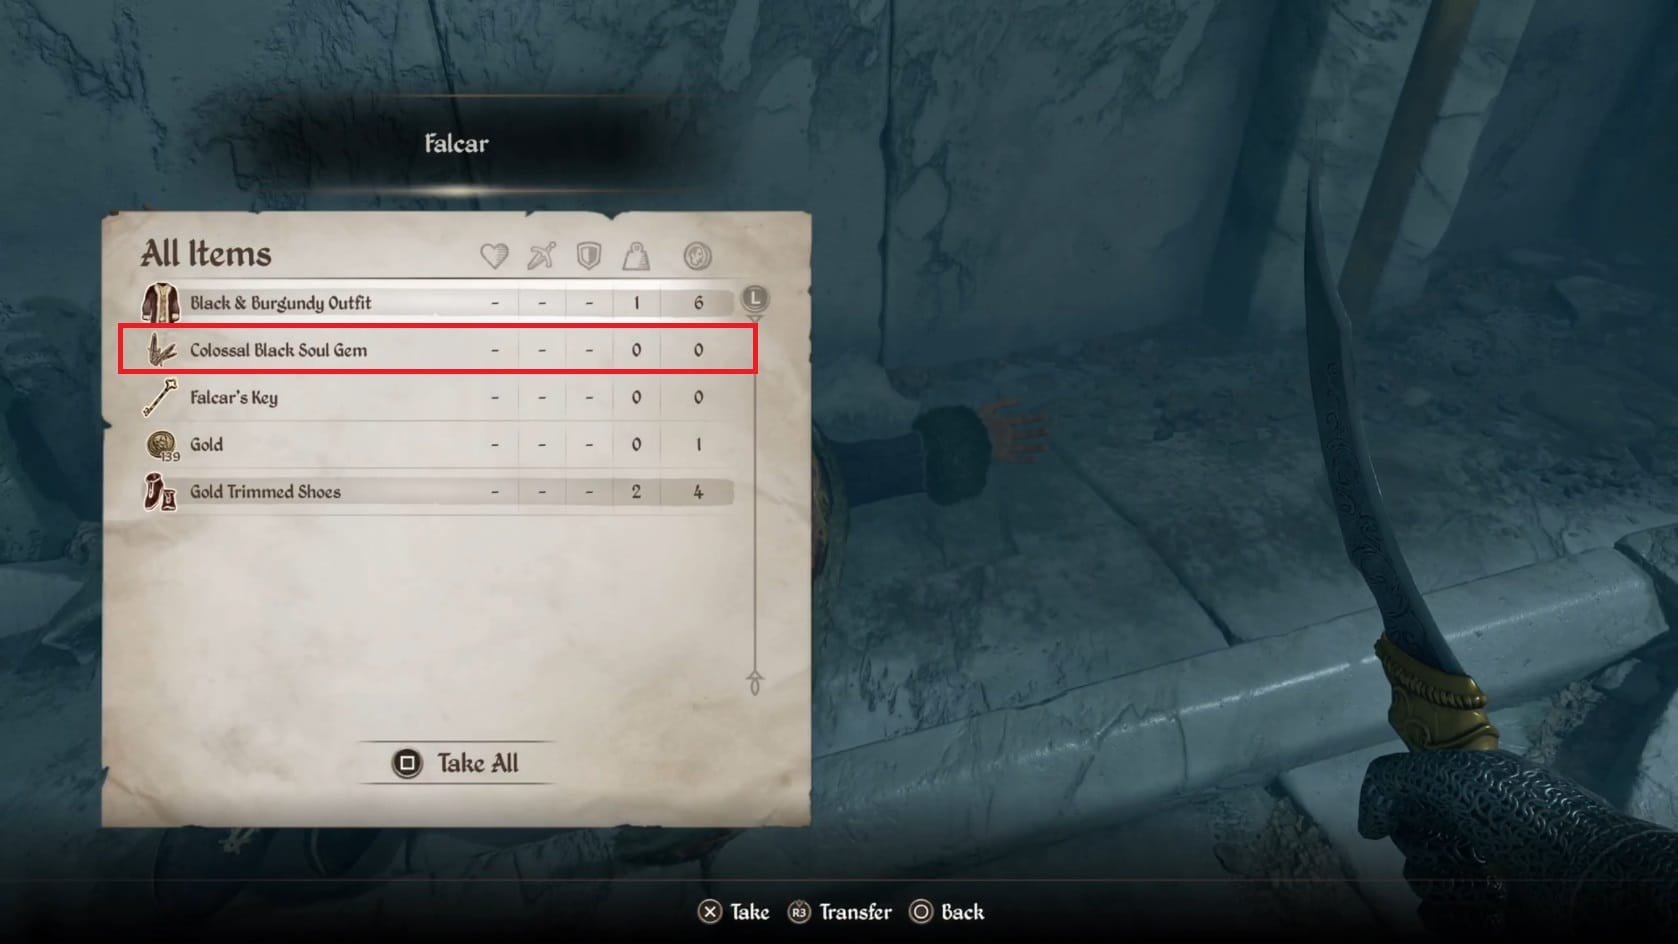
Go to the Northeast and through the short hallway into the next corridor. Again, undead patrol it along with Falcar. Kill him and the nearby Undead. Be sure to loot Falcar’s body to obtain the Colossal Black Soul Gem. You can also take Falcar’s Key to have free access to everything within his (former) room within the Cheydinhal Mages Guild.
Take a moment to go to the Western end of the hallway he was initially end to find a pair of shelves. The one to the West has a Locked Chest (Average) and the one to the Northern shelf is open.
After that, go to the East and into adjoining large room. Head to the Eastern end and take the stairs up. A shelf across from the top of the stairs has an Ayleid Chest. Look to the shelf to the left of it to find a Locked Ayleid Reliquary (Hard). Head to the South after looting those. Be mindful of the Red Gem since it will steadily attack you. But take a moment in the Southeastern corner to activate the Push Block.
Turn to the East after that and go through the short hallway to the Gate. Turn to the right through the gate and follow the hallway. This will bring you back to Silorn one more time.
Silorn (Part 3)
Back in Silorn, you just need to leave at this point. Go across the walkway and into the chamber there. Look to the left to find a Locked Ayleid Cask (Average). Turn to the right and pick the Locked Ayleid Coffer (Hard). Drop off the walkway after that.
Return to Traven
Back outside, you can just fast travel from Silorn back to the Arcane University in the Imperial City. It’s best just to do so. Just head over to the right after that and take the stairs up. This will quickly lead you back outside.
Go into the Arch-Mage’s Tower and up to the Council Chambers to find Hannibal Traven. Approach and talk with him. He has 1 more task for you. And completing this one will wrap-up the main portion of the Guild Questline.
Video Walkthrough
Video Walkthrough