Oblivion Remastered: Mages Guild – Vahtacen’s Secret
Solve the mysterious pillar puzzle in Vahtacen, explore dangerous Ayleid ruins, and recover the Ancient Elven Helmet in this complete Oblivion Remastered Mages Guild quest guide.
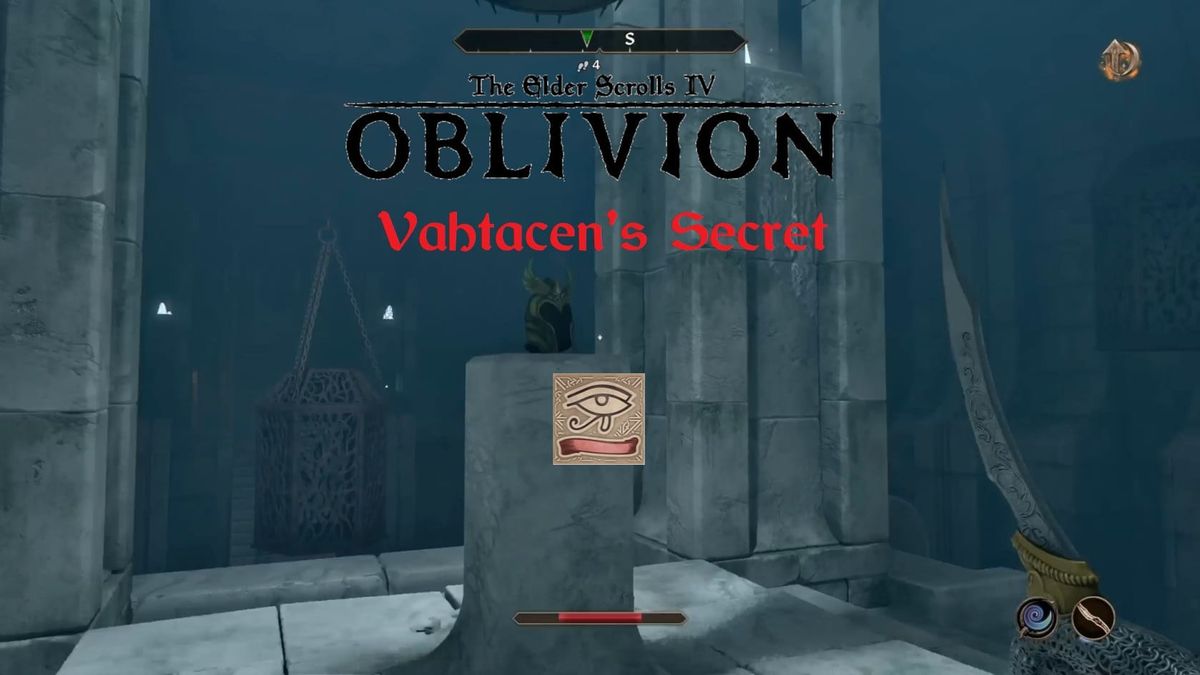
“Vahtacen’s Secret” is part of the Mages Guild Quest Line in Elder Scrolls IV: Oblivion Remastered.
Walkthrough
Talk to Raminus Polus
Return to the Arcane University and talk with Raminus Polus. He has a new task for you, so talk with him about this “Task.” You are being tasked with aiding an Ayleid Research time lead by Irlav Jarol. You can find Irlav Jarol in the Arch Mage’s Tower to get more details about the team that’s on site.
Talk to Irlav Jarol
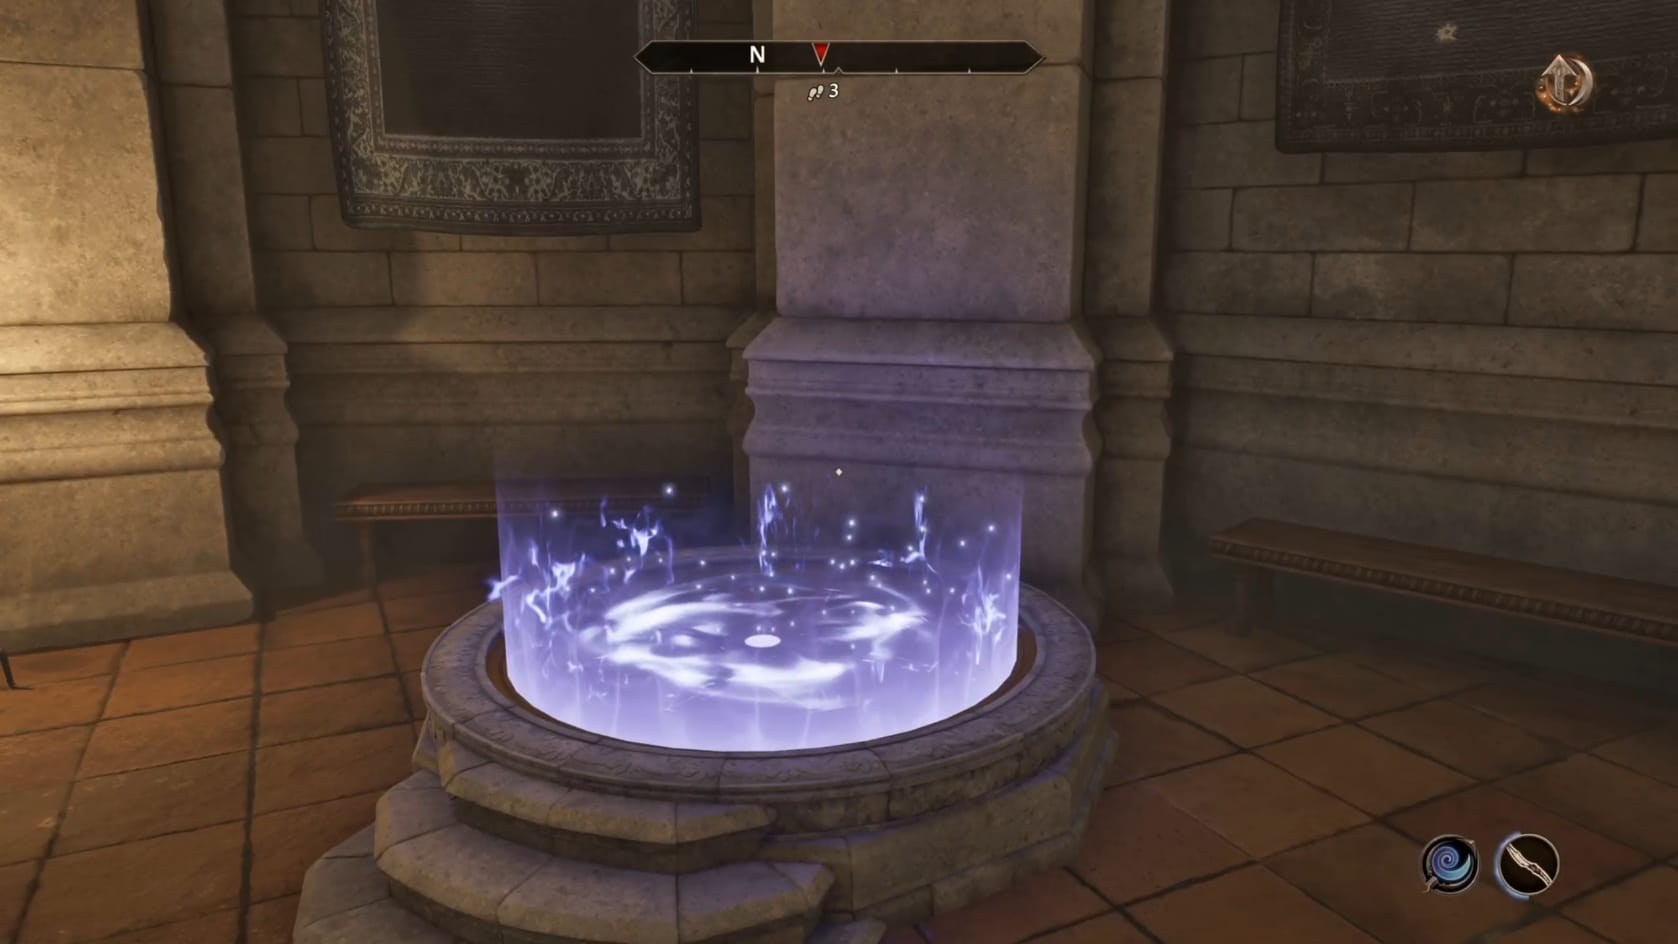
To access the Arch Mage’s Tower, look to the glowing circle against the Northern wall of the entrance hall. Go to it and interact with it. This will bring you into the next chamber of the Tower.
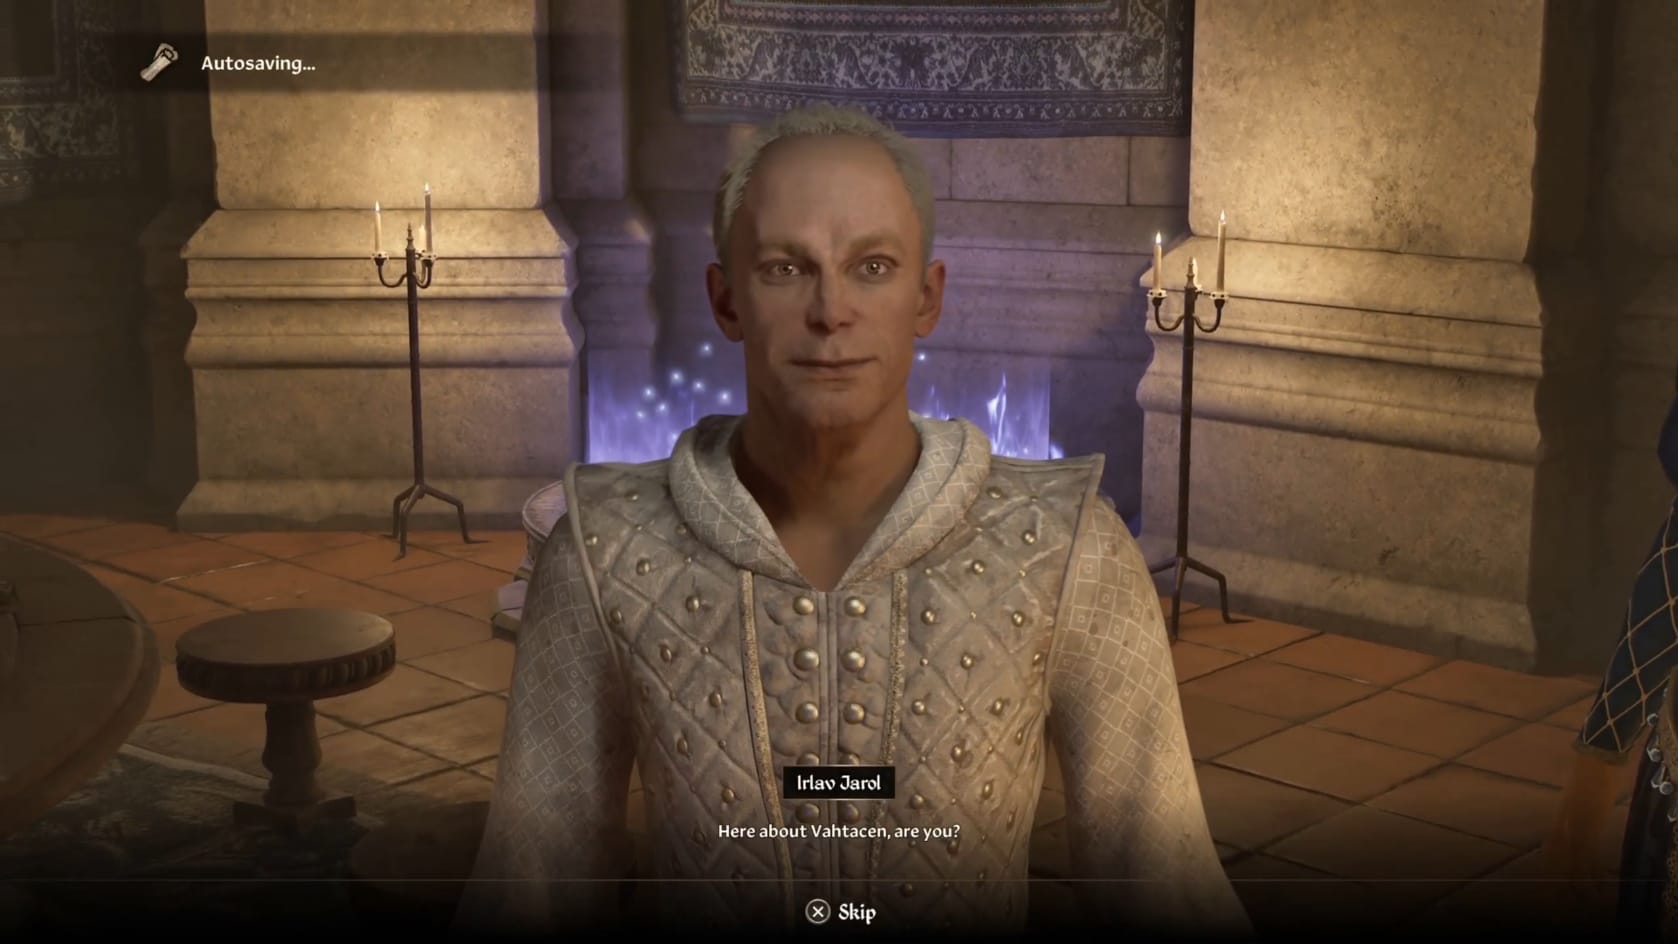
Inside this Council Chamber, you can find Irlav Jarol. Just approach and talk with him to get things started. He immediately knows this conversation is about Vahtacen. He explains that he’s gotten a report from Skaleel that the project’s hit a major problem. He’ll give you a key for the Ruins and then send you on your way.
Travel to Vahtacen
Time to get to the Ayleid Ruins Vahtacen. These ruins couldn’t be explored in full prior to this quest. You’ll be able to fully explore them over the course of it.
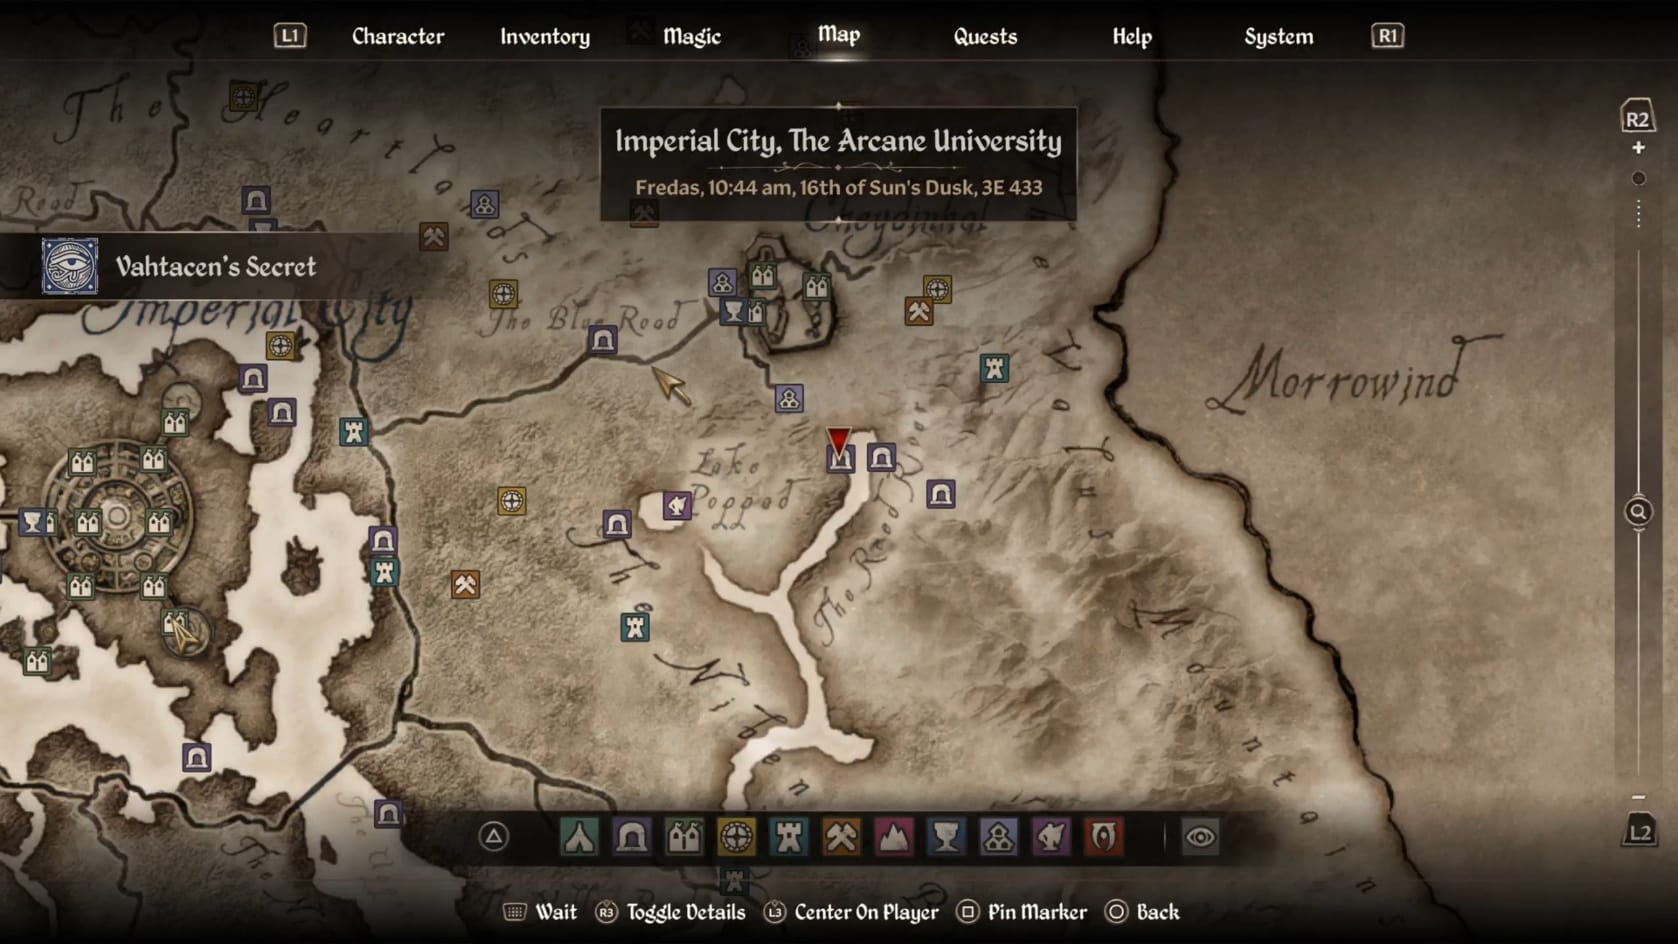
The Ayleid Ruins are located to the Southwest of Cheydinhal. They’re found nearby the source of the Red River. These Ruins are a bit unique because they’re located inside a cave.
Inside the cave, start by heading down the slope. Turn to the left at its base. Follow the corridor to the first chamber. Exit this one to the South and follow that one for a short ways. This will bring you into the Ruins themselves. You can see Skaleel, an Argonian, standing in here with a torch.
Approach and talk with with Skaleel. She’s not thrilled to have you to check in on the project but won’t turn the help away.
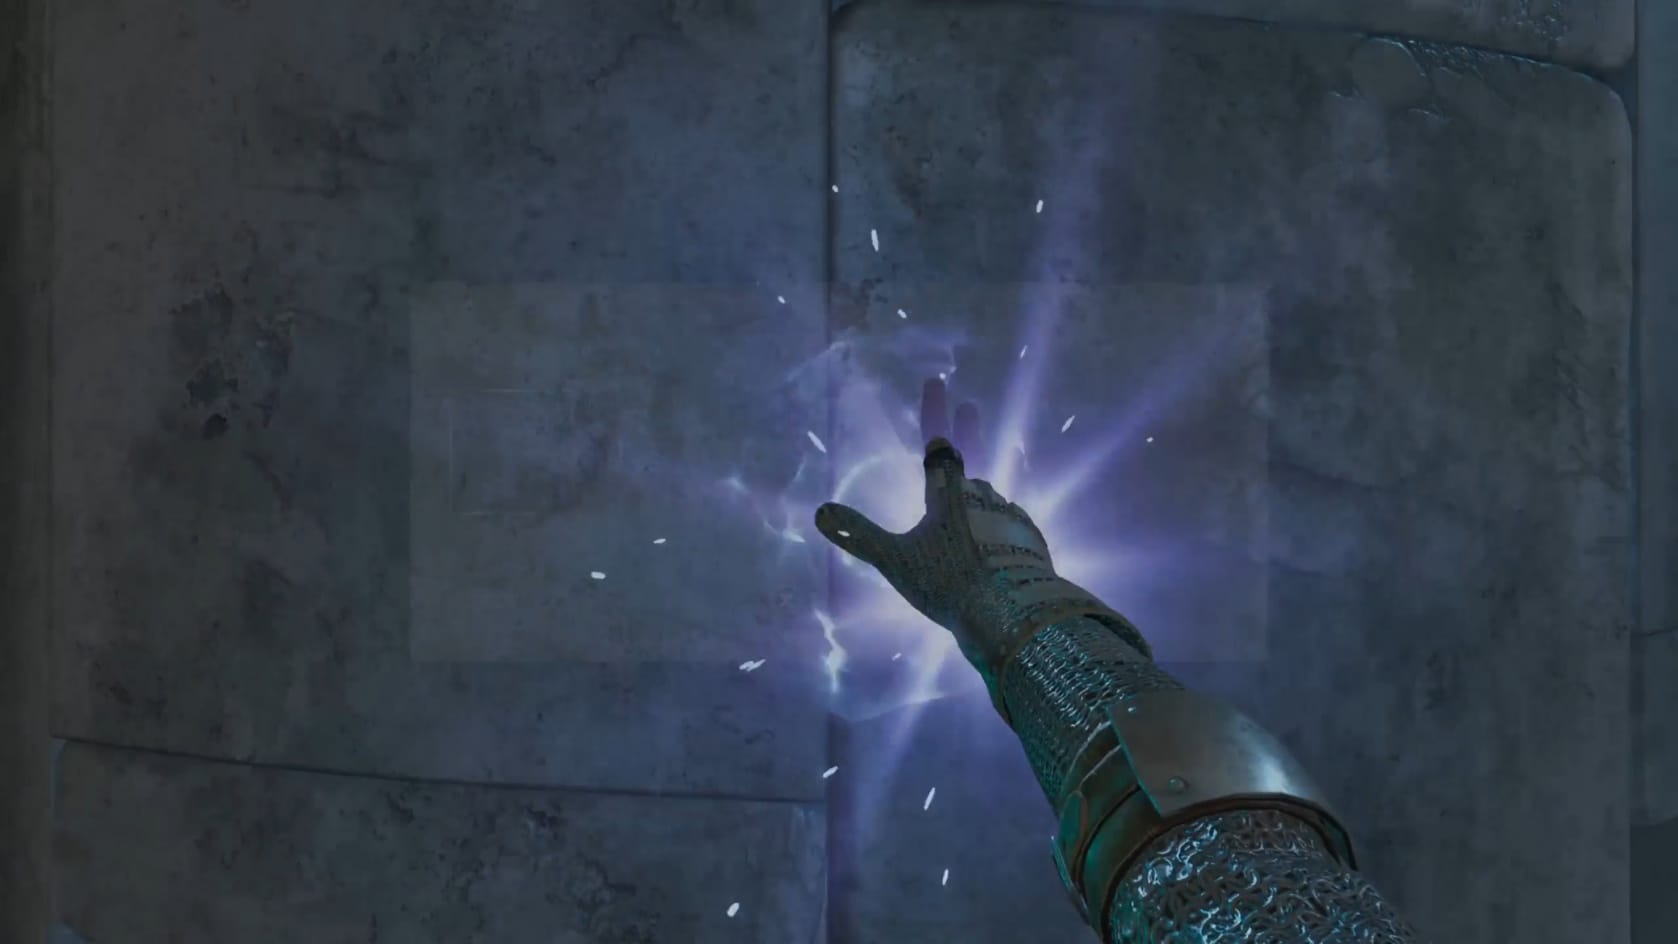
Solve “The Pillar”
Talk with Skaleel about “The Pillar.” She’ll explain its something Magical but they haven’t been able to figure out how to activate it. She suggests that if you cast any spells at it, to keep to simple spells that have a singular effect. You can learn more from Denel who’s still in the chamber studying The Pillar.
Turn to the Northwest and go through the gate there. Through it, head down the short corridor and take the stairs down. Just before the next gateway you’ll find Denel waiting by a desk.
Take the time to talk with Denel to learn what he’s gleaned. There are markings on the wall that he’s certain relate to the Pillar. The problem really is HOW. He wishes he had a Reference Book and offhandedly mentions that Skaleel has one.
Make a quick trip back to Skaleel and ask her about the “Ayleid Reference.” She’ll hand it over without question.
Go through the second gate and over to the right. Head into the chamber beyond it. Go around the wall and read the 4 Tablets strewn about on the Wall.
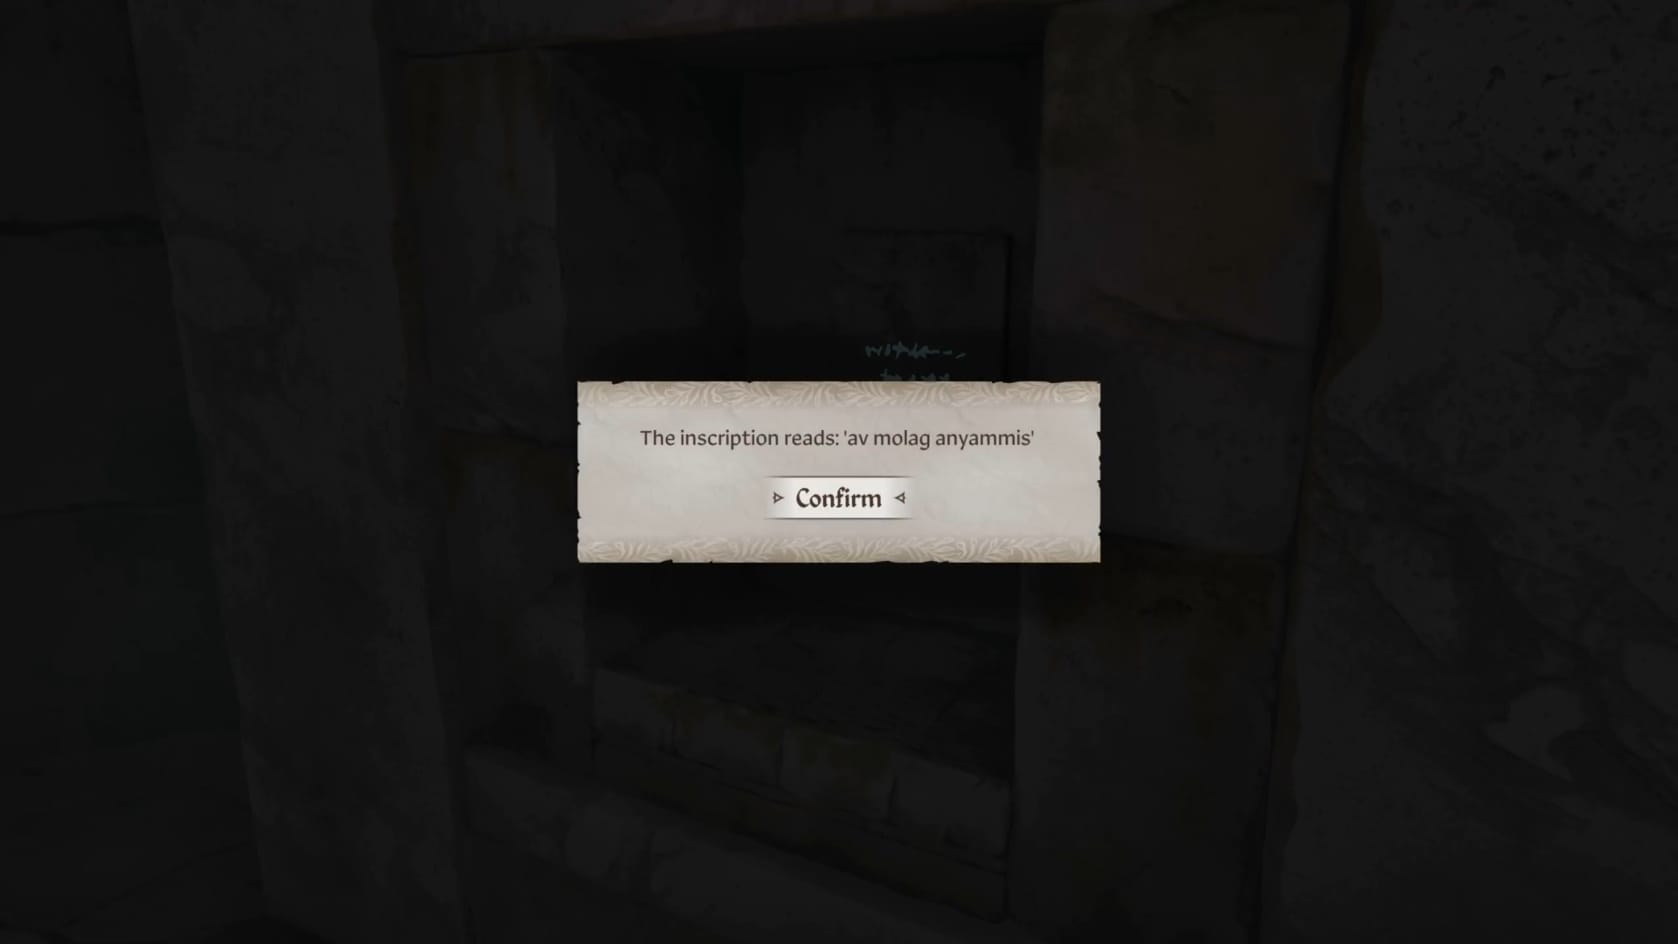
With that done, go back into the hallway and return to Denel. Ask him about “Ayleid Reference.” This will share the book and what you just read in the Pillar Chamber. Ask him about “Translation” and then go through each the inscriptions on the tablet. He’ll explain what each of them mean. This is what you’ll need to do to the Pillar.
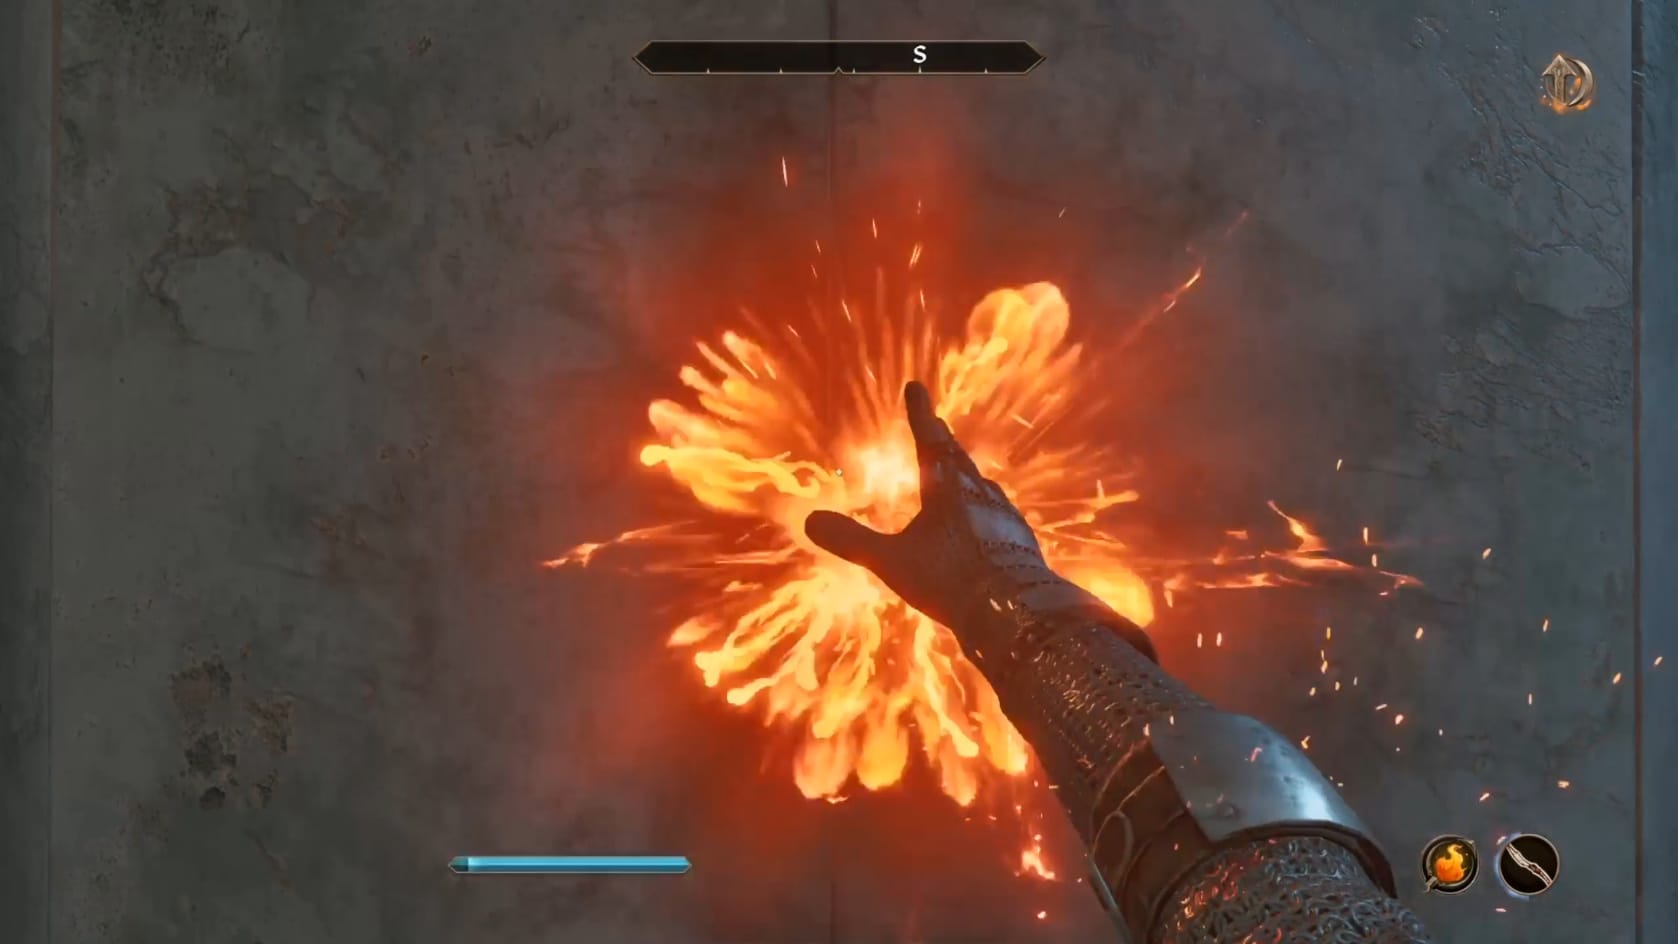
To solve this Pillar, you will need to cast the proper series of spells. Now, if you look into the chest by the desk you’ll find an impressive collection of Spell Scrolls. Among the scrolls will be all the spells you’ll need to solve this puzzle. If you need to replenish this supply, you will need to leave Vahtacen for 4-5 DAYS.
The Spell must have either Touch or a Target for range. They cannot be On Self.
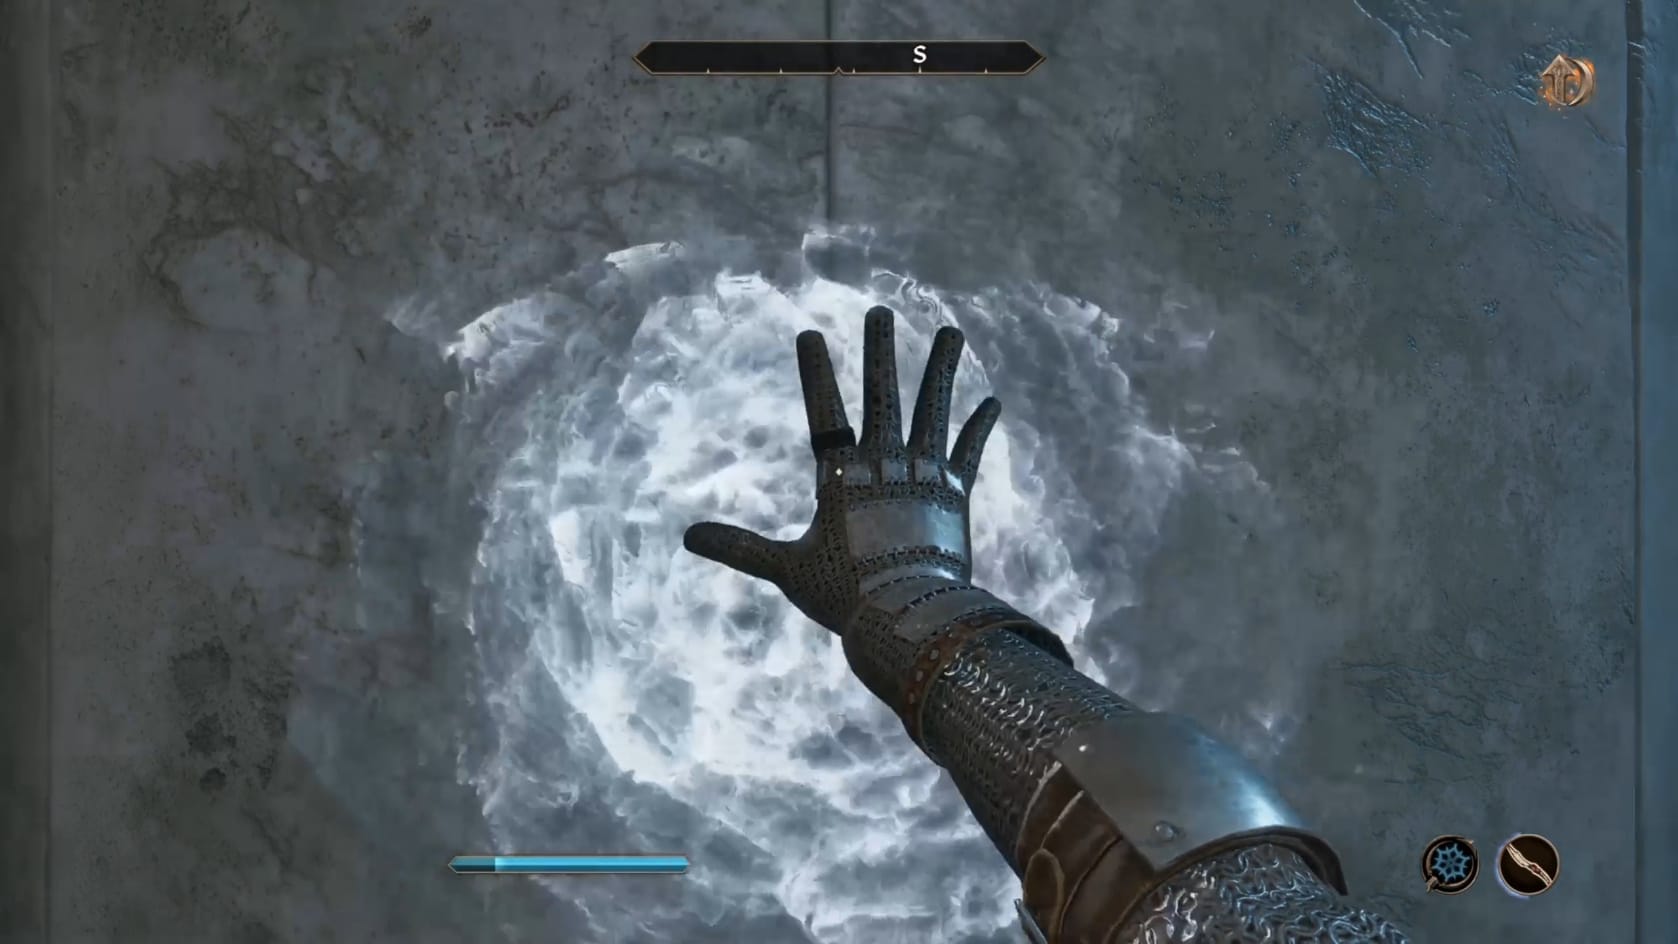
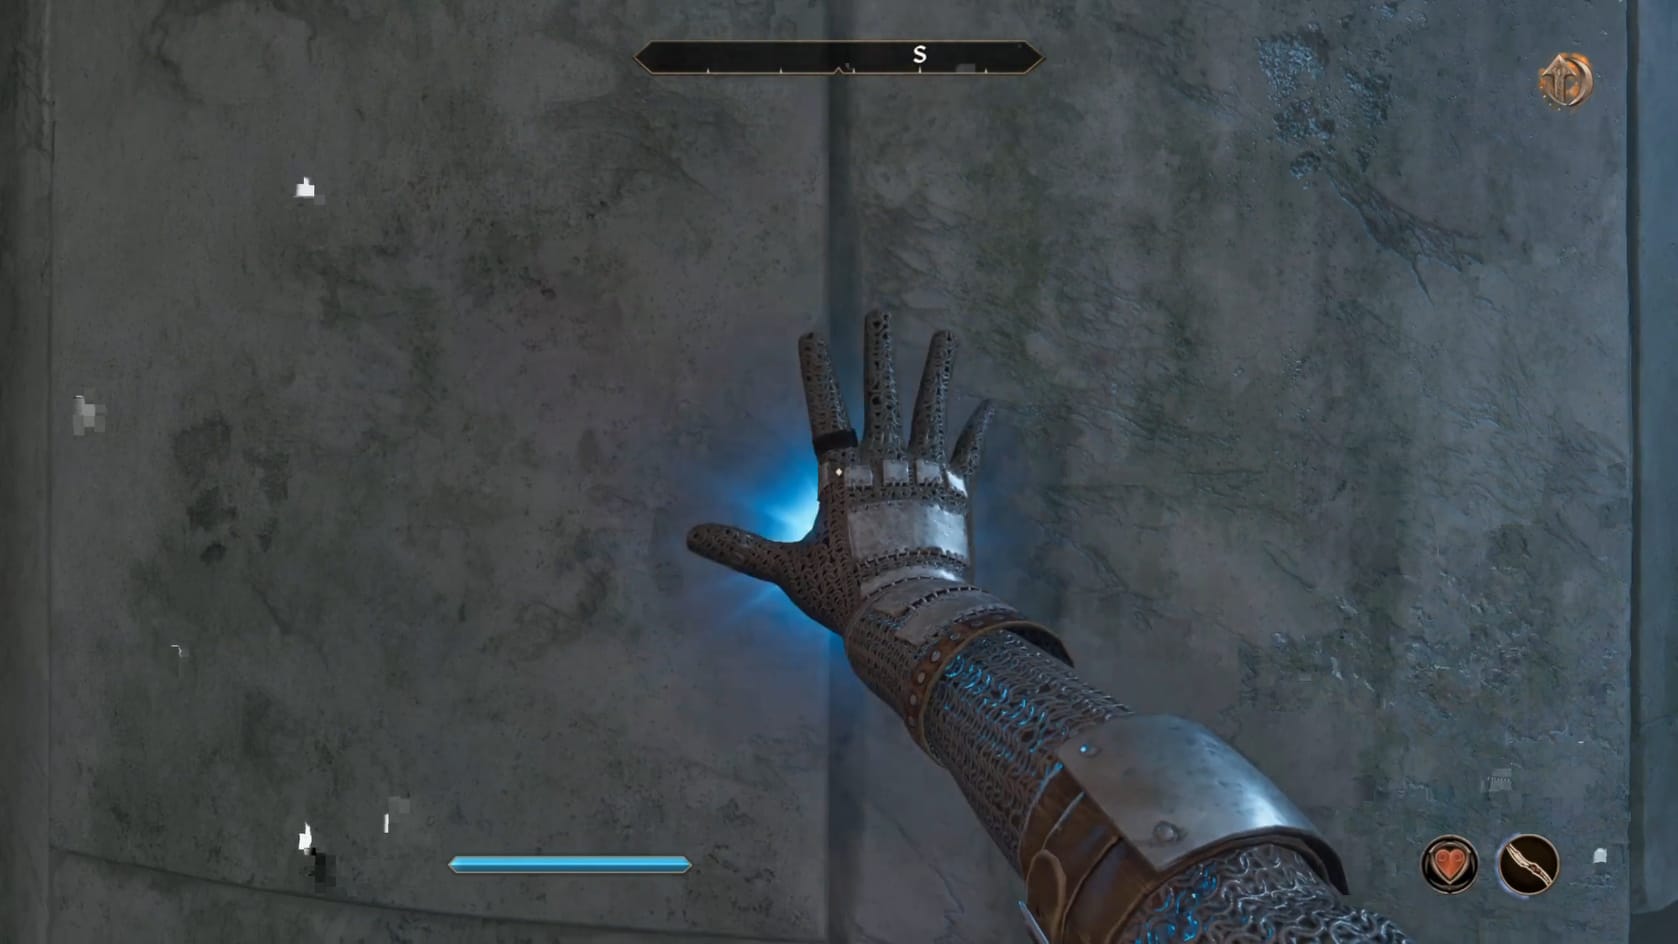
You will need these 4 spells to cast AT the pillar in this order:
- Fire Damage
- Frost Damage
- Damage Magicka
- Fortify Magicka
Equip the Fire spell to begin. Go to the Pillar and hit it with the Fire Spell. Go through the rest of the spells in order after that. Doing so will have the Pillar part and reveal a doorway.
Opening the Pillar with Spells
Go down the stairs and you will see you can reach Vahtacen Lorsel.
Vahtacen Lorsel
You’ve got access to a completely new section of Vahtacen now. Expect to encounter a number of undead like you would in any other of these Ayleid Ruins. Just fight the Undead as you come across them.
Start by going forward and opening the first gate. Follow the corridor and down the sets of stairs in front of you. Follow them along as they slowly spiral downwards. This leads into a room, so go inside it.
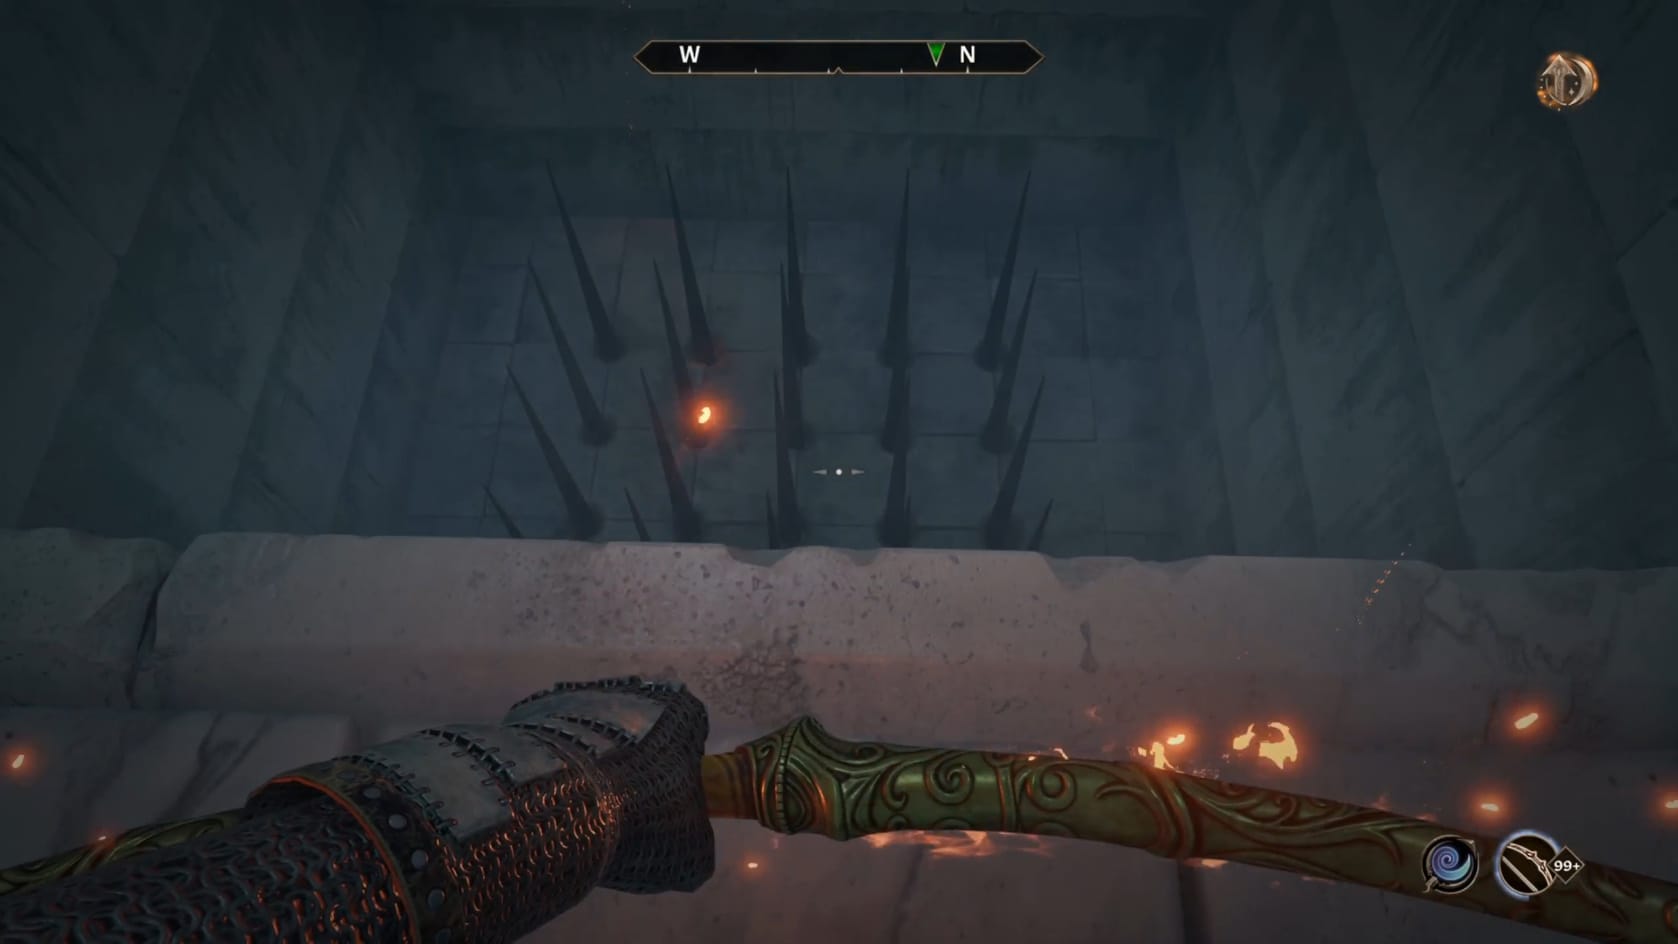
Inside this first room, you will need to be mindful of the middle section of it. There’s a “pit” trap that will drop you onto spikes if you step on it. It’s best to jump over that section if possible to remove the possibility of its dropping you. Take a moment to head to the Northern side of the room and the small shelf there to find an Ayleid Cask to loot. Continue forward by jumping to the Western portion of the room and over to the next gate.
Go to this gate, past the pit, and look to the East to find another Ayleid Chest to loot. Turn back to the nearby gate and head through it. Be careful here because there’s a pressure plate in the middle of the floor just past the first archway. You need to trigger it, revealing 2 Undead that will come after you. Defeat them and head into the next corridor to the Northwest.
In this corridor just go forward until it opens up. There are a number of stone tables around that you should be mindful of. Most importantly, you will need to be careful of the floor trap that will slam you into the spikes just past the first dividing walls.
Evade the trap with careful jumps to the side (or possibly jumping onto the table then over the short walls on the sides). You can find an Ayleid Cask in the first section on the Southern side on a shelf. Another sits in the back of this chamber along the Northern wall on the right-hand and left-hand sides. Continue forward through the corridor after that.
Through the next gate to the Northwest you can find a pair of Swinging Blade Traps. Just carefully time your dash through to continue along. Follow it down the stairs and into the next large chamber.
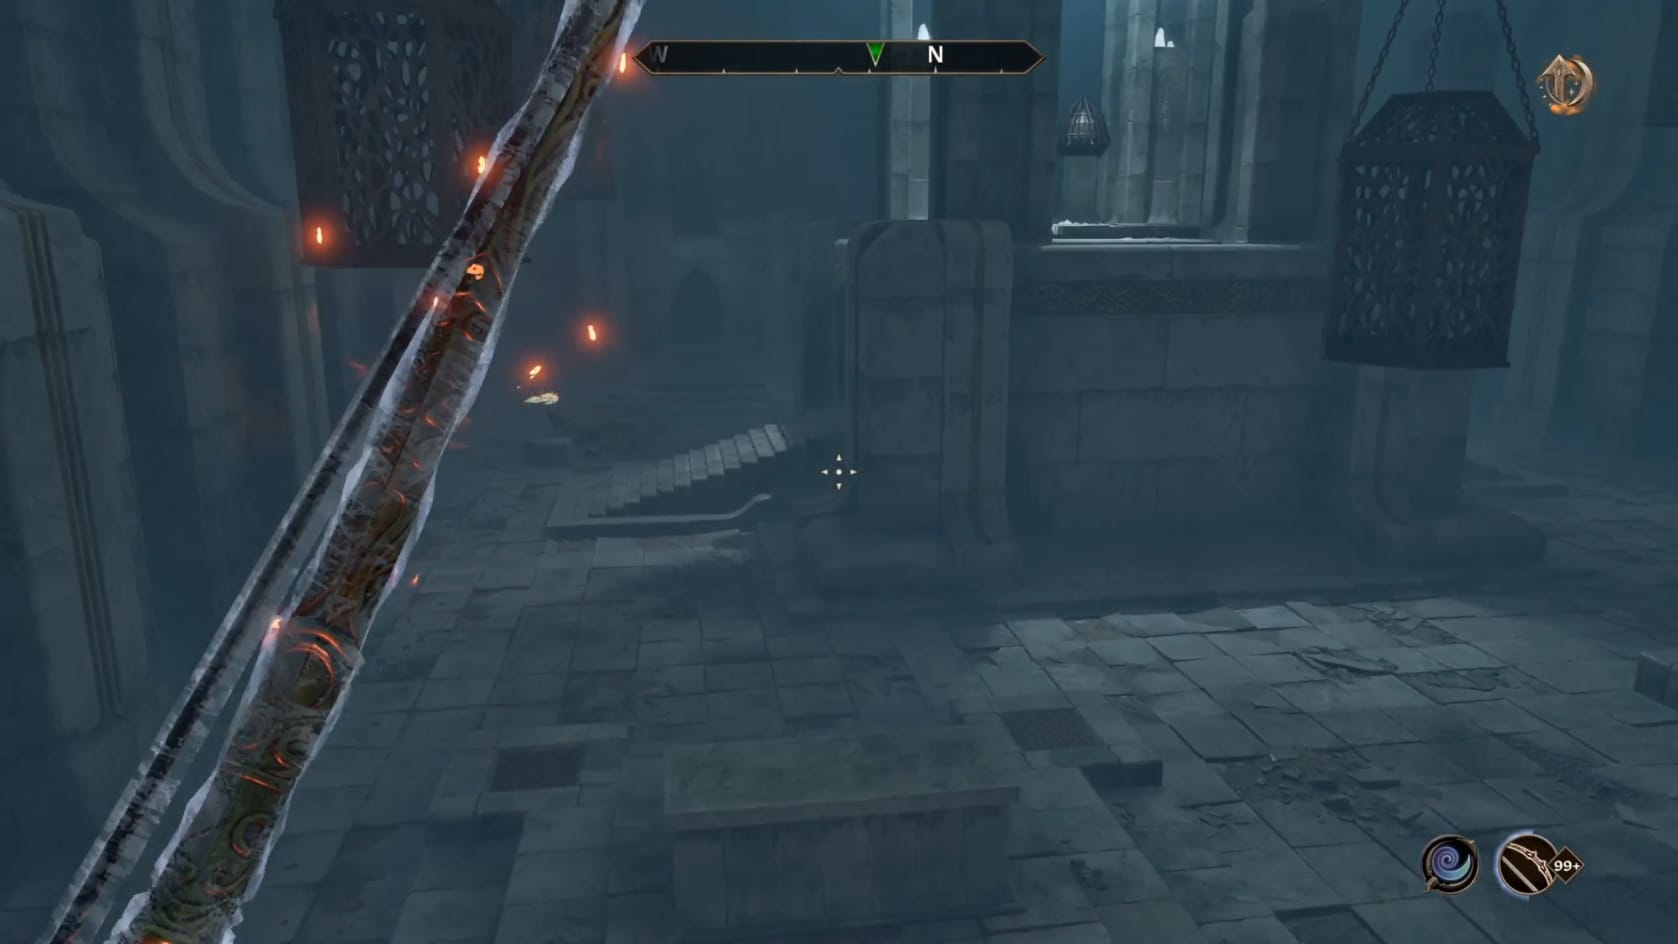
Inside this large chamber, turn to the East and then look to the Southern wall. You’ll find a Locked Door (Average). Pick it to get through and find a stairwell that leads up to a door back to the main part of the Ruins. This gives you access to a portion of it you couldn’t previously reach. Save this for your way out. Head back down the stairs and to the chamber.
In the chamber, you just need to head to the Southeast to the far end of the chamber. Take the stairs up to the balcony there. At the top of the stairs, look to the right (Southwest) to the pillar. In the middle of the pillar is a Crystal Switch. Activate it.
Activating the Crystal Switch will raise the stairs around the previously inaccessible middle portion of the room. This will also unleash a few more undead after you. So defeat them.
Take those stairs up and go to the middle. You’ll find a dome is covering the podium in the middle. Look to the Southwestern pillar while in the middle of the platform to find the Crystal Switch to raise that dome out of your way. Sitting there is the Ancient Elven Helmet. Claim it and you’re good to leave.
Go to the Northwestern corner of this room. Use a Lockpick to get through the door (if you didn’t already) and take the stairs up. This will bring you to a door back to Vahtacen.
In this new section of Vahtacen you will want to defeat the Undead in it then climb the stairs. At the top you can find a few chests and coffers to loot scattered around. Half of them are locked (Average). Leave after that.
Now, head to the Southern part of the room once again. Take the stairs on up. You’ll see a new passage has revealed itself. Go forward to the illuminated section. Look to the Left (East) to find a coffer on on the ground to the left of the chest that’s Locked (Hard). There’s another on the Shelf that’s also locked (Hard).
After getting those opened you will want to continue to the Southeast and up the stairs. At the top there’s likely another Undead waiting for you. Past it, you will want to turn to the right and continue up the stairs. At the top, step on the pressure plate to lower the Southwestern wall. This leads you back to a door leading to the main part of Vahtacen. Go through the door.
Return to Skaleel with the Helmet
Make your way back to that initial chamber where the Expedition set up their camp. You’ll easily find Skaleel there. Just approach and talk with her. She’ll tell you to go and show the Ancient Elven Helmet to Irlav Jarol.
Report to Irlav Jarol
Make your way back out of Vahtacen. Once you’re outside, use Fast Travel to quickly return to the Arcane University in the Imperial City. Once inside the Arch-Mage’s Tower, use the teleporter to travel to the Council Chambers (otherwise follow the Quest Marker to find Irlav Jarol).
Find Irlav Jarol and talk with him. He’ll happily accept the Helmet from you. He’s happy something finally came out of the ruins.
Report to Raminus Polus
Time to find Raminus Polus. Talk to him to hear about what’s next, but first, you need to make an appeal.
Promotion
Take a little more time to talk with Raminus Polus. Ask him about “Advancement.” He’ll promote you to Conjurer. This comes with the Robe of the Conjurer.
Robe of the Conjurer

The Robes have a value of 0 and a Weight of 3.
Level |
Effect |
Level 1-4 |
|
Level 5-9 |
|
Level 10-14 |
|
Level 15-19 |
|
Level 20-24 |
|
Level 25+ |
|