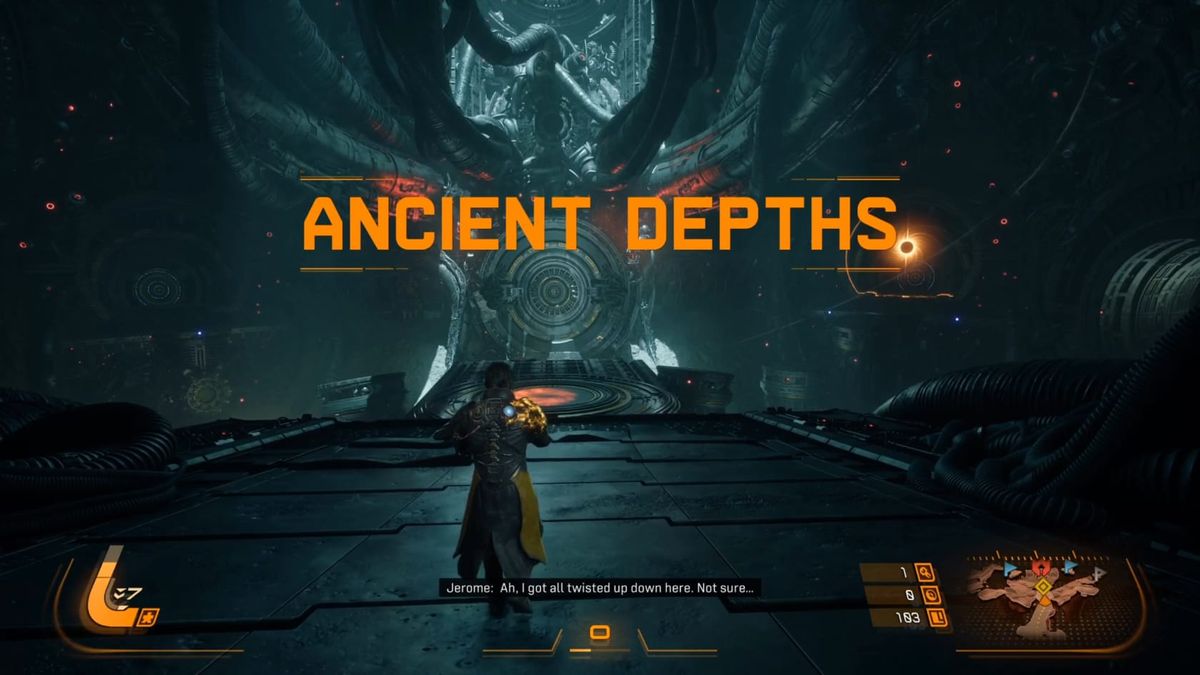
Saros: Ancient Depths Guide
Deep beneath the surface, Arjun explores the Ancient Depths — a ruined mining complex overrun by deadly alien machines and Nova energy hazards. To survive, he must unlock ancient gates, master new weapons, and defeat the colossal Guardian known as Bastion.
Description
A sizable subterranean region, consisting of both natural and artificial caverns. Soltari’s priority site for Lucenite extraction.
However, mining operations already established by Carcosa’s prior civilization. Area remains heavily-defended by ancient machine entities of alien design.
Collectibles
Audio Logs: 14
Halcyon: 12
Holo-log: 1
Text Logs: 3
Enemies
Custodian
Devastator
Excubitor
Guardian
Hollower
Keeper
Prime Custodian
Vessel
Veil
Warden
New Weapons
Horde Shotgun
Dispiritor
Marksman Handcannon
Upgrades
Jump Panel Network
Walkthrough
Having returned to the Passage, head up the stairs from Primary and into the main room with Stacks, Kayla, and Sheridan. Be sure to head into the medical area in the back left (out and to the right of the pool you resurrect from). Search the tables to find a Text Log. These will appear across your numerous deaths, so watch the map for their icons to make them easier to find. When you’re ready to progress forward you will want to return to Primary. Open Primary and go to the World Dial tab. Select the Ancient Depths to begin. Exit the menu and give the portal in front of Arjun a moment to spin up. After that, enter the portal to return to where you were.
The locked door in front of Arjun is now unlocked so head on through and start on your way down. The first thing you’ll find is a ledge too tall to jump up. Approach the dull yellow panel on the floor to trigger a cutscene. Arjun recklessly activates the platform and it doesn’t sound like it did all beneficial things. As you get deeper, you will see another marker on the floor, on your first time through. Go and interact with it. This will enable Shotguns. Usually it is a Horde Shotgun.
Shotguns are a very helpful group of weapons. They do high Stagger Damage, and high Damage when close to their targets. The blast doesn’t have much range is the biggest downside, so you will be fighting close up with one.
Staggering is a great mechanic to exploit on most foes. As Arjun does Stagger Damage, a white bar underneath the enemy’s health will fill up. Once the white bar is full, it will start to flash and drain, but the enemy will enter into a flaying (or collapse) animation. While a foe is Staggered, they will be immobile and take increased damage. This can be a life saver or means to clear the field faster.
Just past here is the first part of the entrance. While the details can change, the room will remain the same.There’s a Jump Panel in the lowest part, about the middle. On the right-hand side you can find a collection of Lucenite. Sometimes there will be laser beams active here you will need to avoid. But through this room are the Mines themselves.
Once you get to the main area of the mine, you have 2 goals: activate the two gates and then take on the boss. You need to complete both gates in a single life and then take down the boss as well. Initially, just one passage will be open, but after clearing a passage, you will freely be able to choose, if you activate the Eclipse Device.
Be sure to also look in the crossing passage that under the walkway leading into the Ancient Depths. There is always a pair of Containers. They will appear each time you are passing through here in a cycle. It’s always a question of when you want to open either. Know that sometimes there will be a locked container. Carosan Keys are getting easier to find (there are upgrades that allow you to start a cycle with them!) but still somewhat scarce.
There is a new energy type introduced here: Nova (Red)
You cannot dash through Nova, nor can you absorb it. All you can do is just avoid it. It’s deadly and will do heavy damage. Later, in the Blighted Marsh, you will get the ability to Parry it.
The interesting thing is if you die and need to start a new cycle after activating the first gate lock and the Eclipse Device. This allows you to activate the Eclipse Zone from the start. While this makes it more challenging overall, you will be reaping much better Lucenite and better equipment.
Each of the paths you are sent down culminates with a fight against a Devastator in a tall chamber. They start with some reinforcements and are periodically reinforced throughout the fight.
Going down the left-hand path, you will eventually hit a split, one that offers a container and one that offers Aether. Both lead to the Gate Controls at the end of the passage. Take whichever one works best for the moment. Going down the right-hand path, it’s shorter, but more challenging for it (usually running it in the Eclipse Zone).
Each time you want to attempt to reach the Boss, Bastion, you will need to complete both sides of this area. When you have, the Door to the boss will open. Go toward the now open door and launch yourself up using the Jump Pad. Again, you will find a pair of containers (at least 1 potentially locked). Collect what you want and head through the circular opening to the Boss arena.
Boss - Bastion
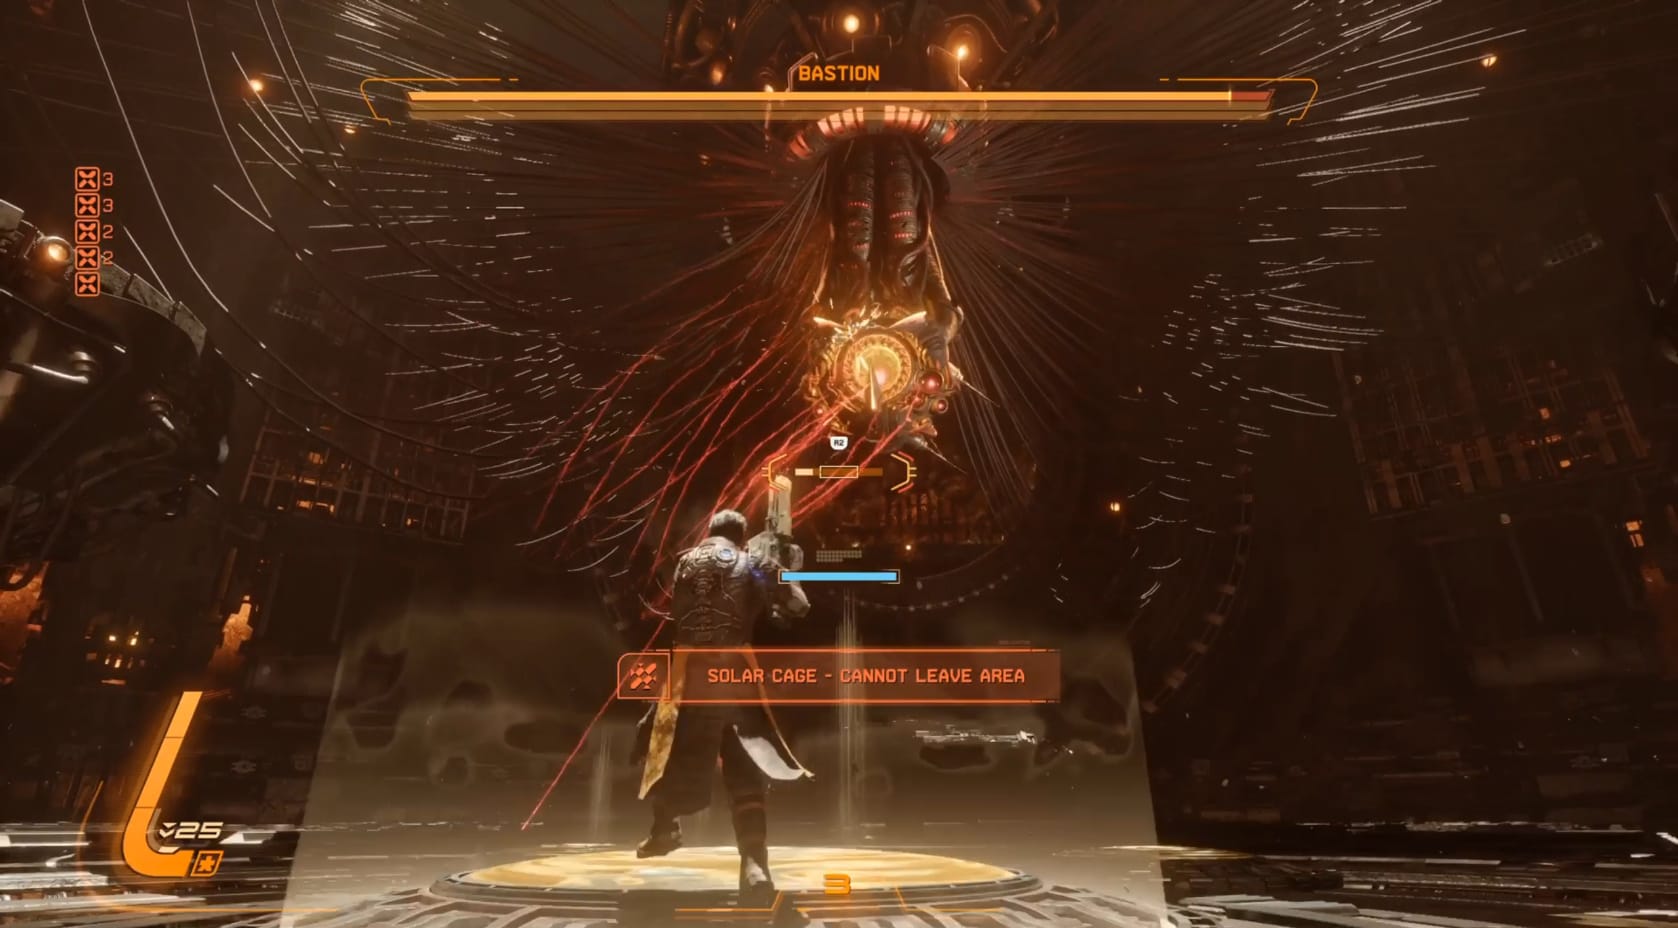
Compared to the Prophet, Bastion would a bit easier to fight, if the arena wasn’t a death trap. Bastion itself is a massive Guardian suspended on the Ceiling. Think of the arena in 3 sections: the center, the walkways, and the sides. Both the sides and the walkways have flame traps that activate after a few seconds. The center is largely jump discs. You can use those to easily evade the attacks that will be coming at you in its second phase and on. It’s never been more important to stay on the move.
Phase 1
This is the easy one. You can also immediately start firing on Bastion to do damage.
The Bastion is largely firing blasts of energy, both normal and Corruption.
- These blasts come in a funnel shape (a center of energy surrounded by Corruption). It can launch this in rounds of 3 attacks.
- It can also just fire a Cone of Corruption. This cone blast can be with Seeking Projectiles.
- It will also drop 2 orbs of energy (these can be just energy or energy and corruption), which will erupt into large walls of their respective energy types either for you to absorb or dash through.
- Bastion can fire a beam down onto the ground. This has bursts of in a ring of yellow energy that you must avoid or evade. It can fire off up to 3 in a row. These will also build in height.
- The last attack to watch out for is its beam attack. It has some tracking, staying after you, but also is covered in a Cylinder of Energy.
Remember, any lost health is free Corruption you can absorb. Charge up your Power weapon and blast the Bastion between each barrage of energy to keep the damage piling on.
Phase 2
To start damaging the Bastion, you will need to destroy all the Guardians that have appeared around the arena. There are 4 that appear initially when this phase begins and Bastion becomes immune to damage. It shows this by retreating into the Ceiling. You need to destroy each of them either by shooting them or hitting them with a melee strike. There are also 2 pairs of beams that appear along the outside of the arena. You can only avoid those, so stay in the middle. When all the Guardians are destroyed, it will emerge from its protective encasement.
The Energy blasts that Bastion has been firing will change a bit:
- Bastion can fire a burst of Energy (or Corruption) that will seek Arjun. This is usually done in 2 shots, one to each side.
- The Funnel of Energy can be inverted, so the middle is Corruption and the rest is Energy. You will also see the Original, with Corruption around a center of Energy.
- The large Cone of Corruption Energy continues to appear. It is more commonly homing in on Arjun.
- Bastion can loose a series of Energy Bursts. This Energy (Or Corruption) will hover in the arena, presenting a lingering hazard.
- Bastion uses its Laser Beam just like before. The rings of energy will layer up and burst out from the blast origin point. There can be up to 6 bursts, with a lot of variance in their height.
- The Walls (Rectangles) of Energy return. Now, Nova (Red) Energy has been added in. Remember, you must Avoid or Evade Nova. You cannot absorb it and it will immediately break your Shield if you attempt to.
Work your way through these attacks, avoiding and absorbing as best you can. Try to constantly be attacking Bastion to reduce the amount of time you are in the fight.
Phase 3
Triggering the damage phase is going to be trickier now. There are now Shielded Guardians that you must destroy and they are also using Nova Energy more. Shielded Guardian you have to Melee to destroy. These Guardians will also appear suspended from above as well. Expect to need to attack mid-air. You will need to watch out for the lasers again and this time they’ll be moving in a simple Up-Down pattern. Once again, Bastion will not re-emerge until all the Guardians have been destroyed.
Once Bastion does re-emerge:
- It can fire the beam down into the ground. This beam will have pulses that show when the rings of Energy. These can have a low ring followed immediately by the 3 ring burst.
- It continues to use the Seeking Bursts of Corruption
- Bastion continues to use the laser beam within an Energy Cylinder.
- Bastion continues to use the Walls of Energy (Corruption, Energy, and Nova) in Pairs. It now can do both sides in the same energy, so be on the watch for the Red Wall or avoid it.
While this can feel like so much more was added, it wasn't actually a lot. Keep to an aggressive approach. Remember, if you have Power Weapon ammo, use it! If you can shoot with your main weapon, shoot. It can take a minute or three of a solid barrage at this point to finish off Bastion, but its death scream is well worth the effort.
Beyond Bastion
Collect any Aether and Lucenite that drops from Bastion. Head for the back of the arena and use the Jump Pad there to go through the high circular opening. Drop from the ledge onto the passage below. A cutscene runs that Relocates Arjun. He will awaken finding a survivor from an earlier expedition: Lina. Approach and talk with her a few times to learn more about what’s happened with her. Be sure to collect the Text Log that’s nearby.
When you’re ready to move forward, head to the nearby area with the Jump Pads (these can be used to reach Containers on an elevated platform). Go through the open archway and into the next passage. Use these Jump Pads to climb up the tall ledges and get back to the main hub of the Ancient Depths. Retrace your steps to get back to where you fought Bastion, and once again use the Jump Pad in the back to reach the archway there. Drop down into the passage below and this time you can reach the containers at the end of it. Be sure to grab the Maximum Integrity Augmentation that’s available the first time through.
Beyond all that, you will enter a large shaft that has light coming down from above. Be sure to search around for both Audio and Text Logs in your ascent back to the surface. Arjun will need to use the Jump Pads to aid his ascent. This gives you a loose path to follow. Once you reach the door, just head through and use the sequence of Jump Pads beyond to reach the surface once again. At this point, head up the slope to find the remains of a Soltari colony. This will bring us to the next area: The Shattered Descent.
Video Walkthrough
YouTube Video Walkthrough: Click here!