Saros: The Cathedral Guide
Explore Saros’ Cathedral, a shifting alien palace filled with inversion puzzles, deadly Guardians, and hidden secrets. Defeat the brutal Priestess in one of the game’s toughest fights.
Description:
Opulent palace or temple of alien design, far removed from the] mainland. Potentially Carcosa’s true seat of power, or forevermore religious site.
Cathedral area unusually resistance to accurate mapping, even beyond the topographical alteration commonly encountered on Carcosa.
Collectibles:
- Audio Logs: 13
- Halcyon: 50
- Holo-Logs: 2
- Text Logs: 5
New Weapons:
- Illumine
Upgrades:
- Corrupted Weapons
- Reaping Chakram
Enemies:
Alpha Variants can be encountered
- Aurelia
- Confessor
- Curator
- Dynast
- Guardian
- Harbinger
- Lyssa
- Primal Osteomaw
- Primal Rupture
- Promise
- Tribute
Boss
- Priestess
Walkthrough
You approach the penultimate area of Saros. Having made your way up the slope, go head to the massive double doors. You will find a new weapon: Illumine. This Power weapon is a beam. Especially at higher levels it can have some amazing traits (Corruptive Charge is a personal favorite).
When the door opens that first time, you will need to deal with a Promise. Blast its face for a quick defeat of it. Go forward and step into the draped hands. They will pull you up to the level above. Be warned though that riding them up to the top will damage Arjun.
You must also be wary of the “hands” coming from the walls. Getting into their grasp will also damage you. The same applies if you ride up the grasping hands that can pull Arjun up. Getting to the top will cause damage.
Leave the hands and head toward the large staircase. But you will encounter the first Holo-Log. After watching the Log, head on up the stairs. Go along either side of the arching staircase. From there, go for the large staircase in front of you. Attempting to go up the stairs you will find Arjun is stuck in a loop trying to ascend. Turn around and head back down the stairs. Interact with the Eclipse Device that faces the stairs. This triggers the Eclipse Zone.
Expect to deal with a good number of Guardians throughout the area. They will usually be shielded. But there is a twist to them. Guardians in a given chamber will usually be firing either beams of Energy, Corruption, or Nova. These will either be normal beams or a cluster that will home in on Arjun.
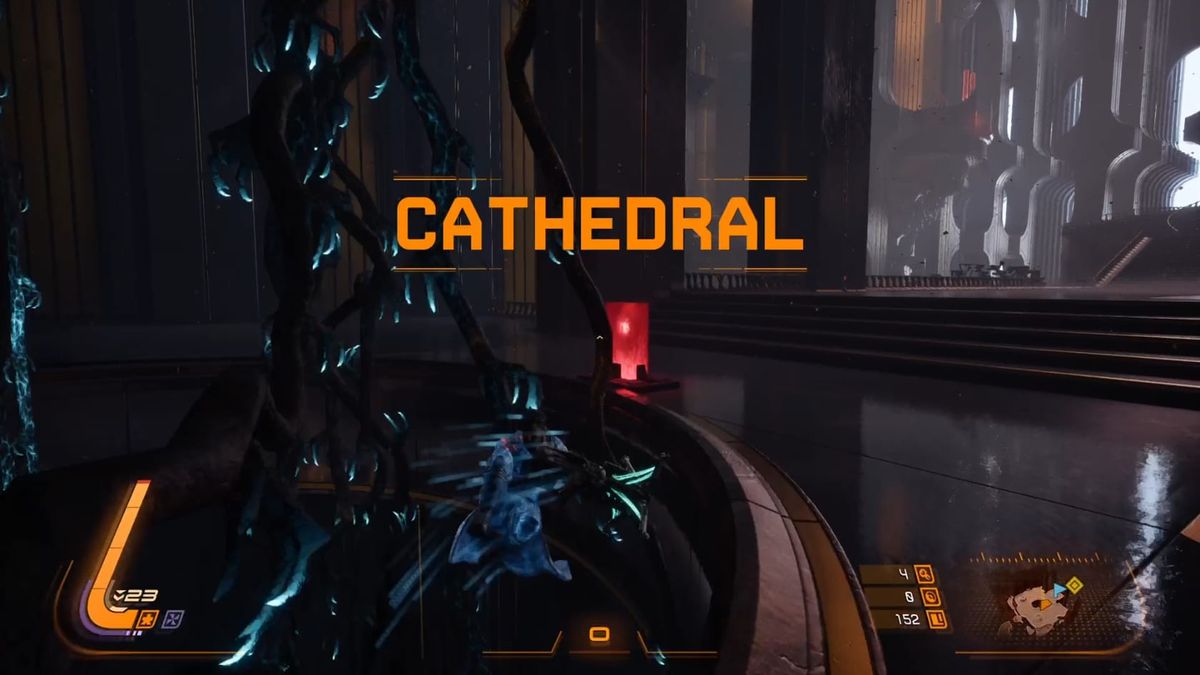
Having made your way into the main area of the Cathedral, you will immediately trigger the holo-log of the area. Delroy will be proclaiming the names and the roles that they are to fill. After watching that, head up either side of the Spiral Staircase.
Ignore what will be the Eclipse Device and climb the large staircase in front of you. For the moment, it goes in a loop, with Arjun never getting any closer. The Suit tells of a toll being paid, and that Arjun must ascend.
Turn around and head down the stairs. The Eclipse Device is active now. Go and activate the device to bring the Eclipse. Now, there are 2 paths, 1 to the left and 1 to the right. Each will need to be cleared, with the Tuning Fork Device at its end activated to clear the way.
Navigate through the 3 rooms to the right. Getting to the end of the path, you are prompted to activate an odd panel. This will invert the hall and rooms you jut came through.
Now, you need to retrace your steps through the inverted room. Getting back to the first room (the first time), it will trigger a Solar Cage, where you will be caught in a mini-boss fight. An example is an Aurelia as the main, with Tributes, Promises and Primal Ruptures supporting.
Subsequent runs after the first, only have a chance that this room will lock on you. Defeat them and head through the archway to the floor panel. Activate it to return to the normal orientation of the world.
Open the containers, collect the Max Integrity increase (if present), and then go to the tuning fork. You don’t just activate it, you need to melee it. Head back to the main staircase after that by simply jumping over the barrier and using a Mid-Air Dash to safely land on it.
Dying after this point, you will want to visit Constance and Primary. A log can be found by Constance and you can talk with them. Any iterative trips down the sides of the Cathedral will have the Eclipse Device moved to the middle of the two wings that you need to explore.
Now it’s time to head down the left-hand path.
Passing through the 3 rooms will bring you to another platform that allows you to invert the rooms. Repeat what you just did and make it back to room you first entered (though on the ceiling). Return to the floor with the panel and activate the second tuning fork. This will summon a full bell. Jump to the starting area with the Eclipse Device and punch the new Tuning Fork that’s appeared. Once again, punch it to ring the Tuning Fork to activate the bell.
You will see that a path has opened in front of you, but also an opening in the ground (and you’ve gained an optional objective). If you want to complete the optional objective, you will want to drop down into the opening in the floor. Fall to the bottom and head to the device like Constance sitting at the top of the small set of stairs, just past the 2 Containers (1 is always Locked). Go up the stairs and approach the pool in front of the device.
Arjun will automatically interact with it (or just take a moment to interact with it). Play through the scene there. Once that’s completed, so is the optional objective. Use the Eclipse Thread to return to the main entrance way. The path to below is now closed off so you can’t fall back down there. Head on up the stairs and into the large circular chamber.
Once inside this chamber, you will be enclosed in a Solar Cage. There will be Curators as well as Dynast and Primal Raptures to fight. Use the statues as cover, and fight smart here. Collect health as it drops and avoid what attacks you can,
When the Solar Cage lifts, head for the far side of the chamber. Stand on and activate the Inversion platform. On the first platform, you can expect to find a piece of Halcyon if you haven’t collected them all yet. Run up the sandy path while collecting the Lucenite along it. Arjun slows automatically as he approaches the crest. He will approach a golden circle and stop underneath it. Watch as he reaches toward it. A cutscene runs and you will be in the boss arena.
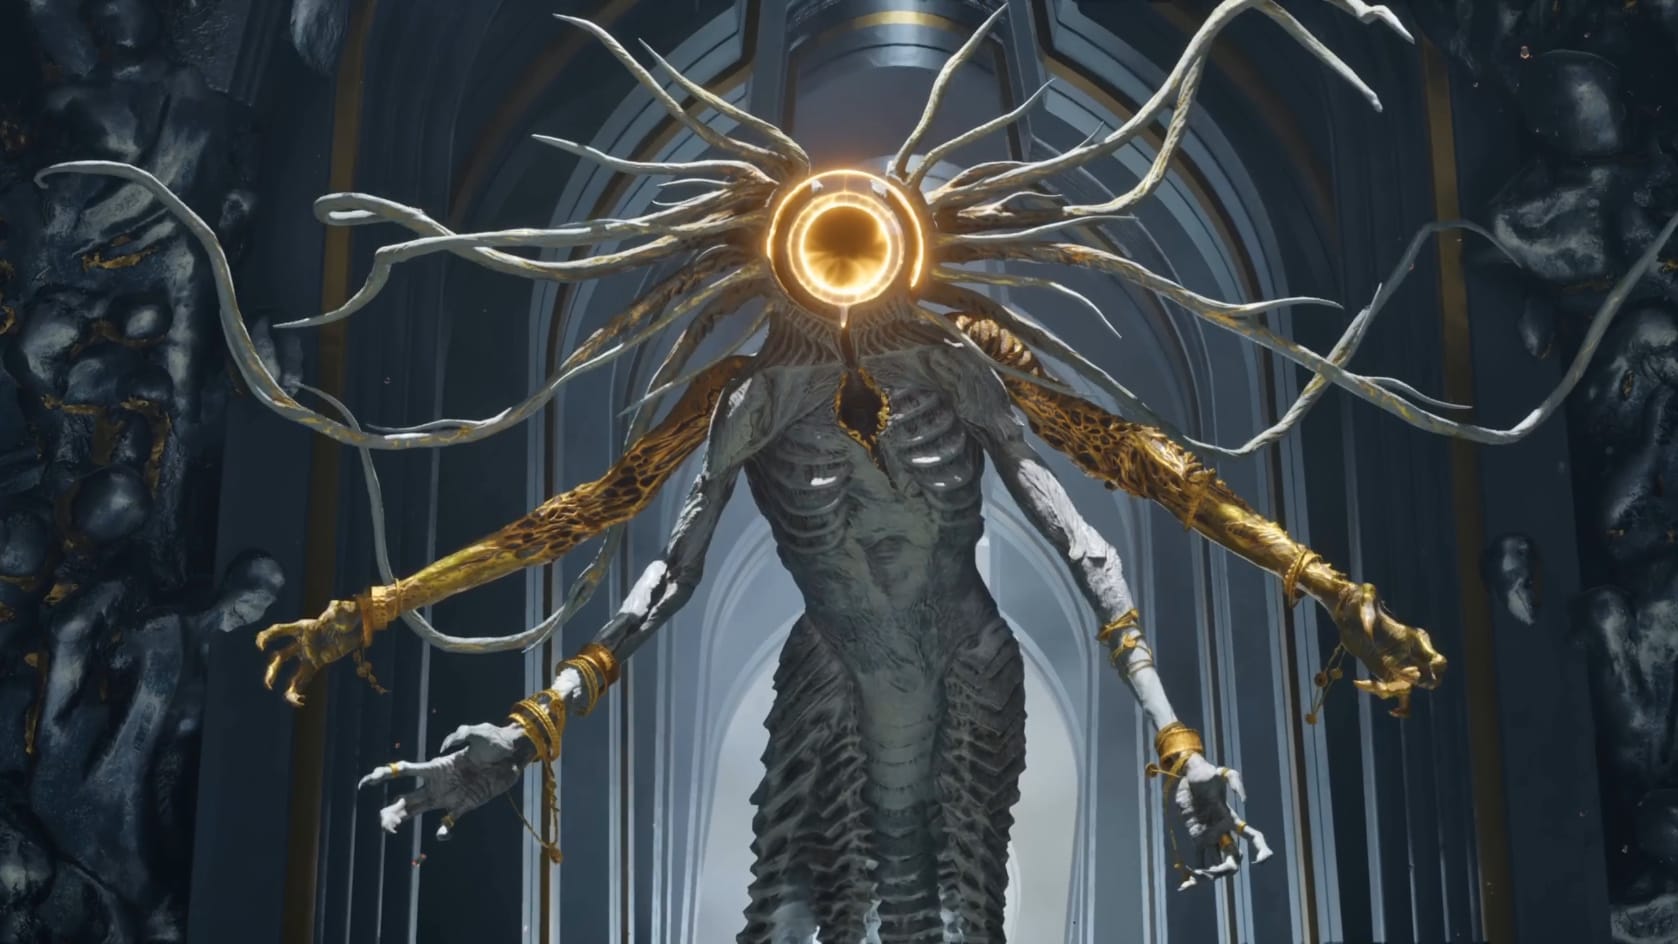
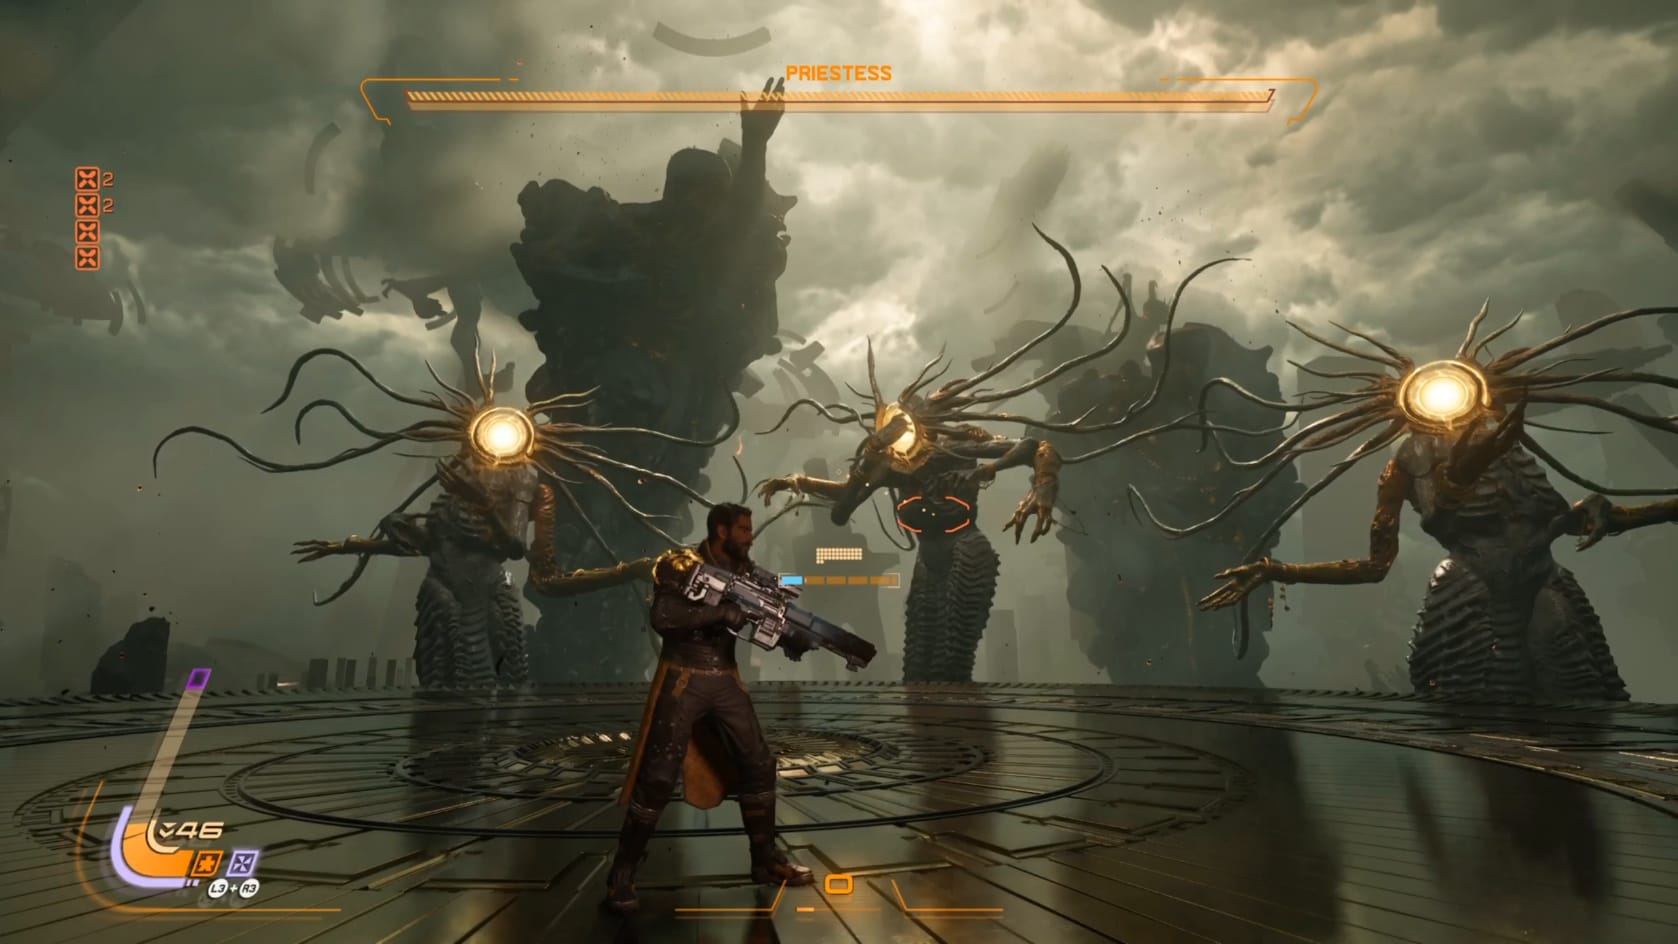
Boss - Priestess
This boss fight is a real skill check. You will need to be on the move for nearby the entire fight. There are lots of projectiles coming, and mixed varieties at that.
Phase One as Arjun inside a building facing off against the Priestess and its 2 Mirror Images. You will need to destroy at least 1 of the 2 Mirror Images to render the Priestess vulnerable. While that is going on, there’s a lot to deal with. Each Image of the Priestess will be firing bolts of energy at Arjun. The thing about the duplicates is that they have notably smaller HP Pools. This does make it a bit easier to manage, since once the Duplicate is gone, that section will cease its attacks. You'll need to worry about:
- Rings of blast energy emitting from their "feet" (3 bursts)
- Outward funnel blasts of Corruption
- Rings of Energy fired at diagonal angles in sequence with bursts of energy
- Ovals of Nova fired from the corridors behind the Priestess(es)
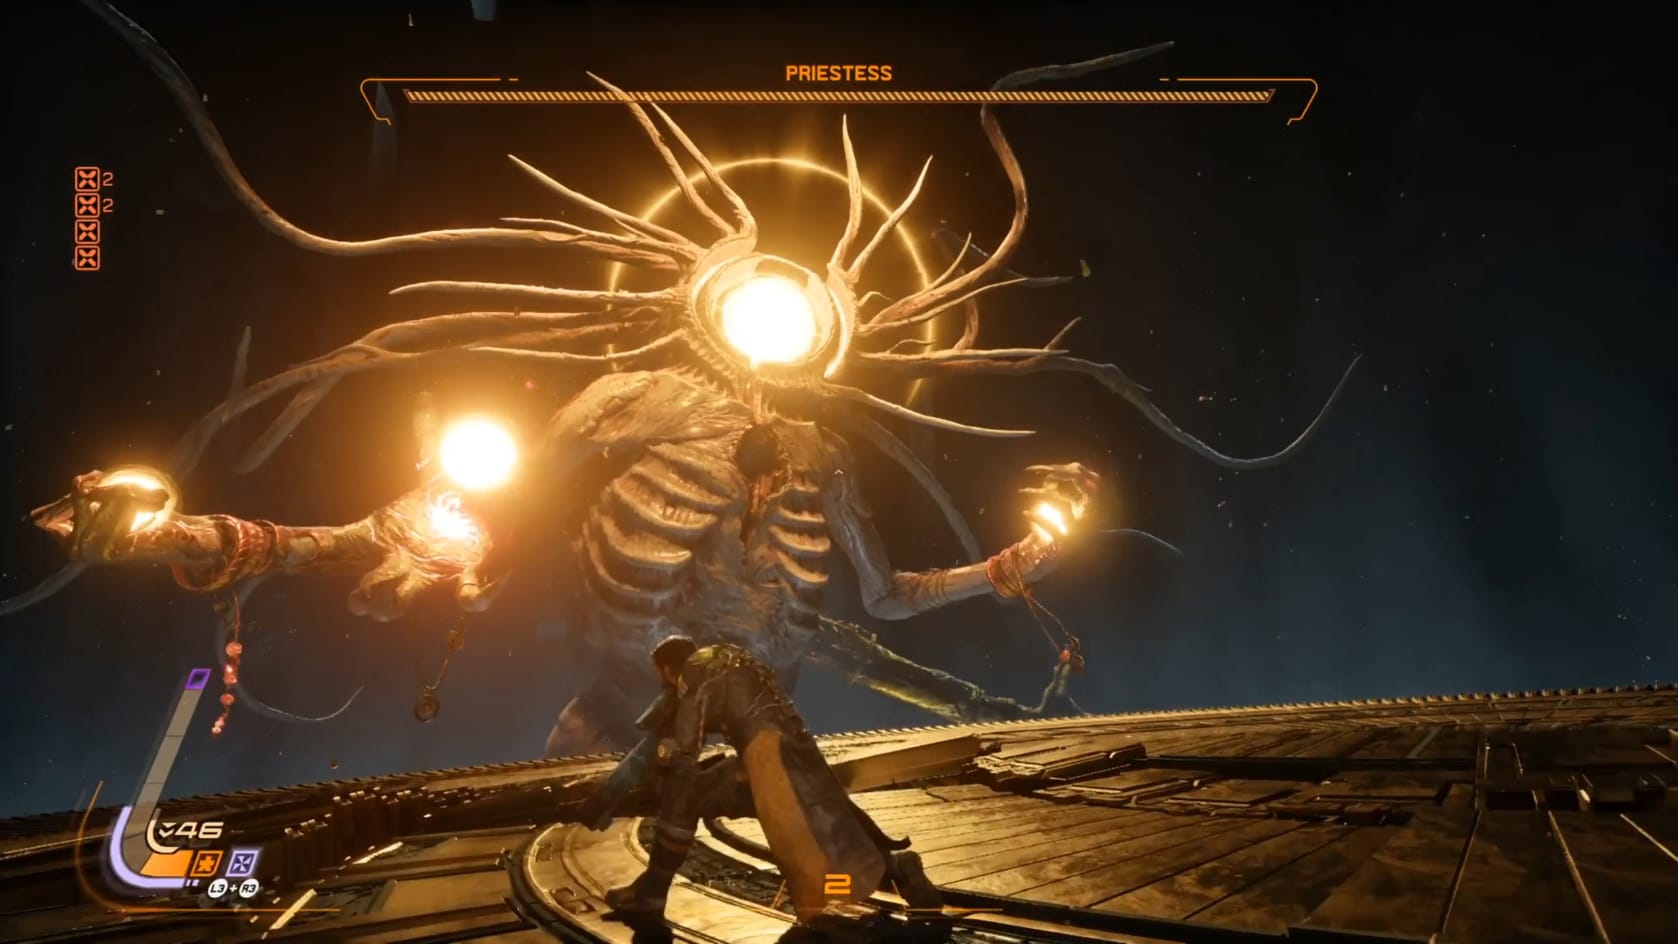
When you get it down to just the Priestess, her attacks will change a bit.
- Walls of Corrupted Energy in lines, with 2-3 bursts rings of energy
- Outward Spiral of Nova blast below herself
- Targeted spiral of Corruption targeting Arjun (can have Energy interlaced at 50% or less of phase 1 health)
- Curved lines of Corruption and Nova sweeping around the room in opposite directions. (Ex. Corruption will go clockwise while Nova goes Counter-Clockwise)
Phase 2 is more difficult, the room you are in falls away. The Priestess moves closer, calling its duplicates again. Together, they place a ball in the center of the platform you are on. Think of them like Turrets. It will start to shoot out Nova energy. So these turrets will be adding danger through the remainder of the encounter. The Priestess and her duplicates will resume their assault after that. To trigger damage, you need to head to the 3 Tuning Forks that appear on nearby or adjacent platforms. Rush up to them and melee them to have them ring. Only after all 3 are hit will the Priestess be vulnerable for a time. Fire on the duplicates and the Priestess, and watch the health bar at the top of the screen to descend which one is real.
- Spiral of Corruption energy from one of the Priestesses
- Lashing line of Energy
- Lashing line of Corruption
The duplicates vanish when the 3rd tuning fork is struck, as does the turret, in a circle of Nova Energy. The Priestess's the attacks change a bit. You can use any Nova energy to parry at her. Evade and attack as she attacks:
- Ring of Nova closes in on the center of the Arena
- Ring of Energy closes in on the center of the Arena
- Spiral star of Corruption that gets launched at Arjun
- Spiraling beams of Corruption from her hand
At 50% health, she's likely to divide once again. This will repeat any time her damage phase comes to an end.
Phase 3 is hard. Not only do you need to contend with the constant waving of the platforms, the orbs in the middle blasting out a pattern of Nova Energy, and attacks from the Priestess. Just like in Phase 2, you will need to navigate the platforms with the Tuning Forks. But this time it’s as they appear. Only 2 will be visible and you need to navigate the platforms while negotiating the incoming fire from the Priestess. On top of that, during the damage phase, the platform you are on will fall part (flying upwards), so you will need to mind what's happening there too! You will want to periodically move from platform to platform to avoid just falling into the void below to take damage.
- Attacks with lines of red and yellow energy
- Unleashes a swathe (or 2) of Corruption diagonally/horizontally across the arena
- Unleashes a swathe (or 2) of Energy diagonally/horizontally across the arena
- Broad spiral of Corruption from "face"
- Manifest and sent out a massive "dart" of Nova seeking Arjun
Defeating the Priestess, Arjun is taunted with Nitya.
He comes to and needs to make his way back to Passage. It’s time to begin the end game.
Video Walkthrough
Video Walkthrough of a Full run of the Cathedral and a winning fight against the Priestess