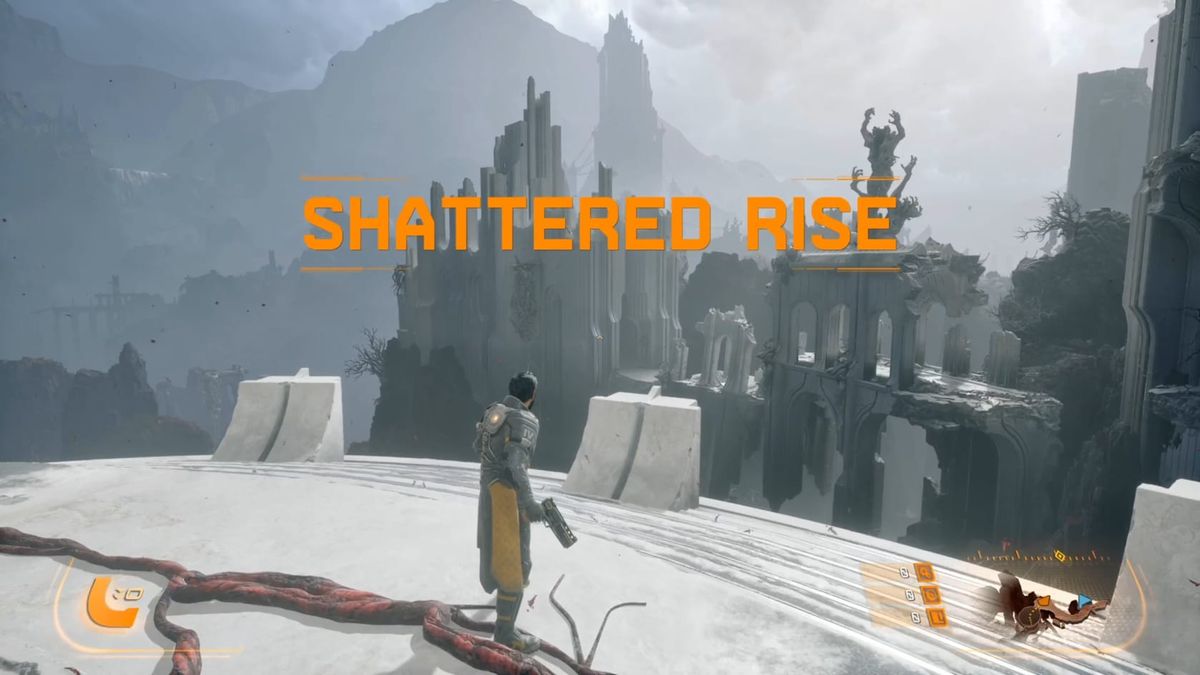
Saros: The Shattered Rise Guide
Explore the Shattered Rise in Saros, master the Eclipse, defeat the Prophet, and unlock the path to the Ancient Depths.
Description:
Anticipated location of the missing Soltari colony. Rocky and mountainous, with abundant hostile fauna. Site contains multiple structures and remnant technology built by a hitherto-unidentified society.
Multiple Echelon IV personnel have perished here while attempting to locate the lost colony.
Collectibles:
Halcyon Available: 8
Audio Logs: 17
Holo-Logs: 1
Text Logs: 3
Enemies:
Custodian
Guardian
Flexion
Osteomaw
Eclosion
Vessel
Mini-Boss
Sunflayer
Boss
Prophet
Walkthrough
This game has a random element to most of the area, but there are set points of navigation. For the Shattered Rise, it is the middle and access to the Boss Section that will be consistent.
For those after the collectibles: Getting the Text and Audio logs is done by simply replaying the area and accessing the secondary and optional paths to find the camps scattered through the area. Understand that some will be inaccessible until you are coming through on the second playthrough, having beating the Yellow King, the final boss. These will be behind the yellow (or golden) force fields. Most can be found in the open. Some are found in the side chambers. These can be locked with a red-lit door that will require a Carcosan Key. Others will have a Red Force Field over them. These Red Doors Arjun can melee attack to open.
On that first trip through, you need to play a carefully. While the idea is to collect the Lucenite and use it to upgrade, it is unavailable until you've activated the a new weapon. Once you do, upgrades will be plentiful and very helpful. But still, when you die, be sure to explore the Passage to talk with Sheridan, Kayla, Stacks, and above the exit of the Passage, Sebastian. Remember, you are just starting out. For now, you only have a little Health, a small amount of Energy, and very basic starting equipment. As you level up and improve your armor, all that will change.
You start with area with the Ricochet and Eruptor Handcannons available to Arjun. Each will start with a single trait, but as your Proficiency (level) increases through a Cycle, more can be added to the weapons. As you pass through the Shattered Rise, you will encounter a winged creature, a future boss: the Architect, as you approach the middle of the Shattered Rise. Just after that, you will be reaching the middle section. Wander your way past the remains of the columns and into the building. During your first visit, you will gain your first additional weapon category: Rifles. This will unlock both Smart and Tactical Rifles for your use. Arjun will remark on this weapon being the favorite of the late Tarn. Head through this building and activate the door by shooting the red and gold flashing circle to the left-hand side of the gate. You will only need to activate this door once, a rarity. Make your way on through the next section. Be sure to punch through any of the Red Barriers that you find. These side rooms contain useful weapons and upgrades.
When you're close to the Eclipse Device, you will need to deal with your first Mini-boss, the Sunflayer. This is the first truly challenging fight of the game. It has a number of attacks and it will be very important to know how to evade all of them. It's favorite is to lunge at Arjun. This attacks starts with a simple thrust, lodging its hand in the ground. When the Sunflayer pulls its hand out of the ground through it looses a circular blast of energy from that point. You can shield against it, possibly taking a little damage and draining all your energy or you can evade it with a jump or dash. When reduced below 50% health, it will add in a useful attack. The Sunflayer swipes it hand upwards from the ground, loosing a blast of energy. Here, you will have the choice of evading the attack or Shielding to draw the energy into your own reserves. In its last stretch of health, the Sunflayer adds a charged swipe attack. While it could swipe earlier, this one does more damage. Keep moving, dashing to avoid most of the attacks.
Continue forward and you will reach the first Eclipse Device, a strange thing that is a mass of Black Hands reaching out of a red mercurial circle on the ground. Interact with it to have Arjun trigger an Eclipse. This brings a massive change to the enemies. They will begin to use a new kind of energy: Corruption. Once the Device is active, head through the now-open archway and start making your way deeper yet into the Shattered Rise. What you've been fighting so far has been the warm-up. Now, the challenge has truly begun. However, the rewards are greater as well. Artifacts are most powerful, but will always come with a Corruption Effect so pay attention to what they are doing to Arjun. The yield from collecting Lucenite is also higher. This makes it easier to level up (gain Proficiency) than before. Getting to the top of the first crest, you are locked into a Solar Cage with an Osteomaw that has been enhanced by the Eclipse. This can also be your introduction to Corruption Damage itself. Defeat it and continue over the rest and down the ridge to (likely) the right.
Corruption is unique damage. Whether you block it with your Shield (It can be absorbed) or take the damage directly, you will lose some maximum Integrity. If Arjun's health is already below this point, the corruption simply fills the bar and adjusts your maximum Integrity. If Arjun's Integrity is full, then the Corruption lowers the max and present Integrity. However, this is not a permanent reduction. When you fire your Power Weapon, this will remove Corruption from Arjun. This can reduce Arjun's Integrity to nearly zero. It's very important to note that Arjun cannot die from absorbing Corruption, but it can effectively lower his total health to 1. He's very vulnerable at that point.
You will need to continue through the Shattered Rise only a short distance before you reach a mechanical gate. It needs an switch to activate that is a ways down to the left. Nearby where Arjun drops in is an inactive energy portal that will be useful later. Take the slope on the left up and be sure to open the container sitting on the slope itself for something (possibly) useful. Arjun's Suit will note 2 things: a Soltari Energy Signal and an Abnormal Biomass. To open the Mechanical gate, you will need to successfully cross this next section.
Navigate the corridors and caverns to progress through this section of the Shattered Rise. You can expect some new enemies than you've fought before. Be sure to watch your mini-map for white flag markers. These side rooms can offer a timed choice but also give you more chances for better weapons and artifacts. However, some of these side passages have the Yellow Field blocking or will require a Carcosan Key to unlock. You can also find a Maximum Integrity Augmentation along this path once. Collect it to enjoy a bit more Health (Integrity).
As you press on, you will hit another Solar Cage. This is close to the end of the path. However, you are very likely to encounter the Eclipse enhanced Sunflayer. This mini-boss has all the same tricks and triggers, but it will now have Corruption Energy instead of regular Energy. There are also more enemies in the arena as well. It helps to clear the lesser enemies like the Flexions, and Eclosions.
It's just past here you will find your first Soltari Holo-cache (Holo-log). Approach and interact with it to learn something about the woman Arjun is after, Nitya. Having collected it, continue forward along the path. Take the stairs up and into the building in front of you. Start by dropping into the pit below and going to the Shielded opening. You can smash through it with a simple melee attack. Navigate the laser filled corridor to the blue-glowing key at the bottom. Collect it and emerge from this corridor. Go on up the slope to the far end of the building from where you entered. Go to the gate, which opens when Arjun claims the Gate Key in the corridor below, and head through it. While there are things that can be found beyond the Return Portal, you will likely need the Grapple to reach them. However, take least take a moment go look at the end of the platform in case there is a container there you can open. With that, use the Return Portal to quickly return to the Mechanical Gate that was sealed earlier.
Back at the Mechanical Gate, go over to the right-hand side of this area. You will see a blue highlighted device. Simply go over to it and interact with it. This Gate that leads to the boss of the Shattered Rise is now permanently open. Going down the left-hand path, off to the side of this Gate is now optional (but gets a recommendation for extra levels and gear if you're having trouble with the Boss). Going down the path, you will see 2 containers. Approaching either will have Arjun enter a growth of swaying tendrils. While in them, he'll be held and slowed down. He can quickly escape using the Dash and leaving the area. You will always find a Blue Container and a Yellow (Locked) Container. Also on the first trip through, you can find a piece of Halcyon waiting for you. Be sure to collect it so you can further enhance your Suit between attempts (or after the fight). You'll see the way forward is blocked by a mass of red vines. Shoot out the Orange-glowing flowers to clear the vines away. Drop into the hole that's revealed after that. It's time to take on the first full boss of Saros.
Boss - The Prophet

Fighting the Prophet can be arduous. My very first win took several hours and dozens of attempts to get all the timing elements right. My second win only took 2 attempts. The big difference: my understanding of the game. You CANNOT be afraid of gaining corruption and using it against the Prophet. Most runs have a chance to have some benefit from gaining corruption, but it’s impossible for me to say exactly what it will be (RNG and all).
You will want to stay more toward the center of the arena. This is because there are grasping tendrils along the sides of the arena. Entering in here will slow Arjun to a walk. Only by Dashing can you quickly move through them.
This fight is broken into 3 phases, each one corresponding to the health bar of the Prophet.
Phase 1 - Initial Confrontation
This is the easiest phase by far. To damage the Prophet you will need to shoot the blooms that are to the left and right of the Prophet. Only when they're destroyed will it become vulnerable. There are at least 2 on each side of it. You also need to stay more centered in the arena. All the sides have those Tendrils on the ground from earlier, as you were entering here. Remember, Arjun can only walk in those Tendrils. He cannot run in them, but he can dash out of them to break away quickly.
Fighting the Prophet you will need to watch out for a number of attacks. These increase the deeper into the fight you get. This is the easiest of all 3. The Prophet can loose a small wave of Energy toward Arjun. This small blast is commonly accompanied by small lines of Corruption Energy being released on the ground. With the Corruption, either dodge it or absorb it as needed. Remember, if Arjun has damage, you can safely absorb that empty portion as Corruption. The Prophet can also slam its claws into the ground, unleashing waves of energy that will break your Shields (and drain all Arjun's Power) if you block them. It's safer to evade them with a Jump or a Dash.
Here, you will need to be on your toes to an extreme. First, know that taking damage gives you free space to take on Corruption. As you gain corruption, this also allows you to charge your Shield, thus, your Power Weapon as well. The attacks will change up as well. The Prophet can loose a burst of Energy that will form into darts that seek out Arjun. This is a great attack to Absorb with your Shield. Unfortunately, it does tend to be followed by 2 diagonal blasts of Corruption, so be on guard for those to either absorb or evade. Potentially there are 3 blasts, with a third that comes out horizontally. Either way, immediately use your Power Weapon and fire at the center of the Prophet. That's where its weak point is. You are generally going to want to fire and immediately shield as the Prophet resumes its attacks. You can also encounter the Prophet launching orbs of Energy in a small arc around itself which then, in sequence, attack Arjun.
Phase 2 - Seedlings
This will add a few new attacks into the Prophet’s rotation. Mostly, Tendril Growths - these erupt the grasping tendrils from the ground. They then start emitting small bursts of Corruption energy. They are easily destroyed by shooting the bulbs in the middle of each. These can drop Aether to heal Arjun. Otherwise it's energy circles now build in height. Each successive one adds another ring on top, increasing the height you need to jump to avoid them.
Getting to the damage phase is the same, you need to shoot and destroy the blooms to the left and right of the Prophet. There is one more Bloom on each side that will need to be destroyed to remove the protection.
When you hit the damage phase, more attacks will be added into the rotation. Now, the Prophet will be sending out ringed blasts of Corruption energy. As always, you can either evade or Absorb it (and fire it back with your Power Weapon). Especially when it's below 50% of this health it, it will loose its attacks in sets of 3. The trio of Diagonal blasts of Corruption is nearly guaranteed to be used. As well as the Prophet loosing circles of Corruption along the ground from itself. Charge up, and then blast your Power Weapons to keep your Corruption under control. Focus your blasts either between the attacks or when the Prophet pauses between rounds of attack. If you don't clear its health bar in a single damage phase, you will need to repeat the first part of this phase to get back to the damage phase.
Phase 3 - Final Stand
You are now out of room to maneuver, it’s down to your raw ability to implement what you’ve learned so far for this boss fight. The Prophet isn’t sending out any more Pods, but has instead set up thick vine walls to confine Arjun into a narrow corridor directly in front of itself. Watch the energies coming off it carefully. It's time for as much all out assault as you can manage. Quickly and loose your Power Weapon on the Prophet. It will be firing off the trio of Diagonal Corruption Energy, the concentric circles of Corruption Energy, and the lines of that same energy on the ground. Once in a while it will use the Homing Energy Attack as well. You will need to very quickly alternate between charging, attacking with your Power Weapon, and just attacking with your Main weapon.
Beyond the Prophet
Once you defeat the Prophet, you will want to just head forward and drop the slope in front of you. Stop in the first chamber to find another Integrity Augmentation to collect. Continue downward until you reach the first Teleporter of Carcosa. These will be essential if you want to bypass needing to do a full run each time you are setting out from The Passage. Head back to the passage to set things in motion to reach the next area, the Ancient Depths.